
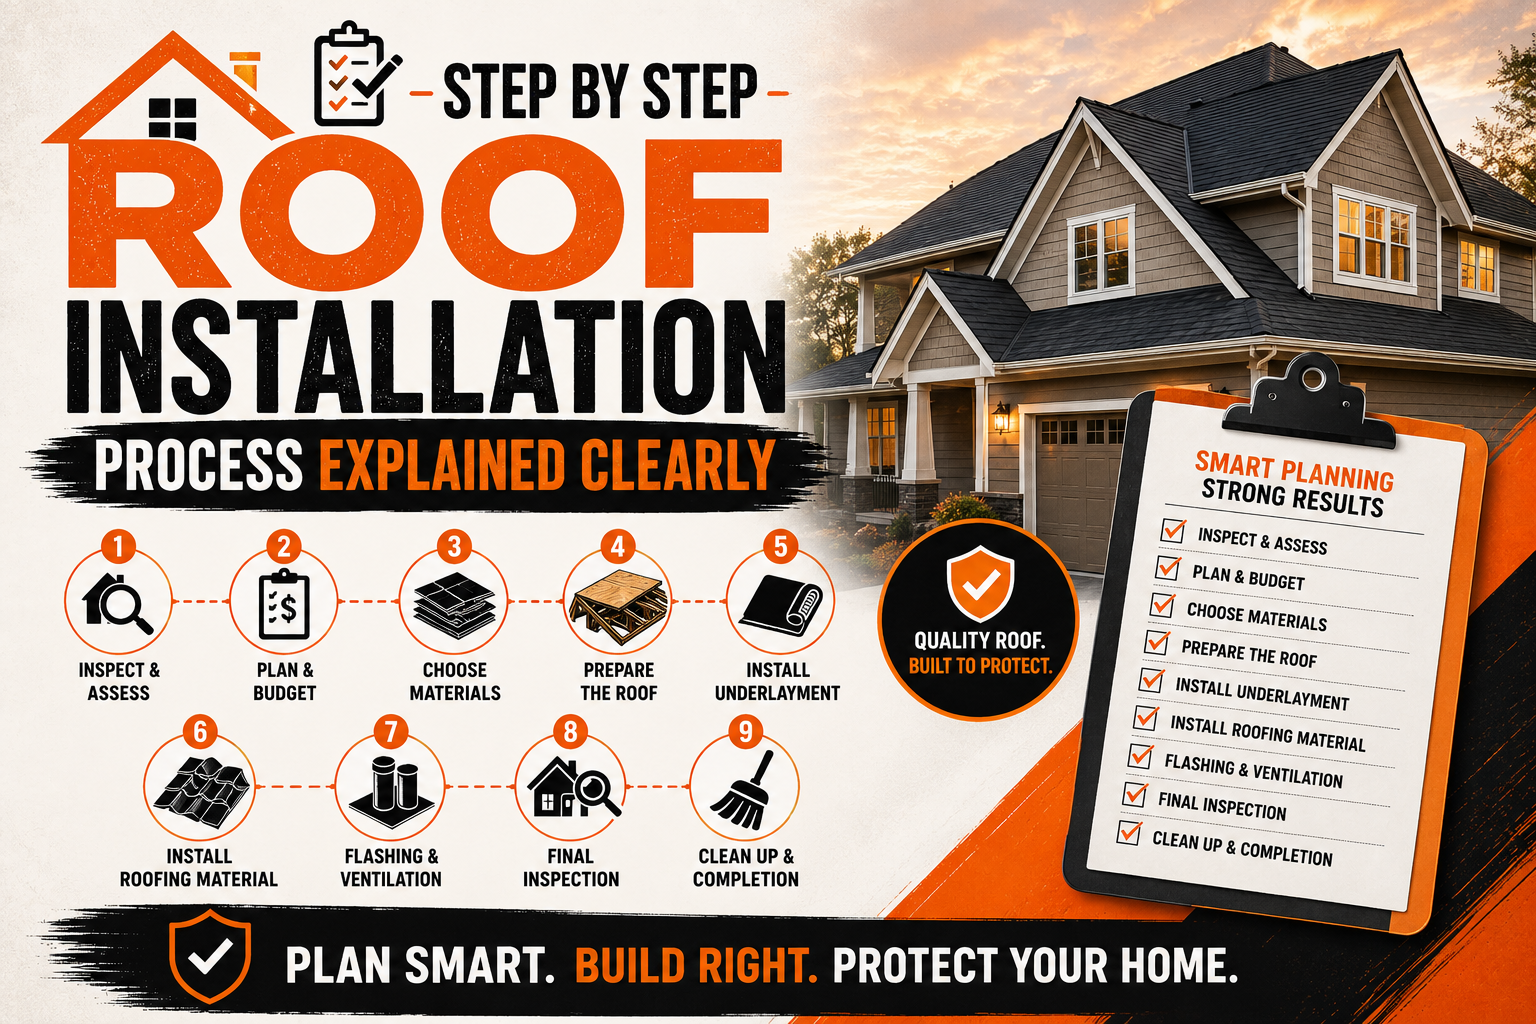
Step by Step Roof Installation Process Explained Clearly
Introduction
A roof installation is one of the most significant construction projects for any home or commercial building. It protects the structure from rain, wind, sunlight, and changing weather while contributing to energy efficiency and the overall appearance of the property. When installed correctly, a quality roof can provide reliable protection for decades.
Many property owners assume roof installation simply involves placing new shingles or panels over the structure. In reality, the process is much more detailed and includes careful planning, inspections, preparation, and multiple protective layers working together. Every stage has an important role in ensuring the roof performs as intended.
Understanding the complete installation process helps homeowners make informed decisions before construction begins. It also makes it easier to communicate with contractors, understand project timelines, and recognize the importance of quality workmanship throughout the project.
In this guide, we will explain every stage of a roof installation project from the initial inspection through the final quality checks. This first part focuses on the preparation phase, which lays the foundation for a safe, efficient, and long lasting roof installation.
Understanding the Complete Roof Installation Process
Roof installation is a carefully organized sequence of tasks rather than a single construction activity. Each stage prepares the surface for the next, creating a complete roofing system that protects the building from moisture, temperature changes, and structural movement. Skipping or rushing any step can reduce the lifespan of the roof and increase the likelihood of future repairs.
A complete roof installation includes inspection, planning, preparation, removal of old materials when necessary, structural evaluation, installation of protective layers, application of the final roofing material, and detailed inspections before project completion. Every layer contributes to the strength and durability of the finished roof.
Modern roofing systems are designed to function as complete weather protection systems. Instead of relying only on the outer roofing material, they combine underlayment, flashing, ventilation, insulation, and drainage components that work together to protect the entire building.
Understanding this process also helps property owners set realistic expectations. While the visible roofing material often receives the most attention, much of the roof’s performance depends on the hidden layers installed beneath it.
Initial Roof Inspection and Project Assessment
Every successful roof installation begins with a thorough inspection of the existing structure. Before materials are ordered or construction starts, roofing professionals carefully evaluate the condition of the building to determine whether repairs or structural improvements are needed. This assessment helps avoid costly surprises after installation has already begun.
The inspection typically starts with the roof’s exterior. Contractors examine the overall condition of the existing roof, identify damaged areas, evaluate roof slopes, and inspect components such as flashing, gutters, chimneys, skylights, and ventilation openings. These observations help determine the scope of the installation project.
The structural framework beneath the roof also requires careful evaluation. Rafters, trusses, beams, and roof decking must be strong enough to support the selected roofing material. If any structural weaknesses are discovered, they should be repaired before installation continues.
Inside the building, the attic provides valuable information about the condition of the roofing system. Contractors look for signs of water intrusion, mold, inadequate ventilation, damaged insulation, or daylight entering through the roof deck. Identifying these problems early prevents them from affecting the new roofing system.
During the assessment, measurements are also taken to calculate the amount of roofing material required. Accurate measurements help reduce material waste while ensuring enough supplies are available to complete the project without unnecessary delays.
Planning the Roof Installation Project
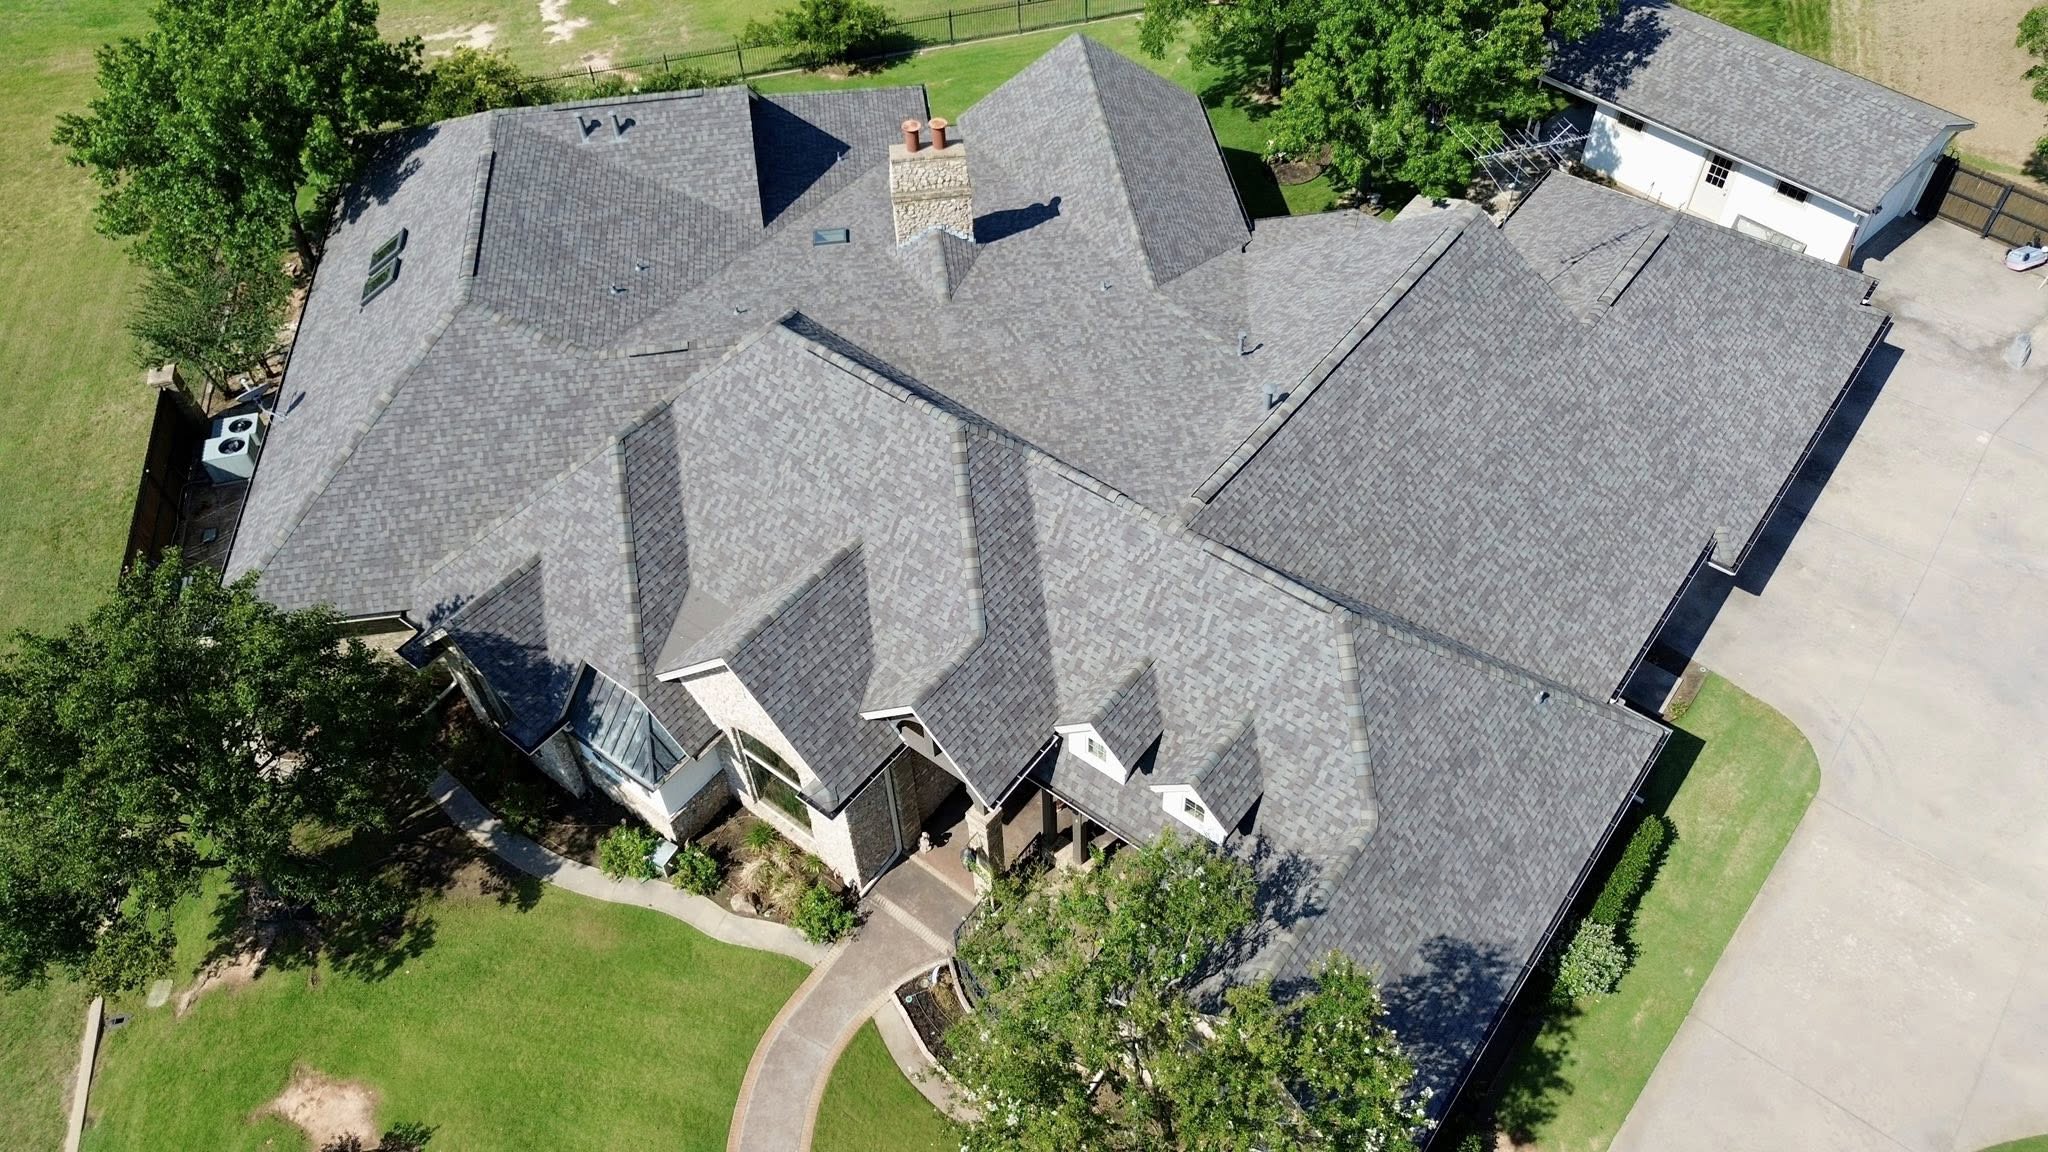
Once the inspection has been completed, the next step is developing a detailed installation plan. Proper planning keeps the project organized and helps ensure every stage of construction proceeds efficiently. It also allows property owners and contractors to establish realistic expectations regarding costs, scheduling, and project milestones.
The planning process begins by defining the project’s objectives. Some property owners prioritize durability, while others focus on energy efficiency, appearance, or long term maintenance. Understanding these priorities helps guide decisions throughout the installation process.
Budget planning is another important part of this stage. The project budget should include roofing materials, labor, permits, waste disposal, equipment, inspections, and a contingency allowance for unexpected repairs. Preparing a complete budget helps reduce financial surprises once construction begins.
Scheduling also plays an important role in project planning. Roofing work should be scheduled during favorable weather conditions whenever possible. Planning material deliveries, contractor availability, and inspection appointments in advance keeps the project moving smoothly.
Communication should remain consistent throughout the planning phase. Property owners should discuss project timelines, working hours, cleanup procedures, warranty coverage, and any special concerns before construction begins. Clear communication reduces misunderstandings and creates a more organized installation process.
Choosing the Right Roofing Materials
Selecting roofing materials involves much more than choosing a style or color. Different roofing systems offer varying levels of durability, weather resistance, maintenance requirements, and energy efficiency. The right choice depends on the property’s design, climate, and long term goals.
Asphalt shingles remain one of the most popular roofing materials because they provide an excellent balance between affordability and performance. They are available in many colors and designs, making them suitable for a wide variety of residential properties.
Metal roofing has become increasingly popular because of its durability and energy saving properties. Metal roofs can last several decades when installed correctly and often reflect solar heat, helping reduce cooling costs during warmer months.
Tile roofing offers exceptional longevity and creates a distinctive architectural appearance. Clay and concrete tiles are commonly used in regions with warm climates because they perform well under prolonged sunlight while providing excellent weather resistance.
Slate roofing is considered one of the longest lasting roofing materials available. Although it requires a higher initial investment, its durability and timeless appearance make it an attractive option for premium residential properties.
Synthetic roofing materials continue to gain popularity as well. Many modern products replicate the appearance of natural materials while offering lower weight, improved impact resistance, and easier installation.
The following table compares several commonly used roofing materials.
| Roofing Material | Average Lifespan | Maintenance Level | Suitable Applications |
|---|---|---|---|
| Asphalt Shingles | 20 to 30 years | Low | Residential homes |
| Metal Roofing | 40 to 70 years | Low | Residential and commercial buildings |
| Clay Tiles | 50 to 100 years | Moderate | Homes in warm climates |
| Concrete Tiles | 40 to 60 years | Moderate | Residential properties |
| Slate Roofing | 75 to 100+ years | Low | Premium homes |
| Synthetic Roofing | 30 to 50 years | Low | Various residential projects |
Choosing the right material requires balancing cost, appearance, durability, maintenance needs, and climate suitability. Considering all these factors together results in a roofing system that provides dependable performance throughout its expected lifespan.
Preparing the Property Before Installation
Proper property preparation creates a safer and more efficient work environment before roofing crews arrive. Taking time to prepare the site also helps protect landscaping, vehicles, outdoor furniture, and other valuable belongings from accidental damage during construction.
Vehicles should be moved away from the work area to provide space for material deliveries, equipment, and waste containers. Keeping driveways clear also improves access for roofing crews throughout the installation process.
Outdoor furniture, grills, decorations, and potted plants should be relocated to safe areas whenever possible. Although contractors take precautions during installation, roofing materials and debris may occasionally fall around the work zone.
Inside the home, items hanging on walls should be checked before construction begins. Roofing work often creates vibrations that can cause pictures, mirrors, or decorative items to shift or fall. Removing fragile items from walls helps prevent accidental damage.
The attic should also be prepared before installation starts. Valuable belongings stored in the attic can be covered with protective sheets to shield them from dust created during roofing work. This simple precaution makes cleanup easier once the project is complete.
Property owners should also notify nearby neighbors before construction begins. Roofing projects often involve temporary noise and increased activity, and providing advance notice demonstrates courtesy while helping neighbors prepare for the construction period.
Safety Measures Before Roofing Work Begins
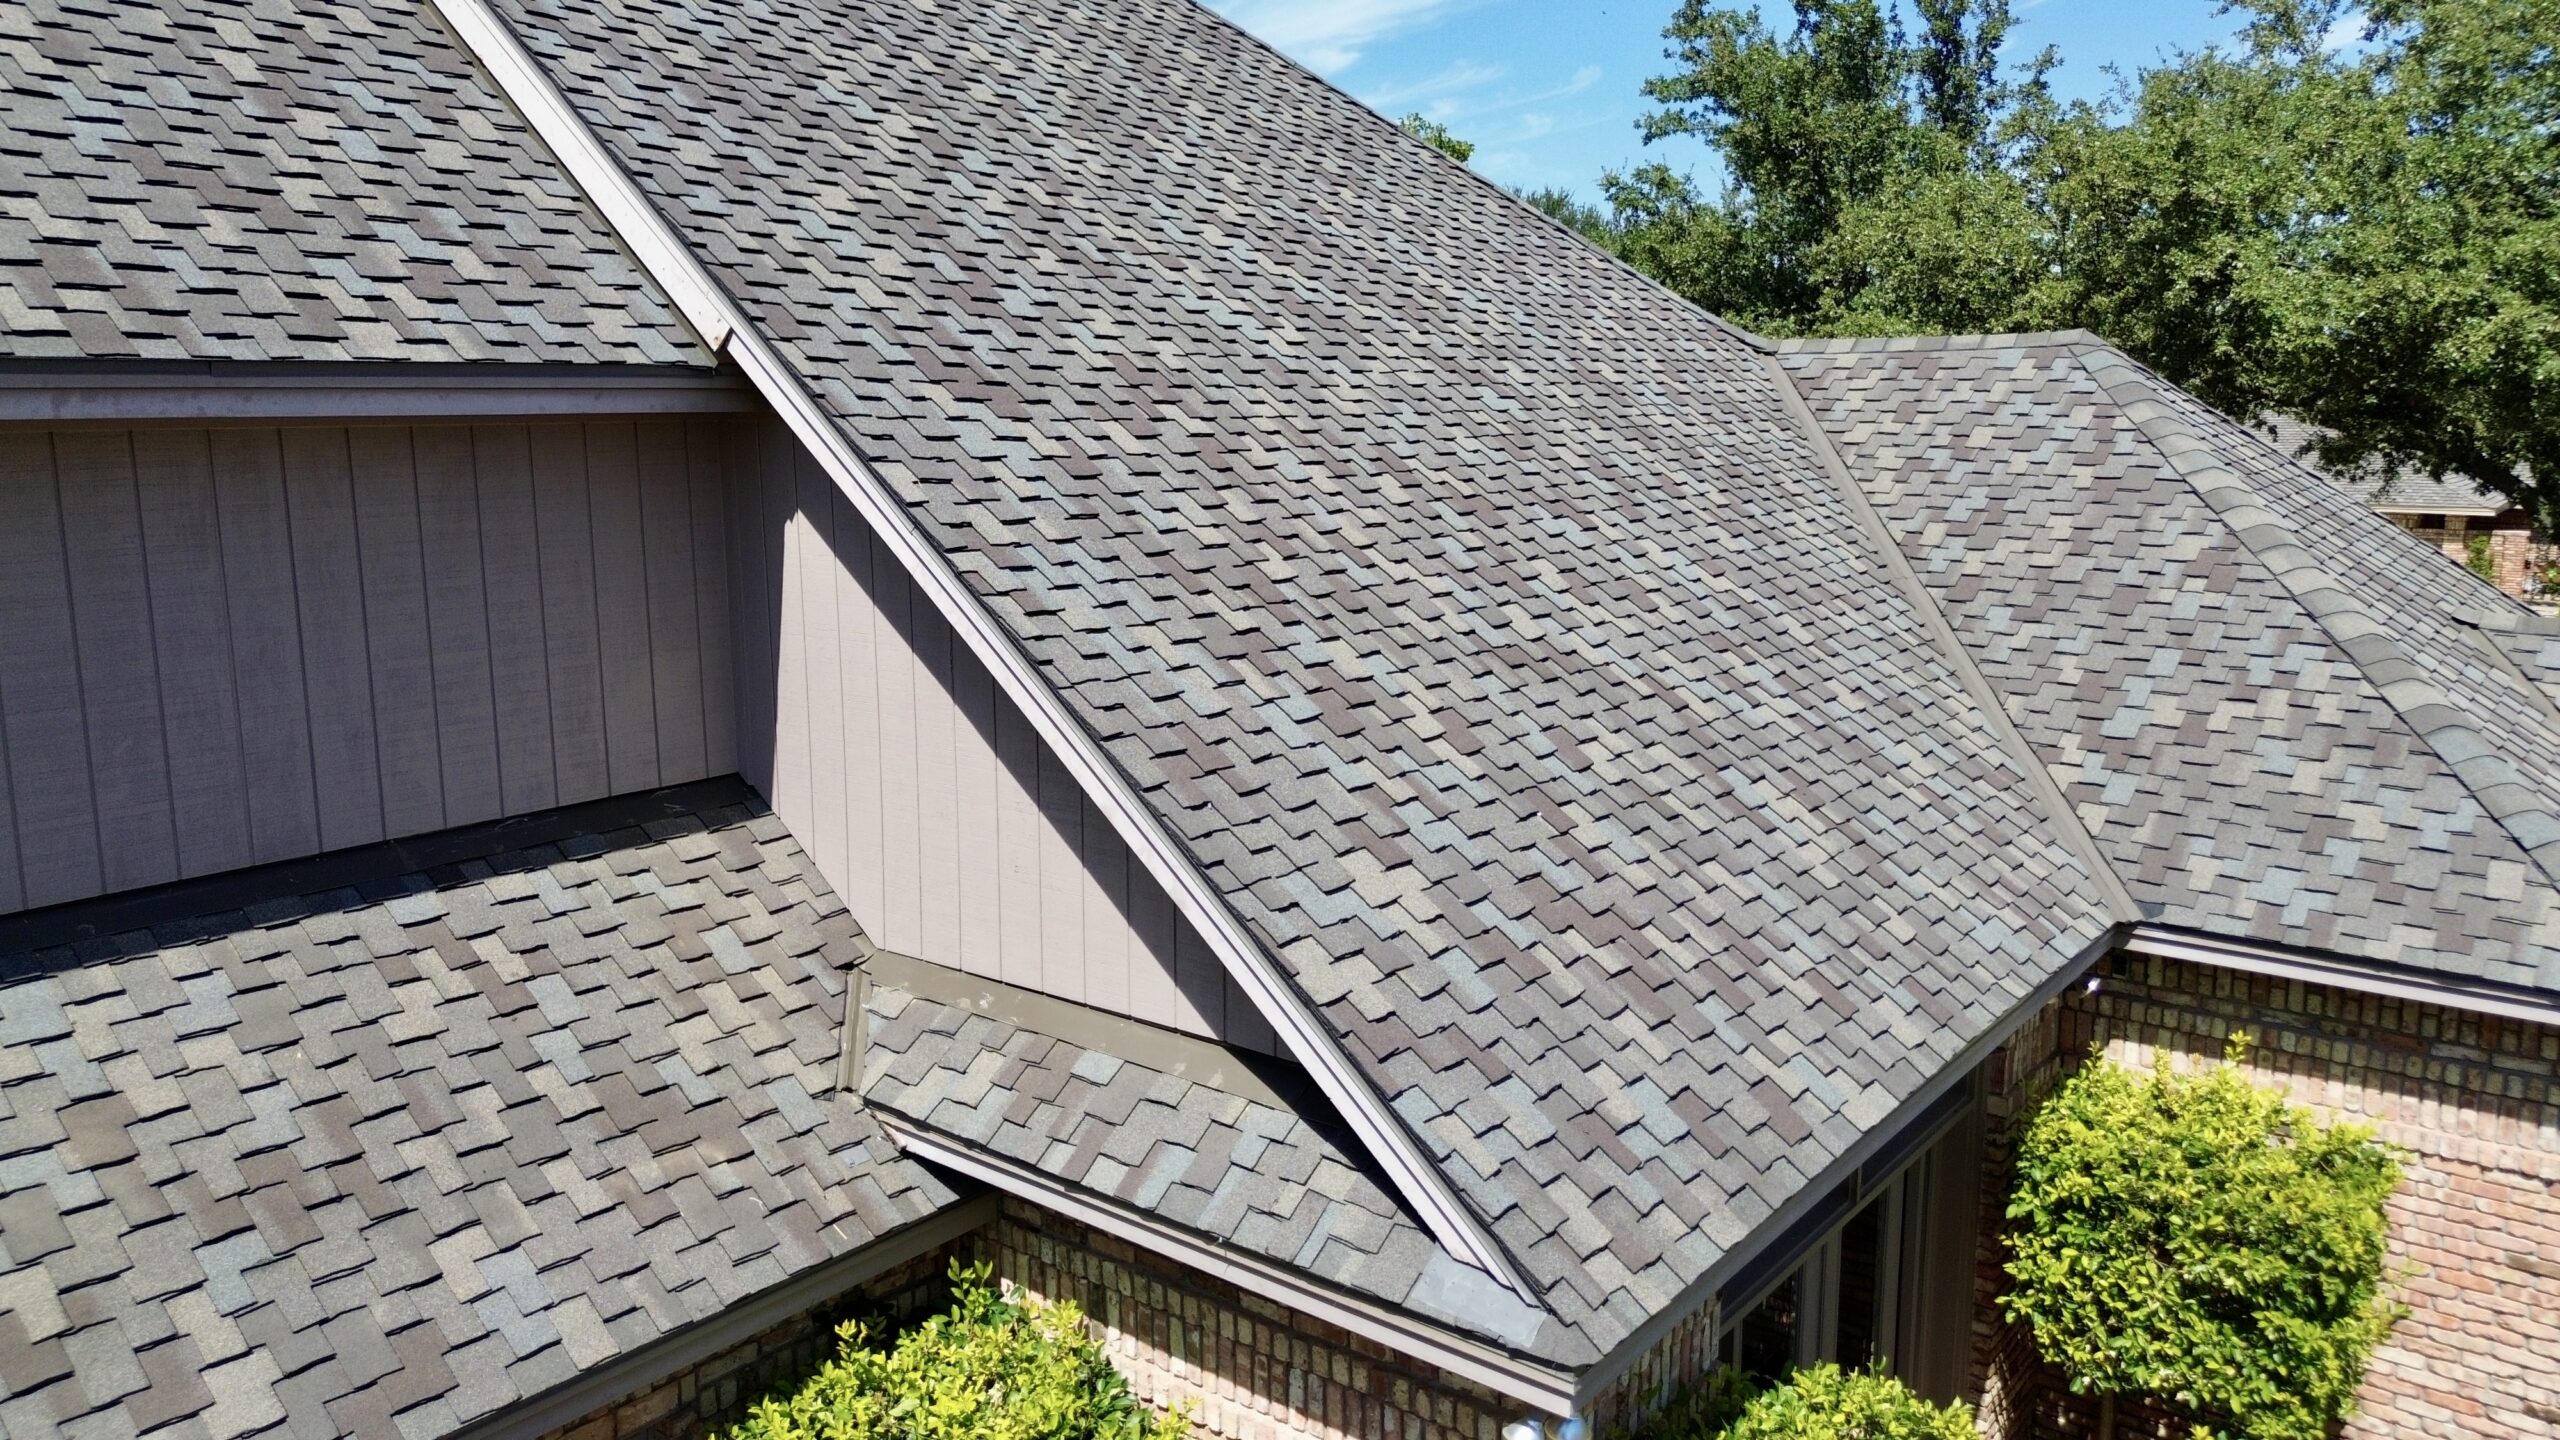
Roof installation involves working at significant heights while handling heavy materials and specialized equipment. Because of these risks, safety preparation is one of the most important steps before construction begins. Proper planning protects workers, property owners, and anyone near the project site.
Roofing contractors should inspect all ladders, scaffolding, safety harnesses, and fall protection equipment before work starts. Damaged equipment should never be used because even minor defects can create serious hazards during installation.
Weather conditions should also be evaluated before each workday. Rain, strong winds, lightning, or icy surfaces significantly increase the risk of accidents and may require installation work to be postponed until conditions improve.
Construction materials should be stored securely to prevent movement caused by wind or uneven surfaces. Proper storage also reduces material damage and keeps work areas organized throughout the installation process.
Everyone working on the project should understand emergency procedures before installation begins. Clear communication regarding emergency contacts, first aid equipment, and evacuation procedures improves overall job site safety.
The following preparation checklist summarizes several important safety measures before roofing work starts:
- Inspect ladders, scaffolding, and fall protection equipment.
- Confirm favorable weather conditions before beginning work.
- Secure roofing materials and equipment properly.
- Establish safe work zones around the property.
- Verify that all workers are using appropriate protective equipment.
- Keep access routes clear for workers and emergency personnel.
Taking these precautions before construction begins reduces unnecessary risks while creating a safer environment for everyone involved in the project.
Understanding the Importance of Professional Installation
Even the highest quality roofing materials cannot deliver their full performance if they are installed incorrectly. Professional installation ensures every roofing component is placed according to manufacturer guidelines and local building requirements. This attention to detail directly affects the roof’s durability, weather resistance, and warranty coverage.
Experienced roofing contractors understand how different materials interact with one another. They know how to install flashing correctly, maintain proper ventilation, secure roofing materials, and create effective drainage systems that protect the building throughout changing weather conditions.
Professional installers also recognize potential problems before they become expensive repairs. Structural weaknesses, moisture damage, or ventilation issues discovered during installation can often be corrected immediately, preventing future damage after the roof has been completed.
Choosing experienced professionals provides peace of mind throughout the installation process. It also increases the likelihood that the finished roof will perform reliably for many years with fewer maintenance concerns and lower long term ownership costs.
The Roof Installation Process
Once the planning, inspections, and preparation work have been completed, the actual roof installation can begin. This stage transforms the project from planning into construction, with each step building upon the previous one to create a complete roofing system. Every layer installed serves a specific purpose, from protecting against moisture to improving ventilation and increasing the roof’s overall durability.
Roof installation follows a logical sequence that should never be rushed. Professional contractors understand that the quality of the finished roof depends not only on the roofing material itself but also on the careful installation of every hidden component beneath it. Taking the time to complete each stage correctly helps ensure the roof performs reliably for decades.
Removing the Old Roofing Materials
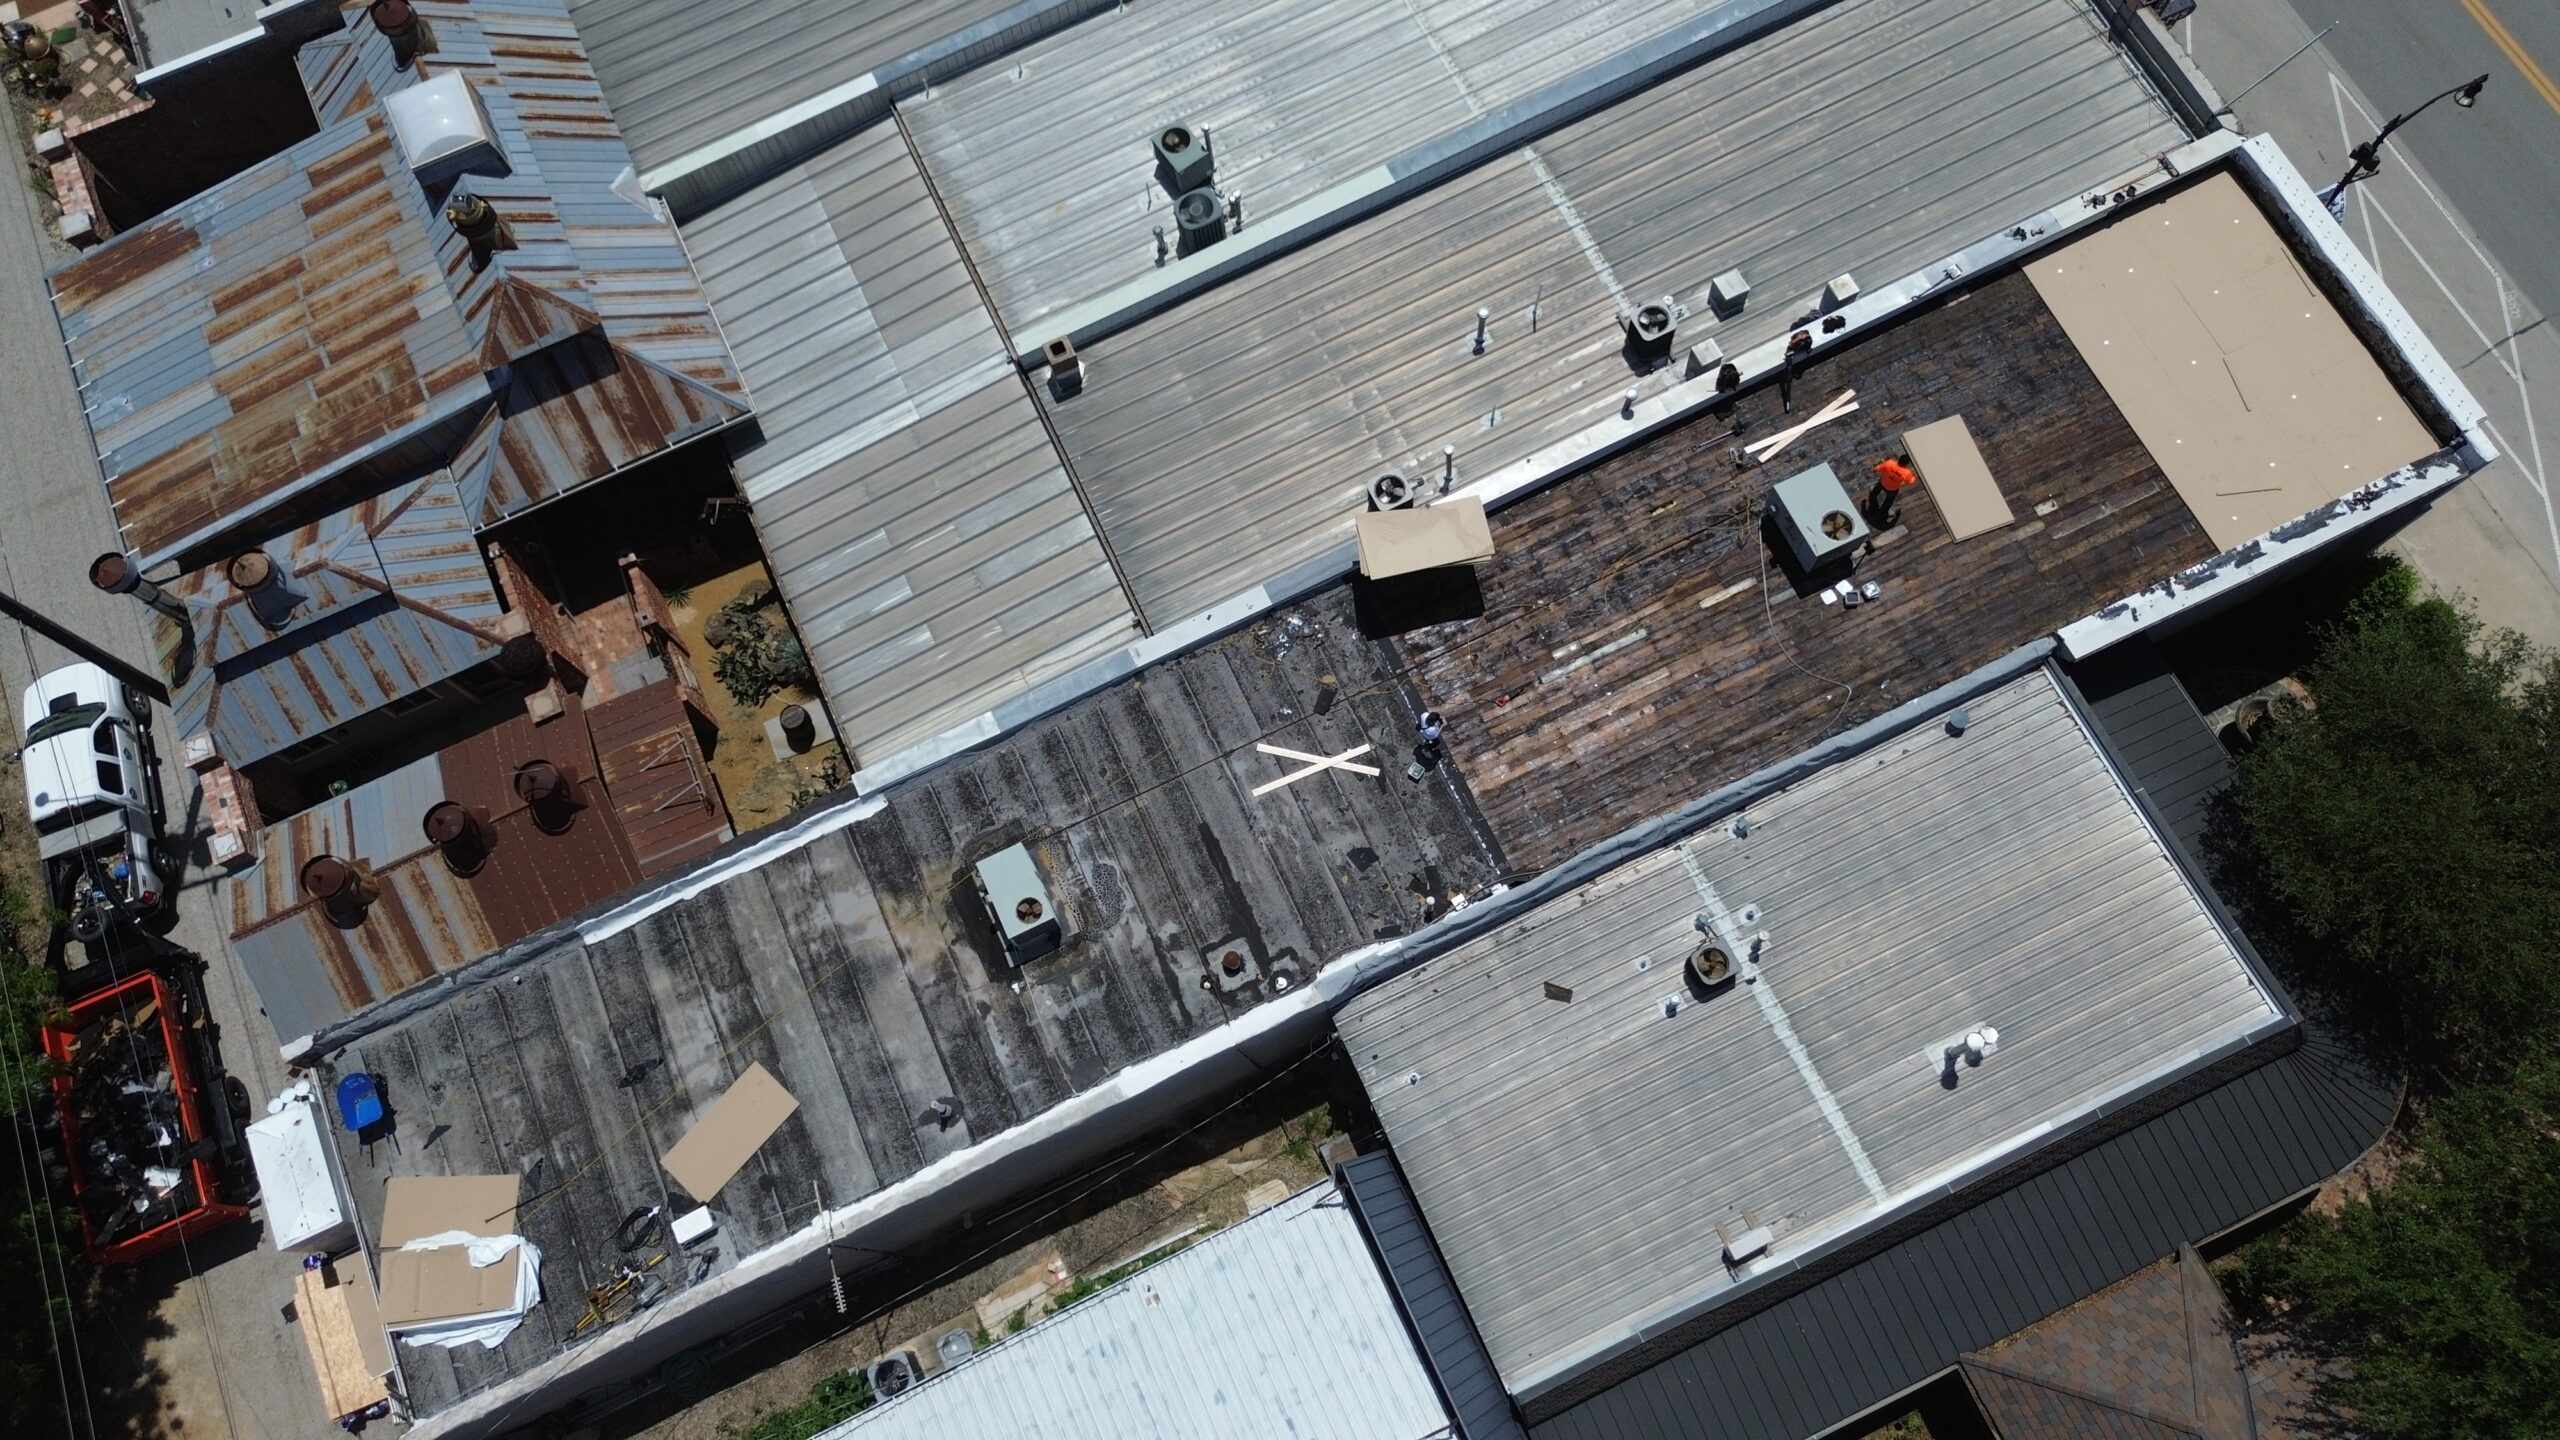
For roof replacement projects, the first construction step involves removing the existing roofing material. This process allows contractors to inspect the underlying structure thoroughly and ensures the new roofing system is installed on a clean, stable foundation. Although installing over existing roofing may seem faster, complete removal often produces better long term results.
The removal process usually begins at the highest point of the roof and continues downward in sections. Contractors carefully remove shingles, metal panels, tiles, or other roofing materials while collecting debris to keep the worksite organized. Proper debris management improves safety and prevents unnecessary damage to the surrounding property.
Removing the old roof also exposes hidden issues that may have developed over time. Moisture damage, deteriorated decking, loose fasteners, or structural weaknesses are much easier to identify once the previous roofing material has been removed. Discovering these problems before installing the new roof prevents future complications.
Contractors often use specialized tools that allow materials to be removed efficiently without damaging the roof deck beneath. Protecting the underlying structure during this stage reduces repair costs and helps maintain the project schedule.
Waste disposal should also be handled responsibly throughout the removal process. Roofing debris is typically collected in designated containers and transported to approved disposal or recycling facilities. Proper cleanup during removal creates a safer work environment while reducing environmental impact.
Inspecting and Repairing the Roof Deck
With the old roofing material removed, the roof deck becomes fully visible for inspection. The roof deck serves as the structural base for every other roofing component, making its condition critical to the success of the entire installation. Even small defects should be corrected before new materials are installed.
Contractors carefully examine the decking for signs of water damage, rot, mold, cracking, or weakened areas. Soft spots may indicate long term moisture exposure that has reduced the deck’s structural strength. Replacing damaged sections at this stage creates a solid foundation for the new roofing system.
Fasteners holding the roof deck should also be inspected. Loose nails or screws can reduce structural stability and may allow movement beneath the finished roof. Reinforcing these connections improves the roof’s ability to withstand changing weather conditions.
In addition to visible damage, contractors verify that the decking remains level across the entire roof surface. Uneven decking may create installation difficulties and affect the appearance of the finished roof. Correcting these irregularities before proceeding ensures roofing materials sit evenly and securely.
Moisture testing may also be performed if previous leaks were suspected. Trapped moisture beneath a new roof can eventually cause mold growth, insulation damage, or structural deterioration. Confirming the deck is completely dry before continuing helps prevent these problems.
This inspection stage may require additional time if unexpected damage is discovered. Although repairs can slightly extend the project schedule, addressing structural concerns before installation is far more cost effective than repairing them after the roof has been completed.
Installing the Underlayment and Moisture Barrier
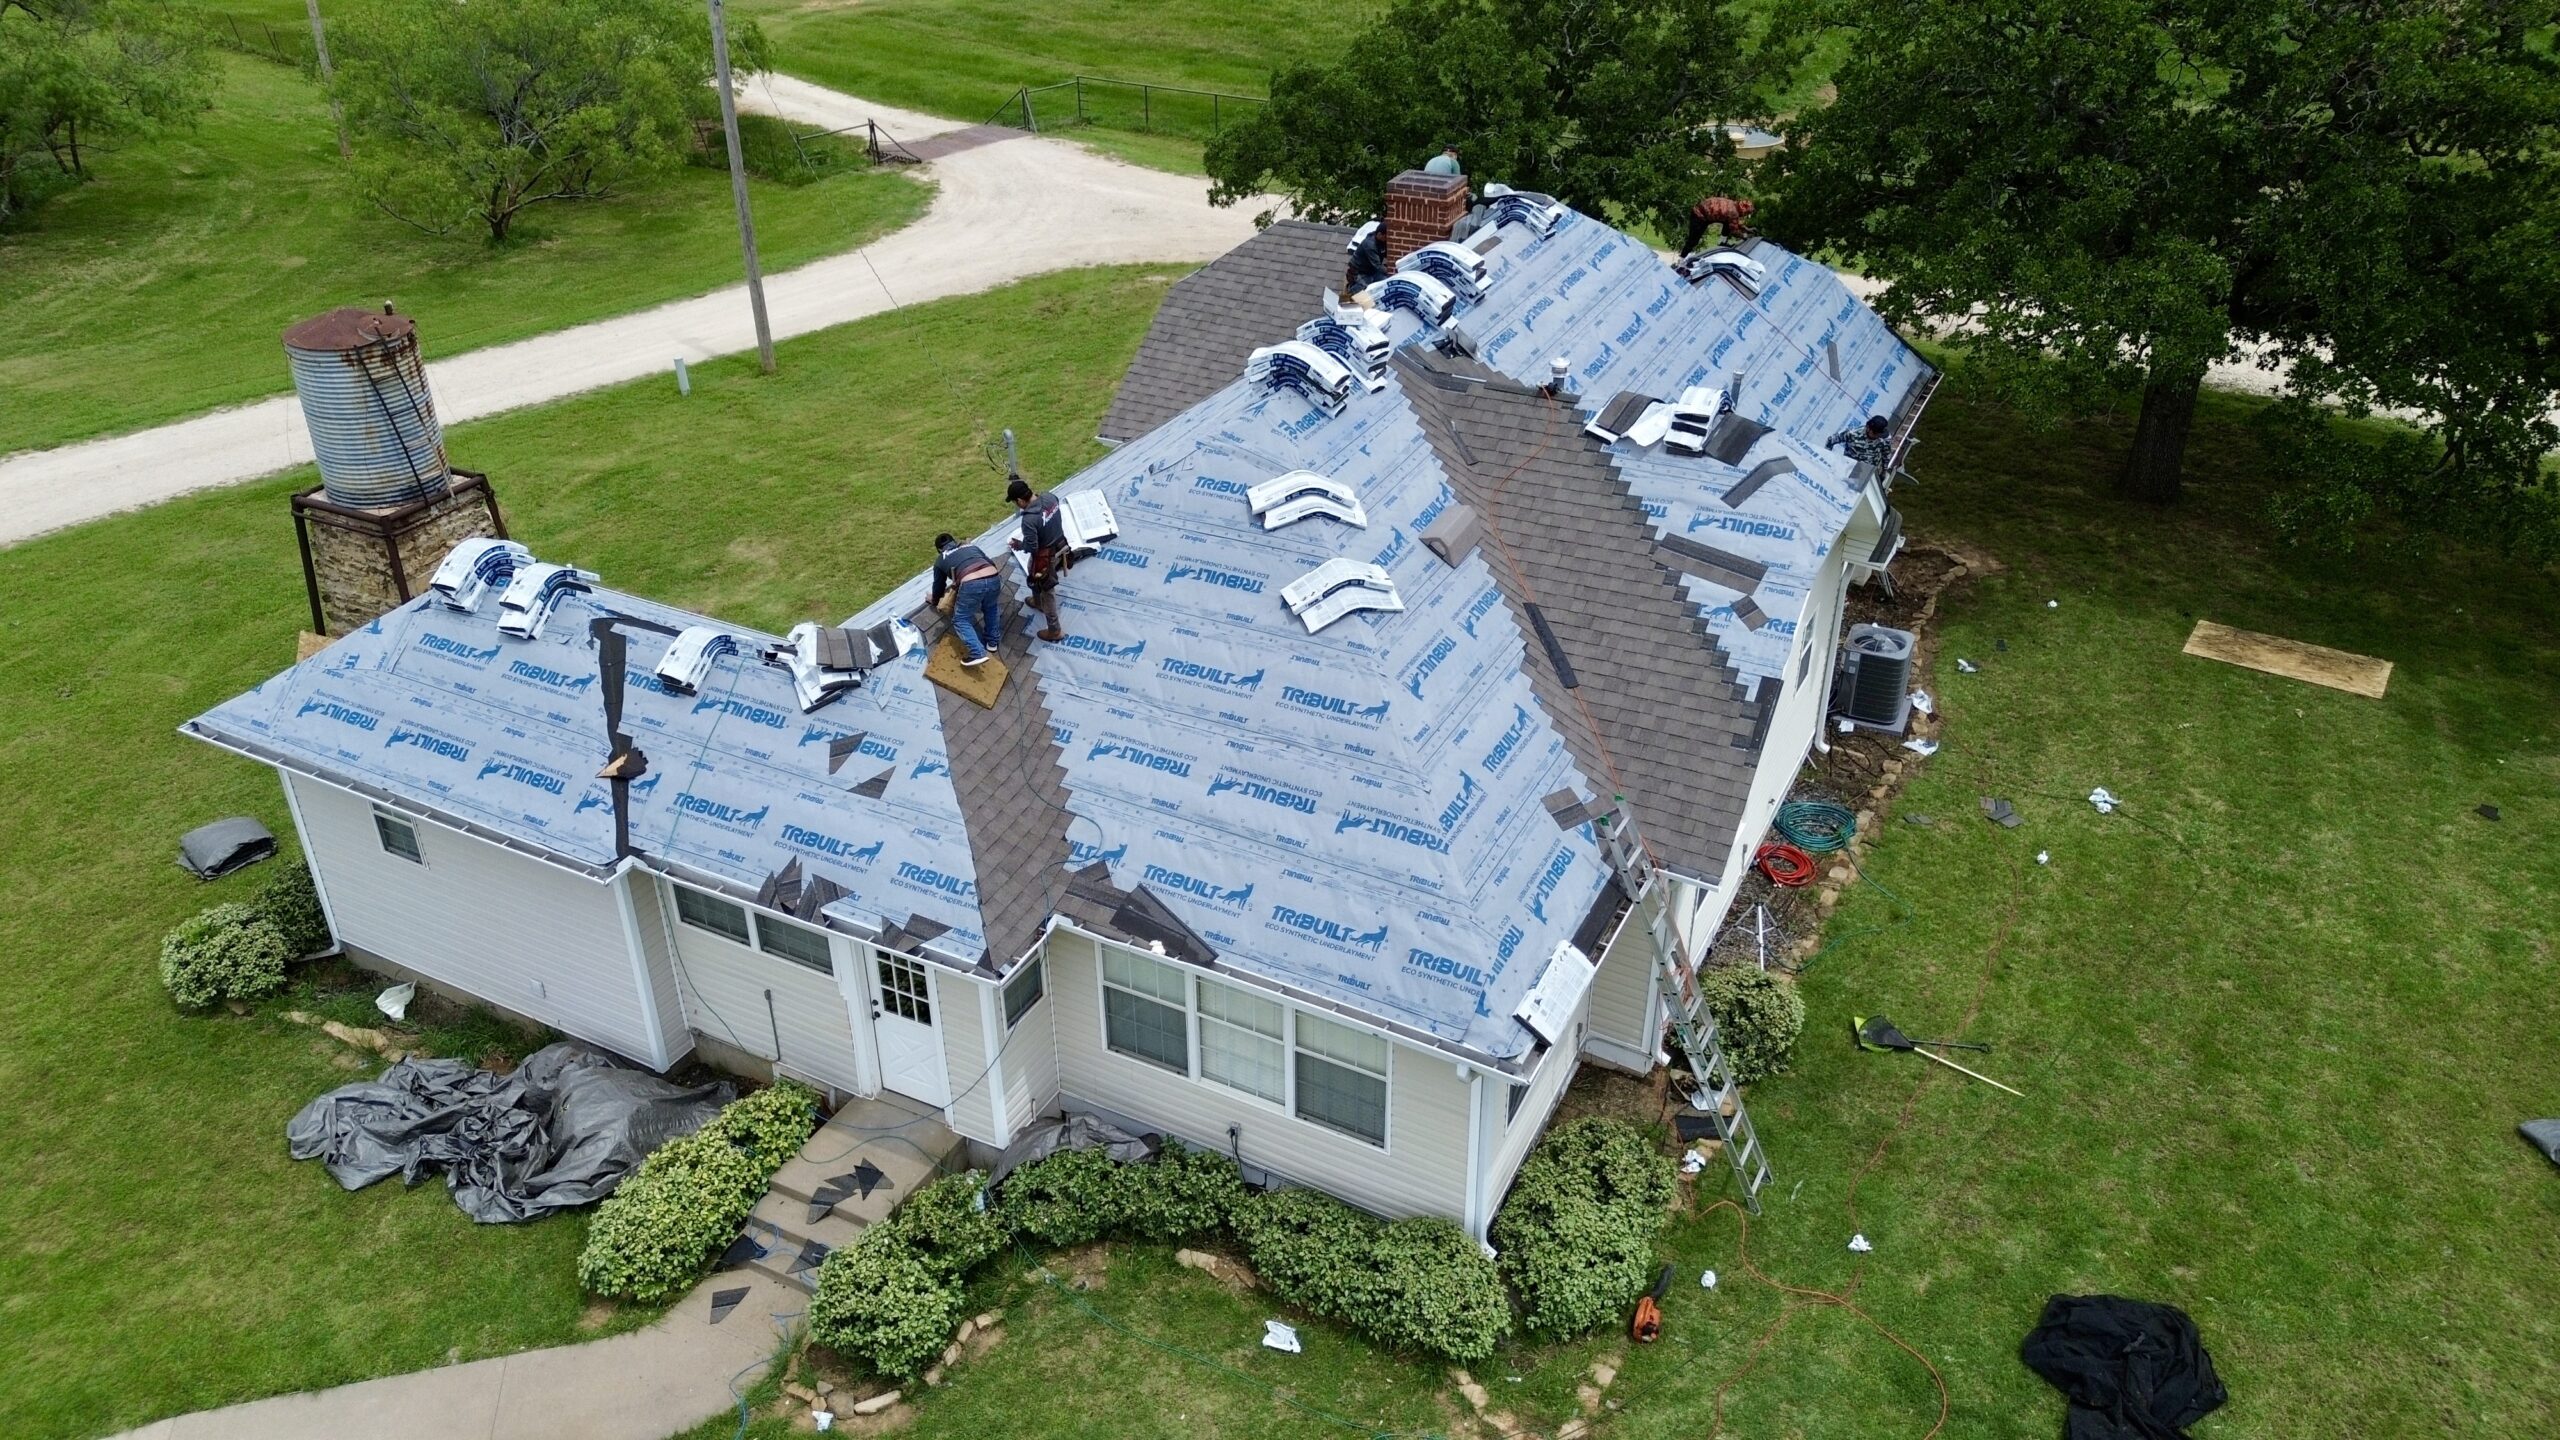
Once the roof deck has been repaired and cleaned, contractors install the underlayment. This layer acts as an additional barrier between the roof deck and the exterior roofing material. Even if water passes beneath shingles or panels during severe weather, the underlayment helps prevent it from reaching the building structure.
Modern roofing systems commonly use synthetic underlayment because of its durability, tear resistance, and moisture protection. Some projects may also use traditional felt underlayment depending on the roofing material and local building requirements. Regardless of the product selected, proper installation is essential for effective protection.
The underlayment is typically installed from the lower edge of the roof upward. Each row overlaps the previous one to create continuous water protection across the roof surface. Correct overlap prevents water from reaching exposed sections beneath the protective layer.
Special waterproof membranes are often installed in areas more vulnerable to water intrusion. Roof valleys, eaves, and locations around chimneys or skylights usually receive additional protection because these sections experience higher water flow during rainfall.
Fastening methods also play an important role. Contractors secure the underlayment using approved fasteners while avoiding unnecessary punctures that could compromise water resistance. Careful installation creates a continuous protective layer capable of performing throughout the roof’s lifespan.
The underlayment may not be visible after installation is complete, but it remains one of the most important components of the entire roofing system. Its ability to protect the structure during extreme weather significantly improves the roof’s long term durability.
Installing Flashing Around Critical Areas
Flashing is designed to protect the most vulnerable parts of the roof where water is most likely to enter. While the main roofing material sheds water across large sections of the roof, flashing creates watertight seals around joints, edges, and roof penetrations.
Metal flashing is commonly installed around chimneys, skylights, plumbing vents, roof valleys, dormers, and wall intersections. These areas experience changing water flow patterns and therefore require additional protection against leaks.
Proper flashing installation requires precision rather than speed. Each piece must fit securely against the surrounding roofing materials while directing water away from openings. Even small gaps or incorrect overlaps can eventually allow moisture to enter the building.
Different types of flashing serve different purposes. Step flashing protects roof to wall intersections, valley flashing manages heavy water flow between roof sections, and drip edge flashing directs water into the gutter system instead of allowing it to reach the roof deck.
Sealants may also be applied where appropriate to improve waterproofing around certain components. However, professional installation relies primarily on correct flashing design rather than excessive use of sealants. Properly installed flashing continues protecting the roof even as temperatures expand and contract roofing materials throughout changing seasons.
Because flashing protects many of the roof’s highest risk areas, careful installation during this stage significantly reduces the likelihood of future leaks.
Installing the New Roofing Material
With the structural components, moisture barriers, and flashing in place, contractors can begin installing the visible roofing material. This stage transforms the roof’s appearance while completing its primary weather protection system. Although it is the most noticeable part of the installation, it depends heavily on the quality of every previous step.
Installation methods vary according to the selected roofing material. Asphalt shingles, metal panels, clay tiles, slate, and synthetic products each require different fastening techniques and installation sequences. Professional contractors follow manufacturer guidelines carefully to ensure optimal performance and maintain warranty coverage.
Roofing installation generally begins at the lower edge of the roof and progresses upward toward the ridge. This overlapping pattern allows rainwater to flow naturally over each layer without entering beneath the roofing material. Proper alignment throughout installation also creates a clean and professional appearance.
Contractors continuously check spacing, alignment, and fastening while installing each section. Even small inconsistencies become noticeable once the roof is complete, making regular quality checks an essential part of the installation process.
Material cutting requires equal attention. Roofing materials must fit accurately around vents, chimneys, skylights, valleys, and roof edges without leaving unnecessary gaps. Precise measurements reduce waste while improving weather resistance.
Weather conditions remain important throughout this stage. Excessive heat, rain, or strong winds may affect material handling and installation quality. Experienced contractors adjust their schedules when necessary to maintain consistent workmanship.
Installing Ridge Caps, Ventilation, and Roof Accessories
Once the main roofing material has been installed, attention shifts to the finishing components that complete the roofing system. Although these elements may appear small compared to the rest of the roof, they perform essential functions that influence durability, ventilation, and overall performance.
Ridge caps are installed along the highest point of the roof where two roof slopes meet. These specially designed components protect the ridge from water penetration while creating a finished appearance. Proper installation also helps secure the upper edges of the roofing material beneath them.
Roof ventilation is another critical component installed during this stage. Effective ventilation allows fresh air to enter through intake vents while warm, moist air exits through exhaust vents near the ridge. This continuous airflow helps regulate attic temperatures and reduces moisture accumulation throughout the year.
Without adequate ventilation, excessive heat may shorten the lifespan of roofing materials while trapped moisture encourages mold growth and wood deterioration. Proper airflow therefore benefits both the roof and the building beneath it.
Additional roof accessories may also be installed at this point. These can include attic vents, skylights, snow guards, satellite mounting systems, solar panel supports, and specialized drainage components. Planning for these features before installation allows them to integrate seamlessly with the completed roofing system.
Every accessory should be installed using approved flashing and waterproofing methods. Proper integration prevents these additions from becoming future leak points while preserving the roof’s structural integrity.
Maintaining Quality Control Throughout Installation
Quality control should continue from the first day of installation until the final inspection. Contractors should never assume that materials have been installed correctly without verifying their work at every stage. Continuous inspection allows small issues to be corrected immediately before they affect later construction.
Roofing crews regularly examine fastening patterns, material alignment, flashing placement, and underlayment installation as work progresses. These routine checks help maintain consistency across the entire roofing system rather than identifying problems only after installation has been completed.
Material handling also remains an important quality consideration. Roofing products should be stored properly throughout the project to prevent damage caused by moisture, excessive heat, or improper stacking. Damaged materials should never be installed simply to avoid replacement costs.
Communication among crew members contributes significantly to quality control as well. Supervisors should review completed sections daily, discuss any concerns, and confirm that installation methods continue meeting manufacturer specifications and project requirements.
Weather monitoring also supports quality assurance. Installation should pause whenever conditions create safety risks or could compromise workmanship. Waiting for suitable weather often produces better long term results than attempting to maintain the schedule regardless of conditions.
Common Challenges During Roof Installation
Even carefully planned roofing projects may encounter unexpected challenges during construction. Recognizing these situations allows contractors and property owners to respond quickly while minimizing delays and additional costs.
One common challenge is discovering hidden structural damage after removing the existing roof. Water intrusion over many years may weaken decking, rafters, or support beams without obvious signs from the exterior. Although repairs require additional time, correcting these issues before continuing is essential for long term roof performance.
Weather conditions can also interrupt installation unexpectedly. Sudden rainfall, strong winds, or extreme temperatures may require temporary suspension of work to protect both workers and exposed building components. Flexible scheduling helps reduce the impact of these unavoidable delays.
Material availability occasionally affects project timelines as well. High demand, transportation issues, or manufacturing delays can postpone deliveries. Ordering materials early during the planning phase reduces the likelihood of significant interruptions.
Complex roof designs create another challenge during installation. Multiple roof angles, dormers, skylights, chimneys, and intersecting roof sections require careful measurements and additional flashing work. Although these features increase installation complexity, experienced contractors use detailed planning and precise workmanship to achieve reliable results.
Despite these potential challenges, a well organized installation process allows most projects to progress smoothly. Careful planning, skilled workmanship, ongoing communication, and continuous quality control help ensure the roofing system is installed correctly while remaining on schedule whenever possible.
Final Inspection and Long Term Roof Care
Completing the installation of the roofing material does not mark the end of the roofing project. The final stage focuses on ensuring every component has been installed correctly, verifying the roof performs as intended, and preparing a maintenance plan that protects the investment for many years. A thorough inspection, proper documentation, and routine care are just as important as the installation itself.
Many roofing problems that appear years after installation can often be traced back to issues that were overlooked during the final stages of the project. Taking time to inspect the completed roof carefully helps identify any concerns before they become costly repairs. This final phase also gives property owners confidence that their new roof is ready to provide dependable protection in all weather conditions.
Cleaning the Worksite After Installation
Once the roofing materials have been installed, contractors begin the cleanup process. Although cleanup may seem like a simple task, it is an important part of every professional roofing project. A clean worksite improves safety, protects the property, and reflects the quality of the contractor’s workmanship.
Roofing projects generate various types of waste, including old shingles, nails, underlayment, packaging materials, damaged roofing products, and wood offcuts. These materials should be collected regularly during construction and removed completely once the installation is finished. Leaving debris behind not only creates safety hazards but can also damage landscaping, driveways, or vehicles.
Special attention should be given to loose nails. Professional roofing contractors often use magnetic sweepers to collect nails from lawns, sidewalks, flower beds, and driveways. This simple step helps prevent injuries to people and pets while protecting vehicle tires from punctures.
Gutters should also be inspected and cleaned after installation. Small pieces of roofing material or dust may accumulate inside the drainage system during construction. Removing this debris ensures rainwater can flow freely once the roof begins serving its purpose.
The surrounding property deserves the same level of attention. Outdoor furniture, landscaping, air conditioning units, and decorative features should be checked to confirm they remain undamaged. If temporary protective coverings were used during construction, they should be removed carefully without disturbing nearby plants or structures.
A properly cleaned worksite allows the property owner to inspect the completed project more easily. It also demonstrates that the roofing contractor values professionalism from the beginning of the project until the very end.
Conducting the Final Roof Inspection
A final inspection confirms that the roofing system has been installed according to the project specifications and industry standards. This inspection should be completed before the project is officially handed over to the property owner. It provides an opportunity to verify workmanship, identify any remaining concerns, and ensure every component functions correctly.
The inspection usually begins with a visual examination of the roof’s exterior. Contractors check the alignment of roofing materials, the consistency of installation patterns, and the condition of flashing, ridge caps, vents, and roof edges. The finished roof should present a clean, uniform appearance without visible gaps, loose materials, or uneven sections.
Attention should then shift to critical areas where leaks are most likely to develop. Roof valleys, skylights, chimneys, plumbing vents, and wall intersections should all be examined carefully. Proper flashing installation and secure sealing around these features are essential for preventing future water intrusion.
The inspection should also include the attic or roof space beneath the new roof. Contractors look for signs of daylight entering through the roof deck, moisture accumulation, disturbed insulation, or inadequate ventilation. These observations help confirm that the roofing system has been installed correctly from both the exterior and interior.
Property owners are encouraged to participate in the final walkthrough whenever possible. Walking through the completed project with the contractor provides an opportunity to ask questions, understand the work that has been completed, and discuss any maintenance recommendations before the project concludes.
Testing the Completed Roofing System
After the visual inspection has been completed, contractors may perform additional tests to verify the roof is functioning properly. These tests provide added confidence that the installation meets performance expectations before the roof is exposed to long periods of changing weather conditions.
One of the most important evaluations involves checking the roof’s drainage performance. Water should flow smoothly toward gutters and downspouts without pooling on the roof surface. Proper drainage reduces the risk of standing water, which can eventually shorten the lifespan of roofing materials.
Ventilation performance should also be reviewed. Intake and exhaust vents should allow continuous airflow through the attic space, helping regulate temperature and moisture levels throughout the year. Balanced ventilation improves energy efficiency while reducing the likelihood of condensation related damage.
Fasteners and exposed roofing components should receive a final inspection as well. Contractors verify that nails, screws, and clips have been installed correctly and that no loose materials remain on the roof surface. Secure fastening improves resistance against strong winds and severe weather.
Some commercial projects may include specialized testing procedures such as moisture detection, infrared scanning, or electronic leak detection. These advanced techniques help identify hidden issues before the building becomes fully operational. While not always necessary for residential properties, they demonstrate the importance of thorough quality assurance.
The purpose of testing is not simply to identify defects but to confirm that every roofing component works together as a complete protective system. Successful testing provides reassurance that the roof is ready to perform under normal weather conditions.
Understanding Roof Warranties
A new roof represents a significant investment, making warranty protection an important part of the overall project. Understanding warranty coverage helps property owners know what protection they receive and what responsibilities they must fulfill to maintain that coverage.
Most roofing installations include two primary types of warranties. The first is the manufacturer’s warranty, which covers defects in roofing materials under normal conditions. The second is the workmanship warranty provided by the contractor, which covers installation related issues that may occur because of improper construction practices.
Although both warranties offer valuable protection, they do not cover every possible situation. Damage caused by severe storms, falling trees, improper maintenance, unauthorized repairs, or accidents may fall outside standard warranty coverage. Property owners should review warranty documents carefully to understand any limitations or exclusions.
Proper documentation is equally important. Warranty certificates, material specifications, invoices, inspection reports, and permit records should all be stored in a secure location. These documents may be required if a warranty claim becomes necessary in the future.
Some manufacturers also require roofing systems to be installed according to specific guidelines before warranty coverage becomes valid. Using approved materials, proper ventilation, and recommended installation techniques helps preserve warranty eligibility throughout the roof’s expected lifespan.
Keeping maintenance records can also support future warranty claims. Documenting inspections, cleaning activities, and repairs demonstrates that the roofing system has been maintained responsibly according to manufacturer recommendations.
Roof Maintenance Tips After Installation
Installing a new roof is only the beginning of its service life. Routine maintenance helps preserve the condition of the roofing system while reducing the likelihood of expensive repairs. Even the highest quality roofing materials benefit from regular inspections and preventive care.
Property owners should inspect the roof periodically throughout the year. Seasonal inspections allow small issues to be identified before they develop into significant structural problems. Looking for missing materials, loose flashing, blocked gutters, or visible damage after storms helps maintain the roof’s overall condition.
Cleaning the roof should also become part of the maintenance routine. Leaves, branches, moss, and other debris may collect on the roof over time, particularly in areas surrounded by trees. Removing this debris allows rainwater to drain efficiently while reducing unnecessary moisture retention.
Tree maintenance is another important consideration. Overhanging branches should be trimmed regularly to reduce the risk of falling limbs during storms. Keeping branches away from the roof also minimizes abrasion caused by repeated contact during windy conditions.
Gutters and downspouts should be cleaned several times each year depending on the surrounding environment. Blocked drainage systems can cause water to back up beneath roofing materials or overflow near the building foundation. Maintaining clear drainage protects both the roof and the rest of the property.
Minor repairs should never be postponed. Replacing a loose shingle or repairing damaged flashing immediately is usually far less expensive than addressing extensive water damage later. Prompt maintenance extends the roof’s lifespan while preserving its protective performance.
Signs That Your New Roof Is Performing Properly
After installation, property owners often wonder how they can determine whether the roofing system is functioning correctly. Fortunately, several indicators suggest that the installation has been completed successfully and the roof is performing as expected.
The roof should maintain a consistent appearance across its entire surface. Roofing materials should remain aligned without curling, shifting, or developing noticeable gaps. Uniform installation indicates careful workmanship and proper fastening techniques.
During rainfall, water should move smoothly toward gutters without collecting on the roof surface. Overflowing gutters, standing water, or visible leaks may indicate drainage issues that require attention. Efficient water movement demonstrates that the roof slope and drainage components are working together effectively.
Inside the building, ceilings and attic spaces should remain dry. There should be no signs of water stains, mold growth, damp insulation, or unusual odors following heavy rain. A dry interior confirms that moisture barriers, flashing, and roofing materials are performing correctly.
Energy efficiency can also provide clues about roof performance. Proper insulation and ventilation help maintain comfortable indoor temperatures throughout the year. If heating and cooling systems operate more efficiently after installation, the roofing system is likely contributing to improved thermal performance.
Noise levels may also decrease after a quality roof installation. Proper insulation and modern roofing materials often reduce the amount of outside noise entering the building, creating a more comfortable indoor environment.
Common Questions About Roof Installation
Many property owners have similar questions once a new roof has been installed. Understanding these common concerns helps maintain realistic expectations while supporting proper roof care in the years ahead.
How soon can the roof experience heavy rain?
A professionally installed roof is generally designed to withstand rainfall immediately after installation has been completed. Contractors ensure that all protective layers and roofing materials are secured before considering the project finished.
How often should professional roof inspections be scheduled?
Most roofing professionals recommend a thorough inspection at least once or twice each year. Additional inspections are advisable after severe storms, high winds, or other extreme weather events that may have affected the roof.
Can homeowners perform roof inspections themselves?
Basic visual inspections from ground level are generally safe for homeowners. However, walking on the roof should be left to trained professionals because improper movement can damage roofing materials and increase the risk of personal injury.
What should be done if a small leak appears?
Even a minor leak should be investigated as soon as possible. Small leaks can allow moisture to spread into insulation, roof decking, and structural framing, leading to more extensive damage if repairs are delayed.
Will a new roof increase property value?
A professionally installed roof often improves curb appeal and may increase buyer confidence because it reduces concerns about future repair expenses. While the exact impact varies by market conditions, a new roof is generally considered a valuable property improvement.
Building a Long Term Roof Care Plan
A long lasting roof depends on consistent maintenance rather than occasional repairs. Creating a simple maintenance plan helps property owners protect their investment while reducing the likelihood of unexpected roofing problems.
An effective maintenance schedule does not need to be complicated. Instead, it should focus on routine inspections, seasonal cleaning, prompt repairs, and professional evaluations whenever necessary. Consistency is more important than performing complicated maintenance procedures.
A practical roof care plan may include the following steps:
- Inspect the roof every spring and autumn.
- Check the roof after severe storms or high winds.
- Clean gutters and downspouts regularly.
- Remove leaves, branches, and other debris from the roof surface.
- Trim overhanging tree branches to reduce potential damage.
- Schedule professional inspections every few years or whenever concerns arise.
- Keep records of inspections, maintenance, and repairs for future reference.
Following a structured maintenance routine helps maximize the roof’s lifespan while reducing long term ownership costs. It also makes it easier to identify gradual changes before they develop into major structural problems.
Conclusion
A roof installation is a carefully planned process that involves much more than placing new roofing materials on top of a building. Every stage, from the initial inspection and project planning to structural preparation, underlayment installation, flashing, ventilation, and final quality checks, contributes to the strength and performance of the completed roofing system.
Following each installation step in the correct order ensures that every roofing component works together to protect the property from moisture, wind, temperature changes, and daily environmental exposure. Attention to detail throughout the project helps create a roof that delivers reliable performance while minimizing future maintenance requirements.
The work does not end when the installation crew leaves the property. Regular inspections, routine maintenance, proper cleaning, and timely repairs all play an important role in preserving the roof’s condition over the years. Understanding warranty coverage and maintaining accurate documentation further protect the investment and simplify future maintenance.
By understanding the complete roof installation process from start to finish, property owners can make informed decisions, communicate effectively with roofing professionals, and recognize the value of quality workmanship. A properly installed and well maintained roof not only protects the building but also improves energy efficiency, enhances property value, and provides lasting peace of mind for many years to come.