
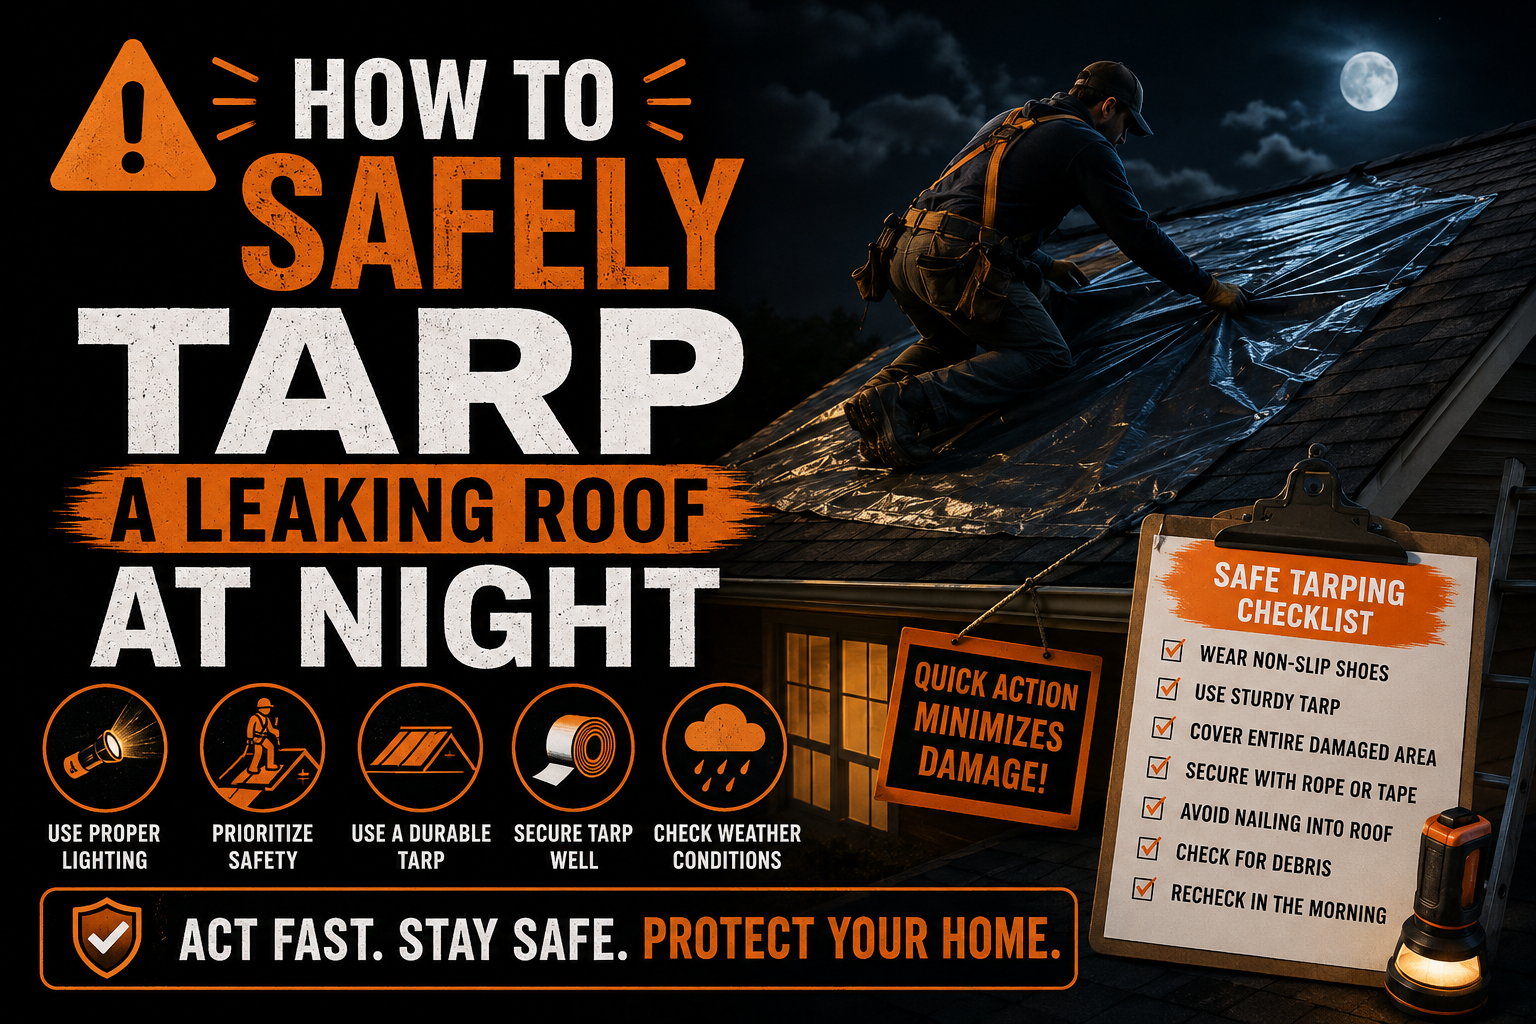
How to Safely Tarp a Leaking Roof at Night
Introduction
Discovering a leaking roof after dark can be one of the most stressful situations a homeowner faces. Rainwater entering the home during the night can quickly damage ceilings, insulation, flooring, furniture, and personal belongings. While the instinct may be to stop the leak immediately, rushing onto a roof without proper preparation can create a far greater safety risk than the leak itself.
A roof tarp is one of the most effective temporary solutions for protecting a damaged roof until permanent repairs can be completed. When installed correctly, it helps divert rainwater away from exposed roofing materials and limits additional water intrusion. However, nighttime installations require extra caution because reduced visibility makes hazards much more difficult to identify.
Not every nighttime roof leak requires someone to climb onto the roof. In many situations, protecting the interior of the home and waiting until daylight is the safest option. Understanding when a roof tarp is appropriate and when professional assistance is the better choice helps prevent unnecessary accidents.
This guide explains how to safely tarp a leaking roof at night, the precautions that should always be taken, the equipment needed for emergency protection, and the factors that determine whether a temporary tarp installation can be performed safely.
Understanding the Risks of Tarping a Roof at Night
Working on a roof is challenging even under ideal conditions. At night, the difficulty increases because reduced visibility makes it harder to recognize damaged roofing materials, uneven surfaces, and hidden obstacles. A roof that appears stable in limited lighting may contain loose shingles, soft decking, or debris that creates slipping hazards.
Wet roofing materials become especially dangerous after rainfall. Water reduces traction on asphalt shingles, metal roofing panels, and tile roofs, making slips much more likely. Even shoes designed for good grip cannot completely eliminate this risk when the roof surface is wet.
Storm damage often leaves roofing materials unstable. High winds may partially loosen shingles, flashing, or roof panels without completely removing them. Stepping on these weakened sections after dark increases the chance of losing balance or causing additional roof damage.
Tree branches, fallen debris, and scattered roofing materials can also create unexpected hazards. Limited visibility makes it more difficult to avoid these obstacles, especially when carrying repair materials or climbing a ladder.
Electrical hazards should never be overlooked following severe weather. Downed power lines, damaged service cables, and water around electrical equipment create dangerous conditions that are often more difficult to recognize at night. If electrical damage is suspected, the safest decision is to stay away from the roof until professionals determine the area is safe.
Weather Conditions That Make Nighttime Roof Work Unsafe
Not every roof leak should be addressed immediately. Certain weather conditions increase the danger so significantly that attempting a temporary roof repair becomes an unnecessary risk.
Heavy rain is one of the most obvious reasons to postpone roof access. Rain reduces visibility even further while making every roofing surface more slippery. Strong winds add another layer of danger by affecting balance and making it difficult to control a large roof tarp.
Lightning presents one of the most serious hazards. Climbing onto an elevated metal ladder or standing on an exposed roof during a thunderstorm should never be considered because of the risk of lightning strikes.
Snow and ice create equally hazardous conditions during winter storms. Frozen roofing materials provide very little traction, while hidden ice patches make slips almost impossible to predict. Waiting until temperatures improve is generally the safest approach.
Dense fog can also reduce visibility to unsafe levels. Even with a bright flashlight or headlamp, thick fog limits the ability to identify roof edges, damaged sections, and potential obstacles.
If any of these weather conditions are present, interior water control measures should take priority while waiting for safer conditions or professional emergency assistance.
Determining Whether a Roof Tarp Is Necessary
A roof tarp is intended to provide temporary weather protection when roof damage creates an immediate risk of water intrusion. Understanding whether the damage truly requires emergency tarping helps homeowners avoid unnecessary exposure to dangerous conditions.
Large sections of missing shingles are one of the clearest reasons to consider temporary roof protection. Exposed roof decking absorbs water quickly, increasing the likelihood of structural deterioration if additional rainfall occurs before repairs can be made.
Damage caused by fallen tree branches also often requires emergency covering. Branch impacts may puncture roofing materials or expose underlayment, allowing water to enter the building through a relatively large opening.
Storm damage around chimneys, skylights, or roof valleys may also justify temporary protection because these areas naturally direct significant amounts of water during rainfall. Even moderate storms can produce noticeable leaks when flashing becomes damaged.
However, not every leak requires immediate roof access. Small ceiling stains without active dripping, minor moisture around old roof penetrations, or leaks that have stopped after rainfall may be monitored temporarily while professional repairs are arranged during daylight.
The size of the damaged area, weather forecast, and overall roof condition should all be considered before deciding whether emergency tarping is appropriate.
Situations Where Interior Protection Is the Better Option
In many cases, the safest response to a nighttime roof leak is protecting the inside of the home rather than climbing onto the roof. Temporary interior measures often prevent additional damage while eliminating the risks associated with working on a roof after dark.
Buckets or waterproof containers can be placed beneath active leaks to collect dripping water. Emptying them regularly prevents overflow while keeping floors as dry as possible throughout the night.
Furniture, electronics, artwork, rugs, and important documents should be moved away from leaking areas whenever practical. If relocation is not possible, waterproof plastic sheeting can help protect valuable belongings until the leak is repaired.
Towels, mops, and absorbent materials may be used to reduce standing water on hard flooring. Removing excess moisture quickly helps prevent slipping hazards while minimizing damage to wood, laminate, or other sensitive flooring materials.
If water begins accumulating inside a ceiling, homeowners should remain cautious. Bulging ceilings may contain significant amounts of trapped water and could eventually collapse under the added weight. Keeping people away from the affected area is often the safest choice until professional assistance is available.
Choosing interior protection instead of immediate roof access is not a sign of delaying repairs. In many situations, it is the safest and most responsible decision.
Temporary Roof Tarp or Professional Emergency Help
Not every homeowner has the experience, equipment, or physical ability to install a roof tarp safely at night. Knowing when to call professionals instead of attempting emergency repairs helps prevent accidents while ensuring the property receives appropriate protection.
Professional emergency roofing services are equipped with specialized lighting, safety equipment, ladders, and fall protection systems designed for challenging conditions. Experienced crews can often perform emergency tarping more safely than someone unfamiliar with roof work.
Homes with steep roof slopes should almost always be left to professionals during nighttime emergencies. Maintaining stable footing becomes much more difficult as roof pitch increases, especially when surfaces are wet.
Large damaged areas also benefit from professional installation because oversized tarps require careful positioning and secure fastening to remain effective during strong winds.
If storm damage has affected structural components or exposed electrical systems, professional evaluation becomes even more important. Temporary repairs should never place personal safety at unnecessary risk.
Knowing personal limitations is an important part of emergency preparedness. If there is any doubt about safely accessing the roof, waiting for qualified assistance is the better choice.
Essential Safety Precautions Before Going Outside
Before leaving the house to inspect roof damage, homeowners should take several important safety precautions. Proper preparation reduces the likelihood of accidents while improving the effectiveness of any temporary repairs.
The first step is checking current weather conditions. Even if rainfall appears to have stopped, strong winds or approaching storms may create unsafe working conditions within minutes. Weather radar and local forecasts can provide valuable information before any decision is made.
Someone inside the home should always know that roof work is being attempted. If possible, another adult should remain nearby to stabilize the ladder, assist with materials, and respond in the event of an emergency.
Proper clothing also improves safety. Long sleeves, durable work gloves, and non slip shoes with clean rubber soles provide better protection against cuts, abrasions, and slipping hazards. Loose clothing that may catch on roofing materials should be avoided.
A fully charged mobile phone should remain accessible throughout the repair process. Quick communication becomes especially important if weather conditions change unexpectedly or emergency assistance is needed.
Taking a few extra minutes to prepare properly often prevents injuries that occur when people rush into emergency roof repairs without considering potential hazards.
Using Lighting Safely During Nighttime Roof Emergencies
Good lighting is essential when inspecting or temporarily covering a leaking roof after dark. Poor visibility makes it difficult to recognize roof edges, loose materials, and other hazards that are obvious during daylight hours.
Headlamps generally provide better hands free illumination than handheld flashlights. Keeping both hands available while climbing a ladder or handling roofing materials improves stability and overall safety.
Flashlights with wide beam patterns help illuminate larger roof sections rather than focusing on a narrow area. This makes it easier to identify obstacles, damaged materials, and safe walking paths.
Extra batteries or backup lighting should always be available. Losing illumination while standing on a roof creates an immediate safety concern that may be difficult to manage safely.
Lighting should never create glare that reduces visibility. Extremely bright lights pointed directly at reflective metal roofing can temporarily affect vision, making careful positioning important throughout the repair process.
Ladder Safety During Nighttime Roof Access
The ladder is one of the most important pieces of equipment used during emergency roof repairs. Improper ladder setup contributes to many roofing accidents, making correct placement essential before anyone climbs toward the roof.
The ladder should always rest on firm, level ground free from mud, standing water, loose gravel, or other unstable surfaces. Stable footing helps prevent shifting while climbing.
Extending the ladder above the roof edge provides a more secure handhold when stepping onto or off the roof. Attempting to transition from a ladder that ends at roof level increases the chance of losing balance.
The ladder should also be inspected before use. Bent rails, damaged rungs, loose locking mechanisms, or worn feet reduce stability and should be corrected before climbing.
Maintaining three points of contact while climbing improves balance throughout the process. Carrying large repair materials by hand while climbing should be avoided whenever possible because it limits the ability to grip the ladder securely.
Emergency Equipment and Materials You Should Have
Preparing an emergency roof repair kit before storm season makes responding to unexpected roof leaks much easier. Having essential supplies available eliminates the need to search for materials during stressful nighttime emergencies.
A heavy duty waterproof tarp should serve as the foundation of the emergency kit. Reinforced tarps provide better resistance against tearing and are generally more reliable during high winds than lightweight plastic coverings.
Roofing tape and emergency roofing sealant are useful for temporarily addressing smaller leaks that do not require full tarp coverage. These products help reduce water intrusion while waiting for permanent repairs.
Other important supplies include sturdy work gloves, a utility knife, measuring tape, a hammer, roofing nails, a flashlight, a headlamp, and spare batteries. Keeping these items together in one easily accessible location allows for a quicker and more organized response.
The table below outlines several important emergency roof tarping materials and their primary purpose.
| Equipment or Material | Primary Purpose |
|---|---|
| Heavy duty roof tarp | Covers large damaged roof sections |
| Roofing tape | Seals small cracks and punctures |
| Emergency roof sealant | Temporarily seals minor gaps around flashing and penetrations |
| Headlamp | Provides hands free illumination |
| Flashlight | Improves visibility during inspection |
| Work gloves | Protect hands from sharp roofing materials |
| Utility knife | Cuts tarp and repair materials |
| Extension ladder | Provides safe roof access |
Preparing the Area Before Installing the Tarp
Preparation is one of the most important parts of any temporary roof repair. Rushing directly onto the roof without first evaluating the surrounding area often creates unnecessary safety risks.
The inspection should begin from the ground whenever possible. Using a flashlight to identify missing shingles, fallen branches, displaced flashing, or obvious punctures helps determine the approximate location of the damage before climbing.
Loose branches, outdoor furniture, and other storm debris near the ladder location should be removed if they create obstacles. Keeping the work area clear reduces tripping hazards while carrying equipment.
Planning the safest route across the roof before climbing also improves efficiency. Knowing where the damage is located and identifying stable walking areas helps reduce unnecessary movement once on the roof.
Choosing the Right Roof Tarp Size
Selecting the correct tarp size is one of the most important steps in creating an effective temporary roof repair. A tarp that is too small may leave sections of the damaged roof exposed, while one that is excessively large can become difficult to secure, especially during windy conditions. Choosing the right dimensions improves water protection and reduces unnecessary movement after installation.
The damaged area should be estimated from the ground whenever possible before climbing onto the roof. Measuring from inside the attic or using visual reference points can also help determine the approximate size without increasing safety risks. The objective is to ensure the tarp extends beyond the damaged section rather than covering only the visible opening.
A tarp should overlap the damaged area on every side. This extra coverage helps direct rainwater over intact roofing materials instead of allowing it to flow underneath the temporary patch. Proper overlap also creates additional space for securing the tarp firmly to the roof.
Material quality is just as important as size. Heavy duty reinforced polyethylene tarps generally provide better durability than lightweight plastic sheets because they resist tearing and remain stable during changing weather conditions. Investing in a stronger tarp often provides more dependable short term protection until permanent repairs can be completed.
Dark colored and light colored tarps perform similarly for emergency roof protection, but reinforced edges and rust resistant grommets improve installation strength. These features help the tarp remain secure when exposed to wind and repeated rainfall.
Positioning the Roof Tarp Correctly
Proper placement determines how effectively a tarp protects the damaged roof. Even a high quality tarp may allow water intrusion if it is positioned incorrectly or installed without considering the natural direction of water flow.
The upper edge of the tarp should always extend above the damaged area rather than stopping directly over it. Rainwater naturally flows downward, so extending the tarp uphill helps guide water across the protective covering instead of underneath it.
The tarp should lie as flat as possible against the roofing surface. Wrinkles, folds, and raised sections create pockets where water can collect, increasing stress on the material and reducing overall effectiveness during prolonged storms.
Care should also be taken to align the tarp with the roof slope. A properly aligned tarp follows the natural drainage path of the roof, helping rainwater flow away efficiently instead of becoming trapped along the edges.
Once positioned, the tarp should be inspected visually before securing it. Correcting placement at this stage is much easier than making adjustments after all fasteners have been installed.
Step by Step Guide to Safely Tarping a Leaking Roof at Night
Installing a roof tarp after dark requires careful planning and patience. Every movement should be deliberate because limited visibility makes it easier to overlook hazards or lose footing. Working slowly is far safer than attempting to complete the repair as quickly as possible.
The damaged section should first be inspected using adequate lighting. Loose shingles, broken branches, and sharp debris should be removed only if it can be done safely. Clearing the area allows the tarp to rest more evenly against the roof surface.
Next, the tarp should be unfolded carefully and positioned so that it completely covers the damaged area while extending beyond it. The material should remain flat without unnecessary folds that could trap rainwater or catch strong winds.
The upper edge should be secured first because it experiences the greatest water flow during rainfall. Once the top has been fastened, the remaining sides can be attached gradually while keeping the tarp stretched evenly across the roof.
After all sides have been secured, the entire installation should be inspected using a flashlight or headlamp. Loose corners, raised sections, or unsecured edges should be corrected before leaving the roof.
Following a consistent installation process helps improve both safety and the effectiveness of the temporary repair.
Securing the Roof Tarp Properly
Securing the tarp correctly is essential for preventing wind from lifting the material during severe weather. A loosely attached tarp may shift overnight, exposing the damaged roof and allowing additional water to enter the structure.
The tarp should remain under gentle tension without being stretched excessively. Over tightening can place unnecessary stress on the material, increasing the likelihood of tearing during strong winds.
Each side should be secured evenly to distribute pressure across the tarp. Concentrating fasteners in only a few locations often causes the material to pull unevenly, reducing stability over time.
After installation, all attachment points should be checked once more before leaving the roof. Confirming that every edge remains secure helps reduce the chance of unexpected movement during overnight storms.
Preventing Water From Entering Under the Tarp
A tarp only provides effective protection when water remains on the outside surface. If rain is allowed to flow beneath the edges, the temporary repair becomes much less effective regardless of the quality of the tarp itself.
The upper edge requires particular attention because this is where most rainwater first reaches the temporary covering. Proper overlap above the damaged area encourages water to continue flowing over the tarp rather than underneath it.
The sides should also remain flat against the roofing surface. Gaps created by loose installation or trapped debris allow wind driven rain to enter beneath the tarp, reducing its ability to protect the damaged section.
Periodic inspections from the ground after rainfall help identify areas where water may be entering beneath the covering. Small adjustments made early often prevent larger problems during future storms.
Understanding how rainwater moves across a roof makes it easier to install a tarp that performs reliably under changing weather conditions.
Managing Wind During Nighttime Installation
Wind presents one of the greatest challenges when installing a roof tarp after dark. Even moderate gusts can make handling large waterproof sheets difficult, particularly when visibility is already limited.
If winds become stronger while the tarp is being positioned, installation should pause until conditions improve. Attempting to control a large tarp during strong gusts increases the risk of losing balance or allowing the material to pull unexpectedly.
Whenever possible, the tarp should remain folded until it is positioned near the damaged area. Unfolding the entire tarp too early creates a larger surface for the wind to catch, making installation more difficult.
Having another adult assist from a safe position can improve control during moderate conditions. Working together often makes positioning the tarp more manageable while reducing unnecessary movement across the roof.
Safety should always remain more important than completing the repair immediately. If wind conditions become unsafe, protecting the home’s interior until daylight is the better decision.
Protecting the Interior Throughout the Night
Temporary roof tarping helps reduce water intrusion, but additional protection inside the home provides another layer of security while waiting for permanent repairs. Combining exterior and interior measures often minimizes the overall impact of roof leaks.
Buckets or large containers should remain beneath active leaks to collect dripping water throughout the night. Checking them periodically prevents overflow and reduces damage to flooring materials.
Water sensitive belongings should be moved away from affected rooms whenever practical. Furniture, electronics, books, artwork, and important paperwork are often easier to protect before additional rain enters the building.
Plastic sheeting can also be placed over large furniture items that cannot be moved easily. This temporary covering helps keep moisture away from valuable possessions while the roof remains under repair.
Good airflow inside the home helps reduce humidity caused by roof leaks. If weather conditions permit, using fans or opening windows slightly can improve drying and reduce the likelihood of mold development.
Reducing Additional Water Damage While Waiting for Daylight
Nighttime roof leaks often continue until weather conditions improve or permanent repairs become possible. Managing water effectively during this period reduces long term restoration costs and helps preserve the home’s interior.
Wet carpets and rugs should be dried as quickly as possible because prolonged moisture encourages mold growth and unpleasant odors. Removing standing water promptly also helps protect subfloor materials from unnecessary damage.
Ceiling stains should be monitored closely throughout the night. If water begins collecting above drywall, the weight can increase significantly, creating the possibility of ceiling failure. Any signs of bulging should be treated seriously, and people should avoid standing beneath affected areas.
Attic inspections can also provide valuable information if access is safe. Observing where water is entering helps determine whether the temporary tarp is performing effectively or if additional protection may be needed once daylight arrives.
Keeping indoor humidity under control during the emergency helps limit secondary damage while preserving the home’s structural components.
Common Mistakes During Nighttime Roof Tarp Installation
Many emergency roof tarp installations become less effective because of avoidable mistakes rather than poor quality materials. Understanding these common errors helps homeowners improve both safety and repair performance.
One frequent mistake is relying on inadequate lighting. Small flashlights often illuminate only a narrow area, making it difficult to recognize roof edges, loose shingles, or uneven surfaces. Good lighting greatly improves visibility and reduces unnecessary risks.
Another common problem involves placing the ladder on unstable ground. Mud, wet grass, loose gravel, and uneven surfaces reduce ladder stability and increase the chance of slipping while climbing.
Some homeowners focus only on the visible leak instead of covering the entire damaged section. Water often travels beneath roofing materials before entering the home, making broader coverage much more effective than patching only the apparent opening.
Using lightweight plastic instead of a reinforced waterproof tarp is another mistake. Thin materials tear more easily during windy conditions and often require replacement much sooner than heavy duty alternatives.
The following mistakes should always be avoided during nighttime roof tarping:
- Climbing onto the roof during active lightning or high winds.
- Using insufficient lighting while inspecting or repairing the roof.
- Installing a tarp that does not fully cover the damaged area.
- Leaving tarp edges loose or unsecured.
- Ignoring unstable roofing materials beneath the tarp.
- Continuing the repair when weather conditions become unsafe.
Avoiding these mistakes helps create a more reliable temporary repair while reducing the risks associated with working on a roof after dark.
Monitoring the Roof Tarp Until Permanent Repairs Are Completed
A roof tarp should never be considered a permanent solution, even if it appears to be performing well after installation. Weather conditions, sunlight, and changing temperatures gradually weaken temporary repair materials, making regular inspections an important part of protecting the roof. Monitoring the tarp helps identify small problems before they become major leaks.
The first inspection should be performed after the next rainfall if conditions are safe. Homeowners should look for signs of new water stains, damp insulation, or active dripping inside the home. These indicators may suggest that water is entering beneath the tarp or through another damaged area that was not visible during the initial installation.
Exterior inspections can often be completed from the ground using binoculars or a flashlight. Loose tarp edges, sagging sections, torn material, or missing fasteners are usually visible without climbing onto the roof. This approach allows homeowners to monitor the repair while minimizing unnecessary safety risks.
Attic inspections provide another valuable way to evaluate the effectiveness of the temporary repair. Checking for fresh moisture, water stains on framing, or damp insulation helps confirm whether the tarp is successfully preventing additional water intrusion.
Regular monitoring becomes even more important if severe weather continues after the tarp has been installed. Strong winds and heavy rainfall place additional stress on temporary coverings, making periodic inspections essential until permanent repairs can be completed.
Signs the Roof Tarp Has Shifted or Failed
Even properly installed roof tarps can shift over time because of repeated exposure to wind and rain. Recognizing the warning signs of failure allows homeowners to take action before the damaged roof becomes exposed again.
One of the first indicators is the appearance of new interior leaks after rainfall. If water begins entering the home in the same location or nearby areas, the tarp may have moved or developed an opening that allows moisture to pass through.
Loose or flapping tarp edges are another common warning sign. Wind movement gradually weakens attachment points and can eventually expose sections of the damaged roof. A tarp that moves noticeably during moderate winds should be inspected as soon as conditions are safe.
Pooling water on top of the tarp may also indicate improper installation or material stretching. Standing water increases the weight placed on the temporary repair and may eventually cause the tarp to sag or tear.
Visible tears, punctures, or worn sections should never be ignored. Even small openings allow rainwater to reach the damaged roof beneath, reducing the effectiveness of the temporary repair.
Watch for these common signs that the tarp requires attention:
- New leaks developing after rainfall.
- Loose or flapping tarp edges.
- Water collecting on top of the tarp.
- Torn or punctured tarp material.
- Missing or loose fasteners.
- Visible movement during moderate winds.
Addressing these issues promptly helps maintain protection while permanent repairs are being arranged.
Temporary Maintenance Tips
Temporary roof tarps require occasional maintenance to remain effective during extended waiting periods. Small adjustments performed under safe conditions can improve performance and reduce the likelihood of additional water damage.
Debris such as leaves, small branches, and accumulated dirt should be removed carefully whenever possible. Heavy debris traps moisture and may place unnecessary weight on the tarp during rainfall.
After periods of strong wind, the tarp should be inspected from the ground to ensure it remains properly positioned. If sections appear loose or displaced, professional assistance may be the safest option, particularly if weather conditions remain unstable.
Homeowners should also continue monitoring indoor conditions. Water stains, damp insulation, and musty odors may reveal hidden leaks even when the tarp appears secure from outside.
Keeping a temporary repair in good condition helps minimize further damage, but it should never delay scheduling permanent roof restoration.
When to Call a Professional Instead
While some emergency roof tarping situations can be managed safely, many types of roof damage require professional assistance from the beginning. Knowing when to stop and contact an experienced roofing contractor helps protect both the home and the people living in it.
Large sections of missing roofing materials usually require more than a simple tarp installation. Extensive damage often affects underlayment, flashing, roof decking, and structural components that cannot be evaluated properly without professional experience.
Steep roofs also present significant safety concerns. Even with proper footwear and lighting, maintaining stable footing becomes much more difficult on roofs with a greater slope. Professional roofers have specialized equipment designed for these situations.
Repeated leaks after installing a tarp may indicate hidden damage beneath the visible roofing materials. Professional inspections identify moisture pathways that are often impossible to locate during an emergency repair.
If there is ever uncertainty about personal safety, contacting a roofing professional is the better choice. Protecting the structure is important, but preventing injuries should always remain the highest priority.
Roof Damage That Requires Immediate Professional Attention
Certain types of roof damage go beyond the purpose of temporary tarping and require immediate professional evaluation. These situations often involve structural concerns that may worsen if left untreated.
Large holes caused by fallen trees or heavy debris can expose roof framing directly to weather. Temporary coverings may reduce water intrusion, but they cannot restore structural stability once major components have been damaged.
Visible sagging in the roof surface is another serious warning sign. Water saturated decking and weakened framing members may no longer support normal loads safely, creating a risk of partial roof collapse.
Damage around chimneys, skylights, or large roof penetrations may also require specialized repairs that temporary materials cannot adequately address. These areas often involve complex flashing systems that must be restored correctly to prevent future leaks.
If interior ceilings begin bowing or showing signs of trapped water, occupants should avoid the affected room until the situation has been evaluated. Ceiling collapse can occur unexpectedly when large amounts of water accumulate above the drywall.
Electrical Hazards Around Roof Leaks
Roof leaks and electrical systems can create dangerous combinations that require immediate caution. Water entering the home does not always remain confined to ceilings because it often follows wiring, framing, and plumbing pathways before becoming visible.
If water reaches light fixtures, ceiling fans, electrical outlets, or breaker panels, those circuits should not be used until inspected by a qualified electrician. Continuing to use affected electrical systems increases the risk of shock and equipment damage.
Exterior electrical service lines damaged during storms should also be treated as hazardous. Homeowners should never approach or attempt to move damaged electrical cables near the roof.
If electrical hazards are suspected, the safest approach is to remain clear of the affected area while contacting the appropriate emergency professionals.
Preventing Future Emergency Roof Leaks
Although storms cannot be prevented, many emergency roof leaks can be avoided through routine maintenance and regular inspections. Addressing small roofing problems before severe weather arrives greatly reduces the likelihood of major damage.
Annual roof inspections allow worn shingles, deteriorated flashing, loose fasteners, and damaged sealants to be repaired before they develop into emergency leaks. Preventive maintenance is often far less expensive than repairing widespread water damage.
Cleaning gutters and downspouts regularly also improves roof performance. Proper drainage allows rainwater to flow away efficiently instead of backing up beneath roofing materials or overflowing onto vulnerable roof edges.
Tree branches that hang over the roof should be trimmed before storm season whenever possible. Reducing the chance of falling limbs helps protect roofing materials during periods of high wind.
When replacing an aging roof, homeowners may also consider upgraded materials designed for better storm resistance. Modern roofing products often provide improved protection against wind, hail, and heavy rainfall compared to older systems.
Building an Emergency Roof Repair Kit
Preparing an emergency roof repair kit before storm season allows homeowners to respond more effectively when unexpected leaks occur. Having essential supplies available reduces stress and saves valuable time during nighttime emergencies.
The kit should be stored in a dry, easily accessible location where it can be reached quickly. All items should be inspected periodically to ensure they remain in good condition and ready for use.
An effective emergency roof repair kit should include:
- Heavy duty waterproof roof tarp.
- Roofing tape for small temporary repairs.
- Emergency roofing sealant.
- Utility knife.
- Work gloves.
- Flashlight and headlamp.
- Extra batteries.
- Measuring tape.
- Hammer and roofing nails.
- Plastic sheeting for interior protection.
Keeping these materials organized allows homeowners to respond calmly and efficiently when severe weather causes unexpected roof damage.
Frequently Asked Questions
Is it safe to tarp a roof at night?
It can be safe only if weather conditions are stable, the roof is structurally sound, proper lighting is available, and appropriate safety precautions are followed. If any condition appears unsafe, waiting for daylight or calling a professional is the better option.
Should I climb onto a wet roof?
No. Wet roofing materials become extremely slippery and significantly increase the risk of falls. If the roof is wet from rain, snow, or ice, it is generally safer to wait until conditions improve.
Can I use a plastic sheet instead of a roof tarp?
A heavy duty roof tarp is the preferred option because it is designed to withstand outdoor weather conditions. Plastic sheeting may provide limited temporary protection, but it tears more easily and is generally less durable.
How long can a roof tarp remain in place?
A properly installed tarp may provide protection for several weeks depending on weather conditions, but it should only be considered a temporary solution until permanent roof repairs are completed.
What if I cannot safely reach the damaged area?
If the damaged section cannot be reached safely, do not attempt the repair. Protect the interior of the home as much as possible and contact an emergency roofing professional.
Will a roof tarp stop every leak?
A correctly installed tarp can greatly reduce water intrusion, but it may not eliminate every leak if hidden roof damage exists. A complete professional inspection is necessary to identify all damaged areas.
Conclusion
Tarping a leaking roof at night can help reduce water damage when performed under safe conditions, but it should never come at the expense of personal safety. Limited visibility, wet roofing materials, changing weather, and hidden structural damage all increase the risks associated with nighttime roof work. Taking time to evaluate the situation carefully is just as important as stopping the leak itself.
Using the right equipment, selecting a properly sized waterproof tarp, following safe installation practices, and monitoring the temporary repair afterward all contribute to a more effective emergency response. At the same time, homeowners should recognize when conditions exceed what can be handled safely without professional assistance.
Routine roof maintenance, seasonal inspections, and preparing an emergency roof repair kit before storm season can significantly reduce the likelihood of facing a roofing emergency after dark. When severe weather does cause unexpected damage, combining thoughtful preparation with timely permanent repairs offers the best protection for both the home and everyone inside it.