
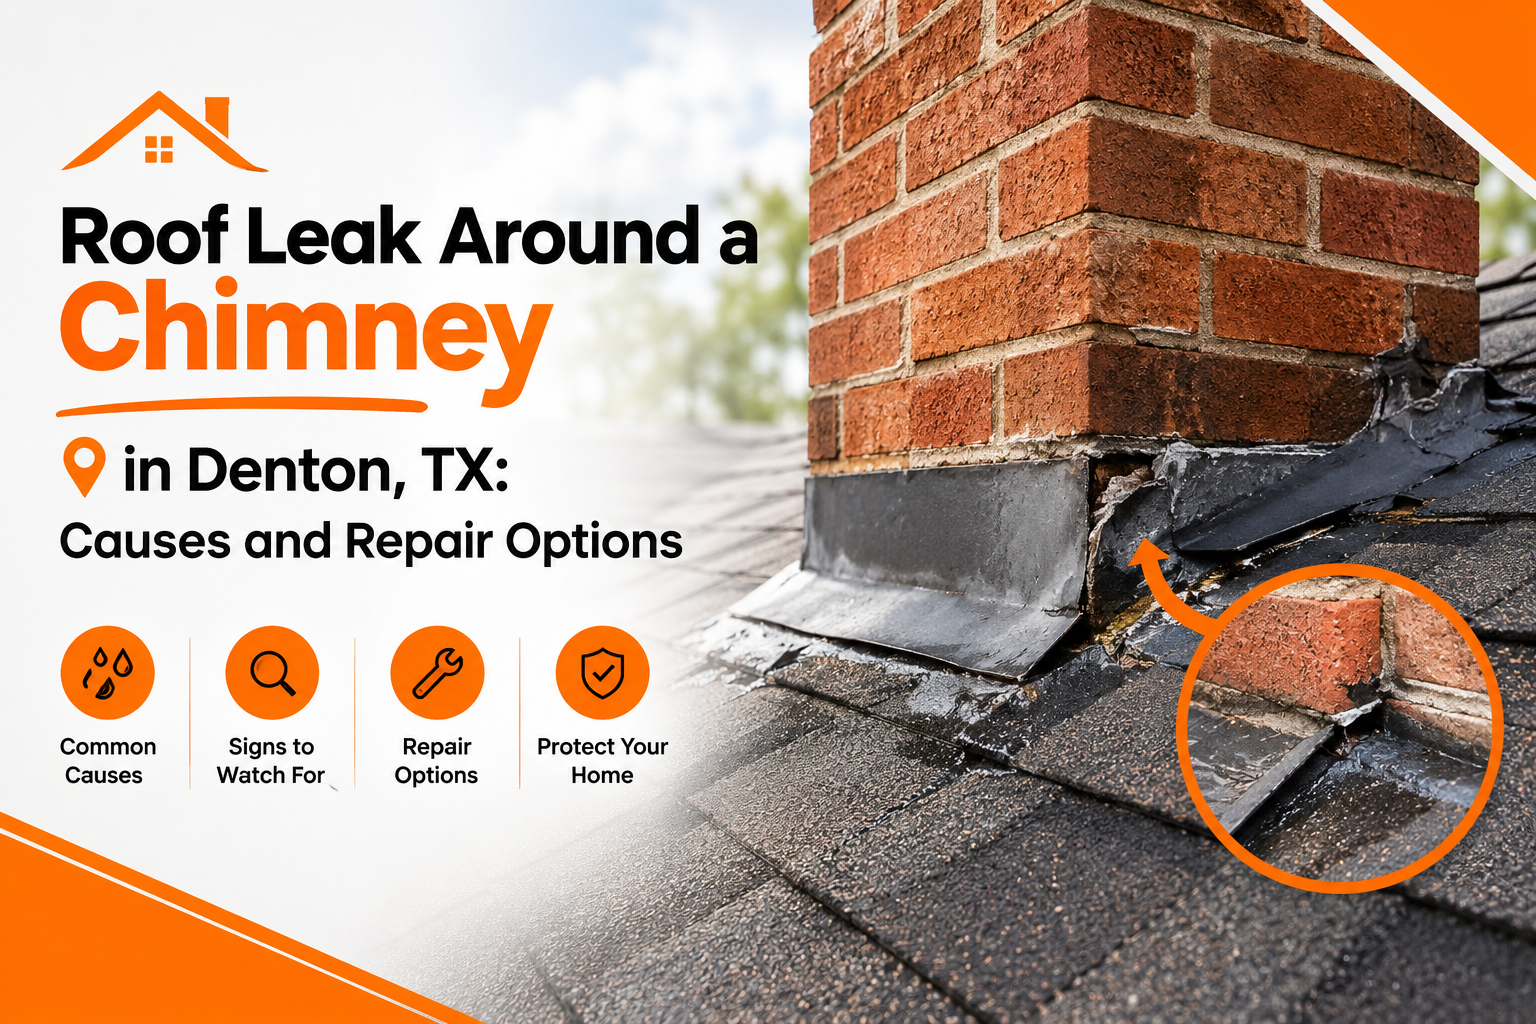
Roof Leak Around a Chimney in Denton, TX: Causes and Repair Options
Introduction
A roof leak around a chimney can become a serious concern for homeowners in Denton, TX, especially when heavy rain, strong winds, and seasonal storms put roofing materials under pressure. Water may enter through damaged flashing, cracked mortar, deteriorated sealant, or worn roofing materials near the chimney. Even a small leak can gradually affect the attic, ceilings, insulation, and nearby structural components if the underlying problem is not repaired.
Chimney leaks can be difficult to identify because the water does not always appear directly beneath the point where it enters the roof. Moisture may travel along rafters, roof decking, or framing before becoming visible as a ceiling stain or damp patch on an interior wall. This makes it important to investigate the source rather than simply covering the visible damage with paint or sealant.
For homeowners dealing with a roof leak around a chimney in Denton, understanding the common causes and available repair options is a practical first step. Professional roofers can inspect the affected area, determine whether the problem involves flashing, masonry, or another roofing component, and recommend an appropriate solution. Small Town Roofing & Construction can help homeowners assess roof damage and understand the repairs needed to protect their homes from continued water intrusion.
🌧️ Understanding Roof Leaks Around a Chimney
A chimney creates a break in the otherwise continuous surface of a roof. Because roofing materials must connect securely around this structure, the surrounding area requires carefully installed flashing and properly sealed transitions. If these components become damaged or deteriorate over time, rainwater can find a path beneath the shingles and into the home.
The chimney itself can also contribute to a leak. Brick and mortar may develop cracks as they age, while the chimney crown or cap can deteriorate and allow water to enter from above. In some cases, homeowners assume the roof is responsible when the actual problem begins with the chimney masonry or another component exposed to the weather.
Identifying the source is essential because different problems require different repairs. Replacing shingles may not solve a leak caused by cracked mortar, and applying masonry sealant will not correct improperly installed roof flashing. A thorough inspection helps distinguish between these possibilities and reduces the chance of recurring water damage.
Why Chimney Areas Need Special Attention
The joint where a chimney meets the roof is one of the more vulnerable areas of a roofing system. Water must be directed around the chimney without allowing it to pass beneath the roofing materials. Flashing, shingles, underlayment, and sealant must work together to create a reliable barrier against moisture.
Over time, these materials can shift, loosen, crack, or wear down. Roof movement, temperature changes, storm exposure, and aging materials can all affect the connection between the chimney and the roof. If water begins entering through even a small opening, repeated exposure can enlarge the damaged area.
Chimney leaks may also develop gradually, making early warning signs easy to overlook. A faint musty smell in the attic, a small ceiling stain, or damp insulation near the chimney can indicate that moisture has already entered the roofing assembly. Addressing these signs early may help prevent a more extensive repair later.
How Rainwater Enters Around a Chimney
Rainwater does not always move straight down through the roof. Wind can push water sideways beneath loose shingles or against exposed chimney joints, while runoff can collect where the chimney interrupts the natural slope of the roof. Poor drainage, damaged flashing, and gaps in the roofing materials can allow that water to penetrate the structure.
The upper side of a chimney, often called the back side or upslope area, deserves particular attention because water flowing down the roof must pass around it. If the flashing in this area is damaged or incorrectly installed, runoff can collect behind the chimney and enter beneath the shingles. The resulting leak may become noticeable only after prolonged or wind-driven rainfall.
Water can also enter through cracks in the chimney crown, damaged masonry, or an unprotected chimney top. These issues may cause moisture to travel downward through the chimney structure and appear near the fireplace, ceiling, or surrounding walls. A proper diagnosis considers the entire chimney and roof connection rather than assuming that every leak originates in the same place.
🔍 Common Causes of Roof Leaks Around a Chimney
Several conditions can cause a chimney roof leak in Denton, TX. Some involve the flashing that connects the chimney to the roof, while others relate to aging masonry, roofing damage, or poor drainage. Understanding the possible causes helps homeowners recognize why a lasting repair usually requires more than applying caulk to a visible gap.
1. Damaged or Loose Chimney Flashing
Flashing is a protective material installed where the chimney meets the roof. It helps direct water away from this joint and prevents moisture from entering beneath the shingles. Depending on the roof design, the flashing system may include several pieces that work together to protect the front, sides, and back of the chimney.
Flashing can loosen, corrode, bend, or separate from the surrounding materials as the roof ages. Strong winds and storm debris may contribute to damage, while improper installation can leave vulnerable gaps from the beginning. When flashing no longer forms a dependable barrier, rainwater can seep into the roof structure.
The correct repair depends on the condition and installation of the existing system. Minor problems may require securing a loose section, while badly deteriorated or incorrectly fitted flashing may need replacement. Simply covering the area with a layer of sealant may offer temporary relief but usually does not correct a larger flashing failure.
2. Cracked or Deteriorating Chimney Mortar
Brick chimneys rely on mortar joints to hold the masonry together and help limit water penetration. Over the years, mortar can crack, crumble, or develop gaps due to weather exposure and normal aging. These openings may allow rainwater to enter the chimney and gradually affect the surrounding roof or interior surfaces.
Denton’s changing temperatures can contribute to expansion and contraction in masonry materials. When moisture enters small cracks and the materials repeatedly experience temperature changes, existing deterioration may become more noticeable. Damaged mortar can also make the chimney more vulnerable to further weather-related wear.
A roofer or qualified masonry professional can assess whether the problem involves isolated mortar joints or more extensive deterioration. Minor damage may be addressed through repointing, which involves removing deteriorated mortar and replacing it with suitable material. More widespread damage may require additional masonry repairs before the chimney can reliably resist moisture.
3. Failed Sealant Around the Chimney
Sealant is sometimes used at joints and transitions around a chimney to help limit water entry. However, sealant is not a substitute for a properly designed flashing system. When it is used as the primary defense against water, the repair may fail as the material ages or the roof and chimney move slightly.
Exposure to sunlight, rain, temperature fluctuations, and normal weathering can cause sealant to shrink, harden, split, or pull away from the surface. Once a gap develops, water can enter through the opening and travel into the roof assembly. Repeatedly adding new sealant over old material may conceal the problem without restoring a reliable barrier.
A lasting repair begins with determining why the sealant failed. A professional may need to remove deteriorated material, inspect the joint, and correct the flashing or surface damage before applying an appropriate replacement product. This approach helps address the underlying weakness rather than relying on repeated patching.
4. Damaged or Missing Roof Shingles
Shingles surrounding a chimney help shed rainwater and protect the layers beneath them. If shingles become cracked, curled, loose, or missing, water may reach the underlayment and roof decking. The damage can be especially concerning where shingles connect with chimney flashing.
Storms, wind exposure, aging materials, and previous repair work can all contribute to shingle problems. In some cases, the shingles may appear intact from the ground even though their edges have lifted or the material underneath has deteriorated. Water entering through these areas may eventually appear as a leak near the chimney.
Repairing the problem may involve replacing damaged shingles, restoring the surrounding flashing, and checking the underlayment for moisture damage. If the affected roof section has widespread deterioration, a more extensive repair may be necessary. The goal is to restore the roof’s water-shedding function while protecting the chimney connection.
5. Cracked Chimney Crown or Missing Chimney Cap
The chimney crown covers the top of the masonry chimney and helps direct water away from its structure. If the crown cracks or deteriorates, rainwater can enter the masonry and contribute to moisture problems. A missing or damaged chimney cap may also allow rain and debris to enter the flue, creating a separate source of water intrusion.
These problems can sometimes be mistaken for a roof leak because the resulting moisture may appear around the fireplace or on nearby walls and ceilings. However, repairing the roof flashing alone will not solve a leak caused by a damaged crown or missing cap. The chimney’s upper components must be inspected as part of the investigation.
Depending on the condition, the solution may involve repairing or rebuilding the crown, replacing a damaged cap, or addressing deteriorated masonry. Homeowners should avoid climbing onto the roof to inspect these components themselves, particularly when the roof is wet or steep. A qualified professional can evaluate the chimney safely and recommend the appropriate repair.
6. Poorly Installed or Improperly Repaired Flashing
Not every chimney leak results from old materials. Incorrect installation can create water entry points even when the flashing looks relatively new. Gaps, insufficient overlap, improper attachment, and poorly integrated roofing materials can prevent water from draining away as intended.
A previous repair may also have addressed only the visible opening without correcting the original problem. For example, adding sealant around the chimney base may not solve a failure involving the flashing beneath the shingles. The leak can return when the temporary patch deteriorates or water finds another path through the joint.
When a leak continues after earlier repairs, a more detailed inspection may be necessary. The roofer should examine how the flashing connects with the shingles and chimney masonry, along with the condition of the surrounding roof materials. Correcting installation problems can help reduce repeat leaks and avoid unnecessary patchwork.
🏠 Signs Your Chimney Is Leaking
A chimney roof leak may begin with subtle signs that are easy to overlook. Recognizing these warning signals early can help homeowners arrange an inspection before water affects a larger portion of the house. Although some symptoms point strongly toward moisture intrusion, the exact source still needs to be confirmed.
Water Stains on Ceilings or Walls
Brown, yellow, or irregular stains on a ceiling or wall near the chimney can indicate that water has entered the building. The discoloration may become darker after rain or gradually expand over several weeks. Peeling paint, bubbling drywall, or damp plaster can also suggest that moisture is collecting behind the finished surface.
The location of the stain does not always reveal where the water entered. Rainwater may travel along framing or other building components before reaching the ceiling. An inspection of the roof, attic, and chimney connection can help trace the moisture back to its source.
Damp Attic Insulation or Roof Decking
Homeowners with accessible attics may notice wet insulation, darkened wood, or damp roof decking near the chimney. These conditions can develop before water reaches the living space, making the attic an important area to inspect when a leak is suspected. A persistent musty smell may also indicate that moisture has been present for some time.
Wet insulation can lose some of its effectiveness and may take a long time to dry if ventilation is poor. Repeated moisture exposure can also contribute to wood deterioration and mold growth. Because attic spaces may contain exposed wiring, unstable surfaces, or other hazards, homeowners should use caution and arrange professional help when access is unsafe.
Dripping Water or Damp Fireplace Surrounds
Visible dripping near the fireplace, wet patches around the chimney breast, or moisture on nearby walls may indicate a problem with the chimney or roof. These symptoms can become more noticeable during heavy rain or after storms with strong winds. However, condensation and other moisture sources can sometimes produce similar signs.
If water is entering through the chimney crown, masonry, or roof flashing, the visible damage may extend beyond one small area. Homeowners should note when the symptoms occur and whether they become worse during particular weather conditions. This information can help a professional narrow down the possible causes.
Musty Odors, Peeling Paint, or Mold Growth
A lingering musty odor around the chimney may signal hidden moisture behind drywall, inside the attic, or within nearby framing. Paint may bubble or peel, while wood trim and other finishes may begin to discolor. Mold can develop when damp materials remain wet long enough, particularly in areas with limited airflow.
Cleaning the visible surface alone will not solve the issue if water continues entering the building. The leak must be corrected, and affected materials should be assessed to determine whether drying, repair, or replacement is necessary. If mold covers a substantial area or moisture has affected concealed building materials, qualified remediation may be appropriate.
Warning Signs That Need Prompt Attention
Some symptoms suggest that a chimney leak needs immediate attention rather than routine monitoring. Active dripping, rapidly spreading ceiling stains, sagging drywall, or visibly deteriorating roof decking should not be ignored. If a ceiling bulges under accumulated water, keep people away from the area and seek professional assistance rather than attempting to puncture or repair it yourself.
Electrical fixtures near wet ceilings also create a potential safety concern. Avoid touching wet electrical components, and contact a qualified electrician if water may have reached wiring or light fixtures. When conditions are safe, move belongings away from the affected area and document visible damage for repair planning and any insurance claim.
🌩️ How Denton Weather Contributes to Chimney Leaks
Weather conditions in Denton, TX, can place repeated stress on roofs and chimneys throughout the year. Rainfall, strong winds, thunderstorms, hail, and seasonal temperature changes can gradually weaken exposed materials and reveal installation problems. Chimney flashing and masonry joints are particularly important to monitor because they connect different building materials that respond differently to changing conditions.
Heavy Rain and Wind-Driven Water
During heavy rain, large amounts of water move down the roof toward valleys, edges, and structures such as chimneys. If flashing is loose or the roofing materials are damaged, runoff may enter through small gaps. Wind can push rain against the sides of the chimney and beneath lifted shingles, making vulnerable joints more likely to leak.
A leak that appears only during severe storms may still indicate a significant weakness in the roofing system. The problem may remain hidden during light rain but become noticeable when water reaches an exposed joint from a different direction. Inspection after a storm can help identify damaged shingles, displaced flashing, and other potential entry points.
Temperature Changes and Material Movement
Roofing materials, metal flashing, masonry, and sealants respond differently to temperature changes. Expansion and contraction can gradually place stress on joints and connections, particularly when materials are already aging or improperly installed. Small cracks may widen over time, allowing water to enter during subsequent rainfall.
Sealants exposed to repeated temperature changes can also lose flexibility or adhesion. If the material separates from the chimney or roofing surface, it may no longer provide the protection it was intended to offer. Periodic inspections help identify deteriorating joints before they lead to more extensive moisture damage.
Thunderstorms, Hail, and Wind Damage
Severe weather can damage shingles, displace flashing, and send branches or other debris onto a roof. Hail may affect roofing materials, while strong gusts can loosen components that were already weakened by age or previous repairs. Even when the chimney itself appears undamaged, the surrounding roof area may have developed openings that allow water inside.
After a significant storm, homeowners should look for signs that can be observed safely from the ground, such as missing shingles or debris accumulation. A professional roof inspection is advisable if a leak appears or visible damage is present. Prompt assessment can help establish whether repairs are needed and limit the time water has to affect the home’s interior.
Why Seasonal Roof Inspections Matter
Routine inspections can help identify problems that develop gradually between major storms. A professional can examine the chimney flashing, shingles, roof transitions, masonry joints, and visible drainage conditions. Catching deterioration early may allow a smaller repair instead of waiting until water has damaged insulation, decking, or interior finishes.
Homeowners should also pay attention to previous leak locations, particularly if a repair was completed several years earlier. A past repair does not guarantee that the surrounding materials remain in good condition. Keeping records of inspections and repairs can make it easier to track recurring issues and plan maintenance.
🔧 Roof Flashing Around a Chimney Explained
Chimney flashing is one of the most important parts of preventing water from entering where a roof meets a masonry structure. It forms a protective transition between the roofing materials and the chimney, directing runoff over the roof surface rather than beneath it. When flashing is correctly installed and maintained, it helps protect the roof decking, attic, and interior of the home from moisture.
What Is Chimney Flashing?
Flashing is typically made from metal or another suitable water-resistant material designed for roof transitions. Around a chimney, the system must account for the roof’s slope, the chimney’s dimensions, and the way shingles overlap. Each section needs to work with the adjacent sections so that water continues moving outward and downward.
A reliable flashing system is more than a visible strip of metal or a bead of caulk. Its design and installation determine whether water is directed away from vulnerable joints. If one section is missing, poorly fitted, or incorrectly overlapped, water may enter even when the remaining sections appear to be in good condition.
Main Types of Chimney Flashing
Different parts of the chimney connection serve different purposes. The appropriate configuration depends on the roof design, chimney construction, and applicable installation requirements.
- Base flashing: Helps protect the lower transition where the roof meets the chimney and directs water away from the joint.
- Step flashing: Uses overlapping pieces along the sides of the chimney, commonly integrated with individual shingle courses to guide water down the roof.
- Counter flashing: Covers or protects the upper edge of the underlying flashing, often by being secured into the chimney masonry.
- Back-pan or cricket flashing: Helps manage water behind a chimney, particularly where the chimney is wide enough to obstruct runoff. A properly designed cricket may be needed to divert water around the upslope side.
Not every chimney uses an identical flashing arrangement, and the exact details matter. A roofer should evaluate the existing system before deciding whether a localized repair or more comprehensive replacement is appropriate.
Why Proper Flashing Installation Matters
Flashing must be integrated with the shingles and chimney rather than simply attached over the surface. Its overlaps, attachment points, and connections need to guide water away from openings. When installation details are incorrect, water may collect behind the chimney or enter through gaps concealed beneath the roofing materials.
A professional assessment can reveal whether the flashing has deteriorated or was installed incorrectly from the beginning. If replacement is needed, the roofer should consider the condition of the surrounding shingles, underlayment, and masonry. Repairing the complete water-management detail is generally more dependable than applying a surface patch to the most visible part of the leak.
Can Caulk Alone Fix a Chimney Roof Leak?
Caulk or roofing sealant can be useful in specific applications, but it is rarely a complete solution when flashing is damaged or improperly installed. Sealant may temporarily close a small gap, yet exposure to weather and movement can cause it to separate over time. Applying more material without identifying the source may allow the leak to return.
If the flashing is loose, corroded, missing, or incorrectly integrated with the roof, the underlying installation should be corrected. Cracked masonry may also require a separate repair from the flashing system. Choosing the right solution begins with identifying the actual entry point and evaluating all nearby components that could be contributing to the leak.
🛠️ Roof Leak Around a Chimney: Repair Options
The right repair for a chimney roof leak depends on the source of the water, the condition of the surrounding materials, and how extensive the damage has become. Some problems can be corrected by replacing a small section of flashing, while others require masonry repairs, shingle replacement, or work on several roofing components. For homeowners in Denton, TX, an accurate inspection helps determine which solution addresses the cause rather than simply hiding the symptoms.
1. Chimney Flashing Repair or Replacement
Repairing or replacing damaged flashing is one of the most common solutions for leaks around a chimney. If a small section has loosened but the remaining system is in good condition, a roofer may be able to secure or repair the affected area. When the metal is badly corroded, improperly installed, or damaged across several sections, replacing the flashing system may be the more reliable option.
The repair process generally involves examining the flashing, checking how it connects with the shingles and masonry, and identifying any gaps that could allow water inside. Depending on the situation, nearby shingles may need to be lifted or removed so the roofer can access the underlying materials. After the work is completed, the surrounding area should be checked to confirm that the flashing directs water away from the chimney joint.
2. Replacing Damaged Shingles Around the Chimney
Cracked, loose, curled, or missing shingles can allow rainwater to reach the roof deck. When the damage is limited to a small area, replacing the affected shingles may restore the roof’s protective surface. However, the flashing and underlayment should also be examined because shingle damage near a chimney may occur alongside other weaknesses.
The replacement shingles should be compatible with the existing roof and installed with the correct overlap and fastening methods. Simply placing a new shingle over damaged material can leave gaps and interfere with drainage. A professional roofer can determine whether the problem is limited to a few shingles or whether the surrounding roof section needs more extensive work.
3. Repairing Cracked Mortar and Chimney Masonry
If the leak originates in deteriorated brickwork or mortar joints, masonry repairs may be necessary. Repointing involves removing damaged mortar from the joints and replacing it with suitable new mortar. This helps restore the integrity of the masonry and reduces the pathways through which rainwater can enter.
More extensive deterioration may require replacing damaged bricks or repairing other chimney components. The appropriate materials and methods depend on the chimney’s construction and condition. Because masonry problems and roof flashing failures can occur together, the entire roof-to-chimney connection should be evaluated before the repair is considered complete.
4. Repairing or Rebuilding the Chimney Crown
A cracked or deteriorated chimney crown can allow water to penetrate the upper part of the chimney. Depending on the severity of the damage, a professional may recommend repairing isolated cracks or rebuilding the crown if it has extensive deterioration. The finished crown should help direct water away from the masonry rather than allowing it to collect around the chimney.
The chimney cap should also be inspected during this process. A missing, loose, or damaged cap can allow rain and debris to enter the flue, although this is not necessarily the source of a roof leak. Addressing these upper chimney components alongside any flashing problems can help prevent moisture from returning through a different entry point.
5. Installing a Cricket Behind the Chimney
A chimney positioned across the flow of roof runoff can create an area where water collects behind it. This is particularly relevant for wider chimneys or roof configurations that concentrate water at the upslope side. A cricket is a small sloped structure designed to divert water around the chimney and toward the appropriate drainage paths.
If the existing roof design allows water to accumulate behind the chimney, installing a properly designed cricket may improve drainage. The work can involve framing, underlayment, flashing, and roofing materials, so it requires more planning than a simple sealant repair. A qualified roofer can determine whether a cricket is appropriate for the roof’s dimensions and existing construction.
6. Replacing Damaged Roof Decking or Underlayment
A long-standing leak can damage the materials beneath the shingles. Underlayment may deteriorate, and roof decking can become discolored, soft, or weakened after repeated moisture exposure. Installing new shingles without addressing damaged underlying materials may leave the roof vulnerable to future problems.
During repairs, a roofer may need to remove a section of shingles to assess the condition of the decking and underlayment. Any damaged material should be evaluated and replaced where necessary before the roofing surface is restored. The amount of work depends on how far the moisture has spread and whether the damage is limited to one small section or extends across a larger area.
💰 Chimney Roof Leak Repair Costs in Denton, TX
The cost of repairing a roof leak around a chimney in Denton depends on the type of damage, the accessibility of the roof, the materials involved, and the amount of labor required. A minor repair involving a small section of sealant or flashing will generally cost less than replacing an entire flashing system or repairing damaged roof decking. Extensive masonry work can increase the overall price, particularly when several chimney components need attention.
The figures below are general planning estimates for common residential repairs, not verified quotes for a specific Denton property. Actual prices may vary based on roof height, pitch, material availability, contractor rates, and the condition of the existing structure.
Estimated Chimney Leak Repair Costs
| Type of Repair | General Estimated Cost |
|---|---|
| Minor sealant or localized joint repair | $150 to $400 |
| Small flashing repair | $200 to $600 |
| Chimney flashing replacement | $400 to $1,500 |
| Shingle replacement near the chimney | $200 to $700 |
| Chimney mortar repointing | $300 to $1,200 |
| Chimney crown repair | $250 to $1,000 |
| Chimney crown rebuilding | $700 to $2,000 |
| Cricket installation behind a chimney | $500 to $2,000 or more |
| Localized roof decking replacement | $300 to $1,200 or more |
| Interior ceiling or drywall repairs | $200 to $1,500 or more |
These ranges can overlap because contractors may include different amounts of labor, material removal, cleanup, and inspection in their estimates. A repair that initially appears minor may become more involved if hidden damage is discovered after the shingles or flashing are removed. Ask for a written estimate that identifies the suspected cause, the work included, and any additional charges that could apply if concealed damage is found.
Factors That Affect the Final Price
Several conditions can influence the cost of chimney leak repairs in Denton. Understanding them can help homeowners compare estimates and make informed decisions.
- Extent of the damage: A small opening may require limited work, while extensive water intrusion can affect flashing, shingles, decking, insulation, and interior finishes.
- Roof height and pitch: Steep or difficult-to-access roofs may require additional safety equipment and labor.
- Material selection: The cost can vary depending on the flashing material, roofing type, masonry products, and compatibility with existing components.
- Chimney condition: Cracked mortar, a deteriorated crown, or damaged bricks may require masonry work in addition to roofing repairs.
- Previous repairs: Poorly completed patches can make diagnosis more difficult and may need to be removed before a lasting repair can be performed.
- Hidden moisture damage: Wet insulation, weakened decking, or damaged drywall can increase the total project cost.
How to Avoid Paying for Unnecessary Repairs
Homeowners should ask the contractor to explain what caused the leak and how the recommended repair will resolve it. A detailed estimate should distinguish necessary repairs from optional improvements and identify any materials that need replacement. Photographs of the affected areas can make it easier to understand the condition of the flashing, shingles, or masonry.
It is also sensible to compare estimates when the damage is not an emergency and time allows. Make sure each contractor is quoting for a comparable scope of work rather than choosing solely on the lowest price. A very low estimate may omit important steps, such as checking the underlayment or repairing the flashing beneath the visible surface.
🧪 How Professionals Find the Source of a Chimney Leak
Finding the source of a chimney leak can require more than looking for a wet spot on the ceiling. Water can travel through concealed spaces before becoming visible inside the home, and several defects may produce similar symptoms. Professional roofers use a systematic inspection to narrow down the possible entry points and determine which components need repair.
Step 1: Reviewing the Leak History
The inspection often begins with questions about when the leak appears and where the moisture is visible. A homeowner may notice dripping only during heavy rain, dampness after strong winds, or a stain that continues to grow even during dry weather. These details can help the roofer distinguish between potential roof leaks, chimney masonry problems, and other moisture sources.
Information about previous repairs is also useful. If the same area has leaked after multiple patches, the original repair may not have addressed the underlying cause. Sharing photographs taken during earlier storms can provide additional clues about the location and severity of the problem.
Step 2: Inspecting the Roof and Flashing
The roofer examines the shingles around the chimney, the condition of the flashing, and the visible transitions between roofing materials and masonry. The inspection may reveal loose metal, corroded sections, cracked sealant, lifted shingles, or gaps where water can enter. The back side of the chimney deserves particular attention because runoff may collect there.
Roof inspections should be carried out with appropriate safety precautions. Homeowners should not climb onto a wet, steep, or storm-damaged roof to investigate the problem themselves. A qualified professional can inspect difficult areas using suitable equipment and access methods.
Step 3: Examining the Chimney Masonry
The inspection may also include the chimney crown, cap, bricks, and mortar joints. Cracks or missing mortar can allow water to enter the masonry, while damage near the top may create a different entry point from the roof flashing. The roofer may recommend a masonry specialist if the chimney requires repairs beyond the contractor’s scope of work.
It is important to distinguish between a chimney leak and a leak that merely appears close to the chimney. The moisture may originate from a nearby roof valley, damaged shingles, or another connection. Looking at the entire surrounding area helps prevent an incorrect diagnosis.
Step 4: Checking the Attic and Interior
When safe access is available, the attic can provide valuable evidence about how water is entering the structure. A professional may look for damp insulation, darkened roof decking, water marks, or staining along rafters near the chimney. Interior walls and ceilings may also be examined to understand how far the moisture has traveled.
Visible damage does not always show the full extent of the problem. Water may spread behind drywall or into concealed cavities, so additional evaluation may be needed if the materials remain damp. If mold, damaged electrical components, or weakened structural materials are suspected, the appropriate qualified specialist should be involved.
Step 5: Recommending a Targeted Repair
After gathering the evidence, the roofer should explain the likely source of the leak and outline the recommended work. This may involve replacing flashing, repairing shingles, correcting masonry defects, improving drainage, or addressing more than one issue. The proposal should also identify any additional inspection or repair work that may become necessary if hidden damage is uncovered.
A clear diagnosis helps homeowners avoid repeated temporary fixes. It also provides a basis for comparing estimates and understanding why a particular repair is necessary. Once the work is complete, the repaired area should be inspected to confirm that the identified defects have been addressed.
🏡 DIY Chimney Leak Repairs vs. Professional Roofing Services
When water appears around a chimney, some homeowners consider handling the repair themselves to save money. While documenting a leak and taking simple precautions indoors can be helpful, working on a roof involves fall risks and can cause additional damage if the repair is performed incorrectly. The best approach depends on the nature of the problem and whether it can be assessed safely from the ground.
What Homeowners Can Do Safely
Homeowners can take useful steps without climbing onto the roof. Move furniture and valuables away from the affected area, place a container beneath minor dripping when it is safe to do so, and photograph visible stains or water damage. Record when the leak occurs, particularly whether it follows heavy rain, strong wind, or a period of prolonged wet weather.
If water is entering the home, arranging a professional inspection promptly is more useful than repeatedly applying a product to the visible stain. Do not touch wet light fixtures or exposed wiring, and keep people away from sagging ceilings. These precautions can reduce immediate risks while the source of the leak is investigated.
Limitations of DIY Flashing Repairs
Applying roofing cement or sealant over a visible gap may seem straightforward, but it can hide the problem without correcting the underlying defect. Flashing may need to be integrated with shingles or secured into masonry, and an improper patch can interfere with the way water drains off the roof. Some products may also be unsuitable for the materials or conditions involved.
Working at roof level adds another concern. Wet shingles, steep slopes, loose debris, and unstable surfaces can create dangerous conditions, especially during or immediately after a storm. Homeowners without suitable training and safety equipment should leave roof access and flashing repairs to qualified professionals.
Benefits of Hiring a Professional Roofer
A professional roofer can assess the roof-to-chimney connection, identify related damage, and recommend a repair suited to the roof’s construction. This can reduce the likelihood of paying for repeated temporary patches that fail to resolve the problem. Professional work may also include documentation of the damage and an explanation of the materials and methods used.
Before hiring a contractor, ask about relevant experience, insurance, written estimates, and workmanship warranties. Confirm that the proposed work covers the identified cause rather than only the visible symptoms. For complicated leaks involving both roofing and masonry, clarify which parts of the project the contractor will handle and whether another specialist is needed.
When Professional Help Is Especially Important
Professional assessment is strongly recommended when a leak continues after earlier repairs, when the chimney flashing is damaged, or when the roof deck may have become wet or weakened. Extensive masonry cracks, a damaged chimney crown, or a leak affecting several rooms also require more than a superficial patch. If water has reached electrical systems or caused a ceiling to sag, safety concerns should be addressed immediately.
The aim is not simply to stop the next drip but to restore the roof’s ability to keep water out. A targeted repair can protect surrounding materials and help prevent the same problem from returning. Choosing the correct solution early may also limit damage to ceilings, insulation, and interior finishes.
⚠️ Problems Caused by Ignoring a Chimney Roof Leak
A small chimney leak can gradually become a more expensive home repair if moisture continues entering the roof. Water may spread through insulation, roof decking, framing, drywall, and other building materials. Even when the leak appears to stop temporarily during dry weather, the underlying opening may still allow water inside during the next storm.
Damage to Roof Decking and Structural Wood
Repeated moisture exposure can cause wood decking and framing to deteriorate over time. If the materials remain wet, they may soften, lose strength, or become vulnerable to decay. Repairing the original leak before the damage spreads can help reduce the need for more extensive roof work.
Mold and Indoor Moisture Problems
Damp insulation, drywall, and wood can provide conditions that support mold growth when moisture persists. Mold may produce musty odors and damage affected materials, while hidden moisture can remain unnoticed behind walls or above ceilings. Correcting the leak and properly drying the affected area are important steps in addressing the problem.
Damage to Ceilings, Walls, and Interior Finishes
Water stains, peeling paint, bubbling drywall, and damaged trim can affect the appearance and usability of rooms near the chimney. As moisture continues to spread, repairs may require more than repainting or replacing a small section of drywall. The affected materials should be checked to determine whether they can be dried and restored or need replacement.
Higher Repair Costs Over Time
Delaying a repair can turn a localized flashing problem into a project involving roofing, insulation, decking, masonry, and interior finishes. The longer moisture remains active, the more difficult it may be to determine the full extent of the damage. Prompt inspection and appropriate repairs can help control the scope of the work and protect the home from further deterioration.
🛡️ How to Prevent Future Chimney Roof Leaks
Preventing chimney roof leaks starts with regular maintenance and early attention to small signs of deterioration. Homeowners in Denton, TX, can reduce the likelihood of recurring water problems by keeping the roof and chimney in good condition and arranging inspections when damage is suspected. Although no maintenance plan can eliminate every risk, proactive care can help identify vulnerable areas before they develop into costly repairs.
Schedule Regular Roof and Chimney Inspections
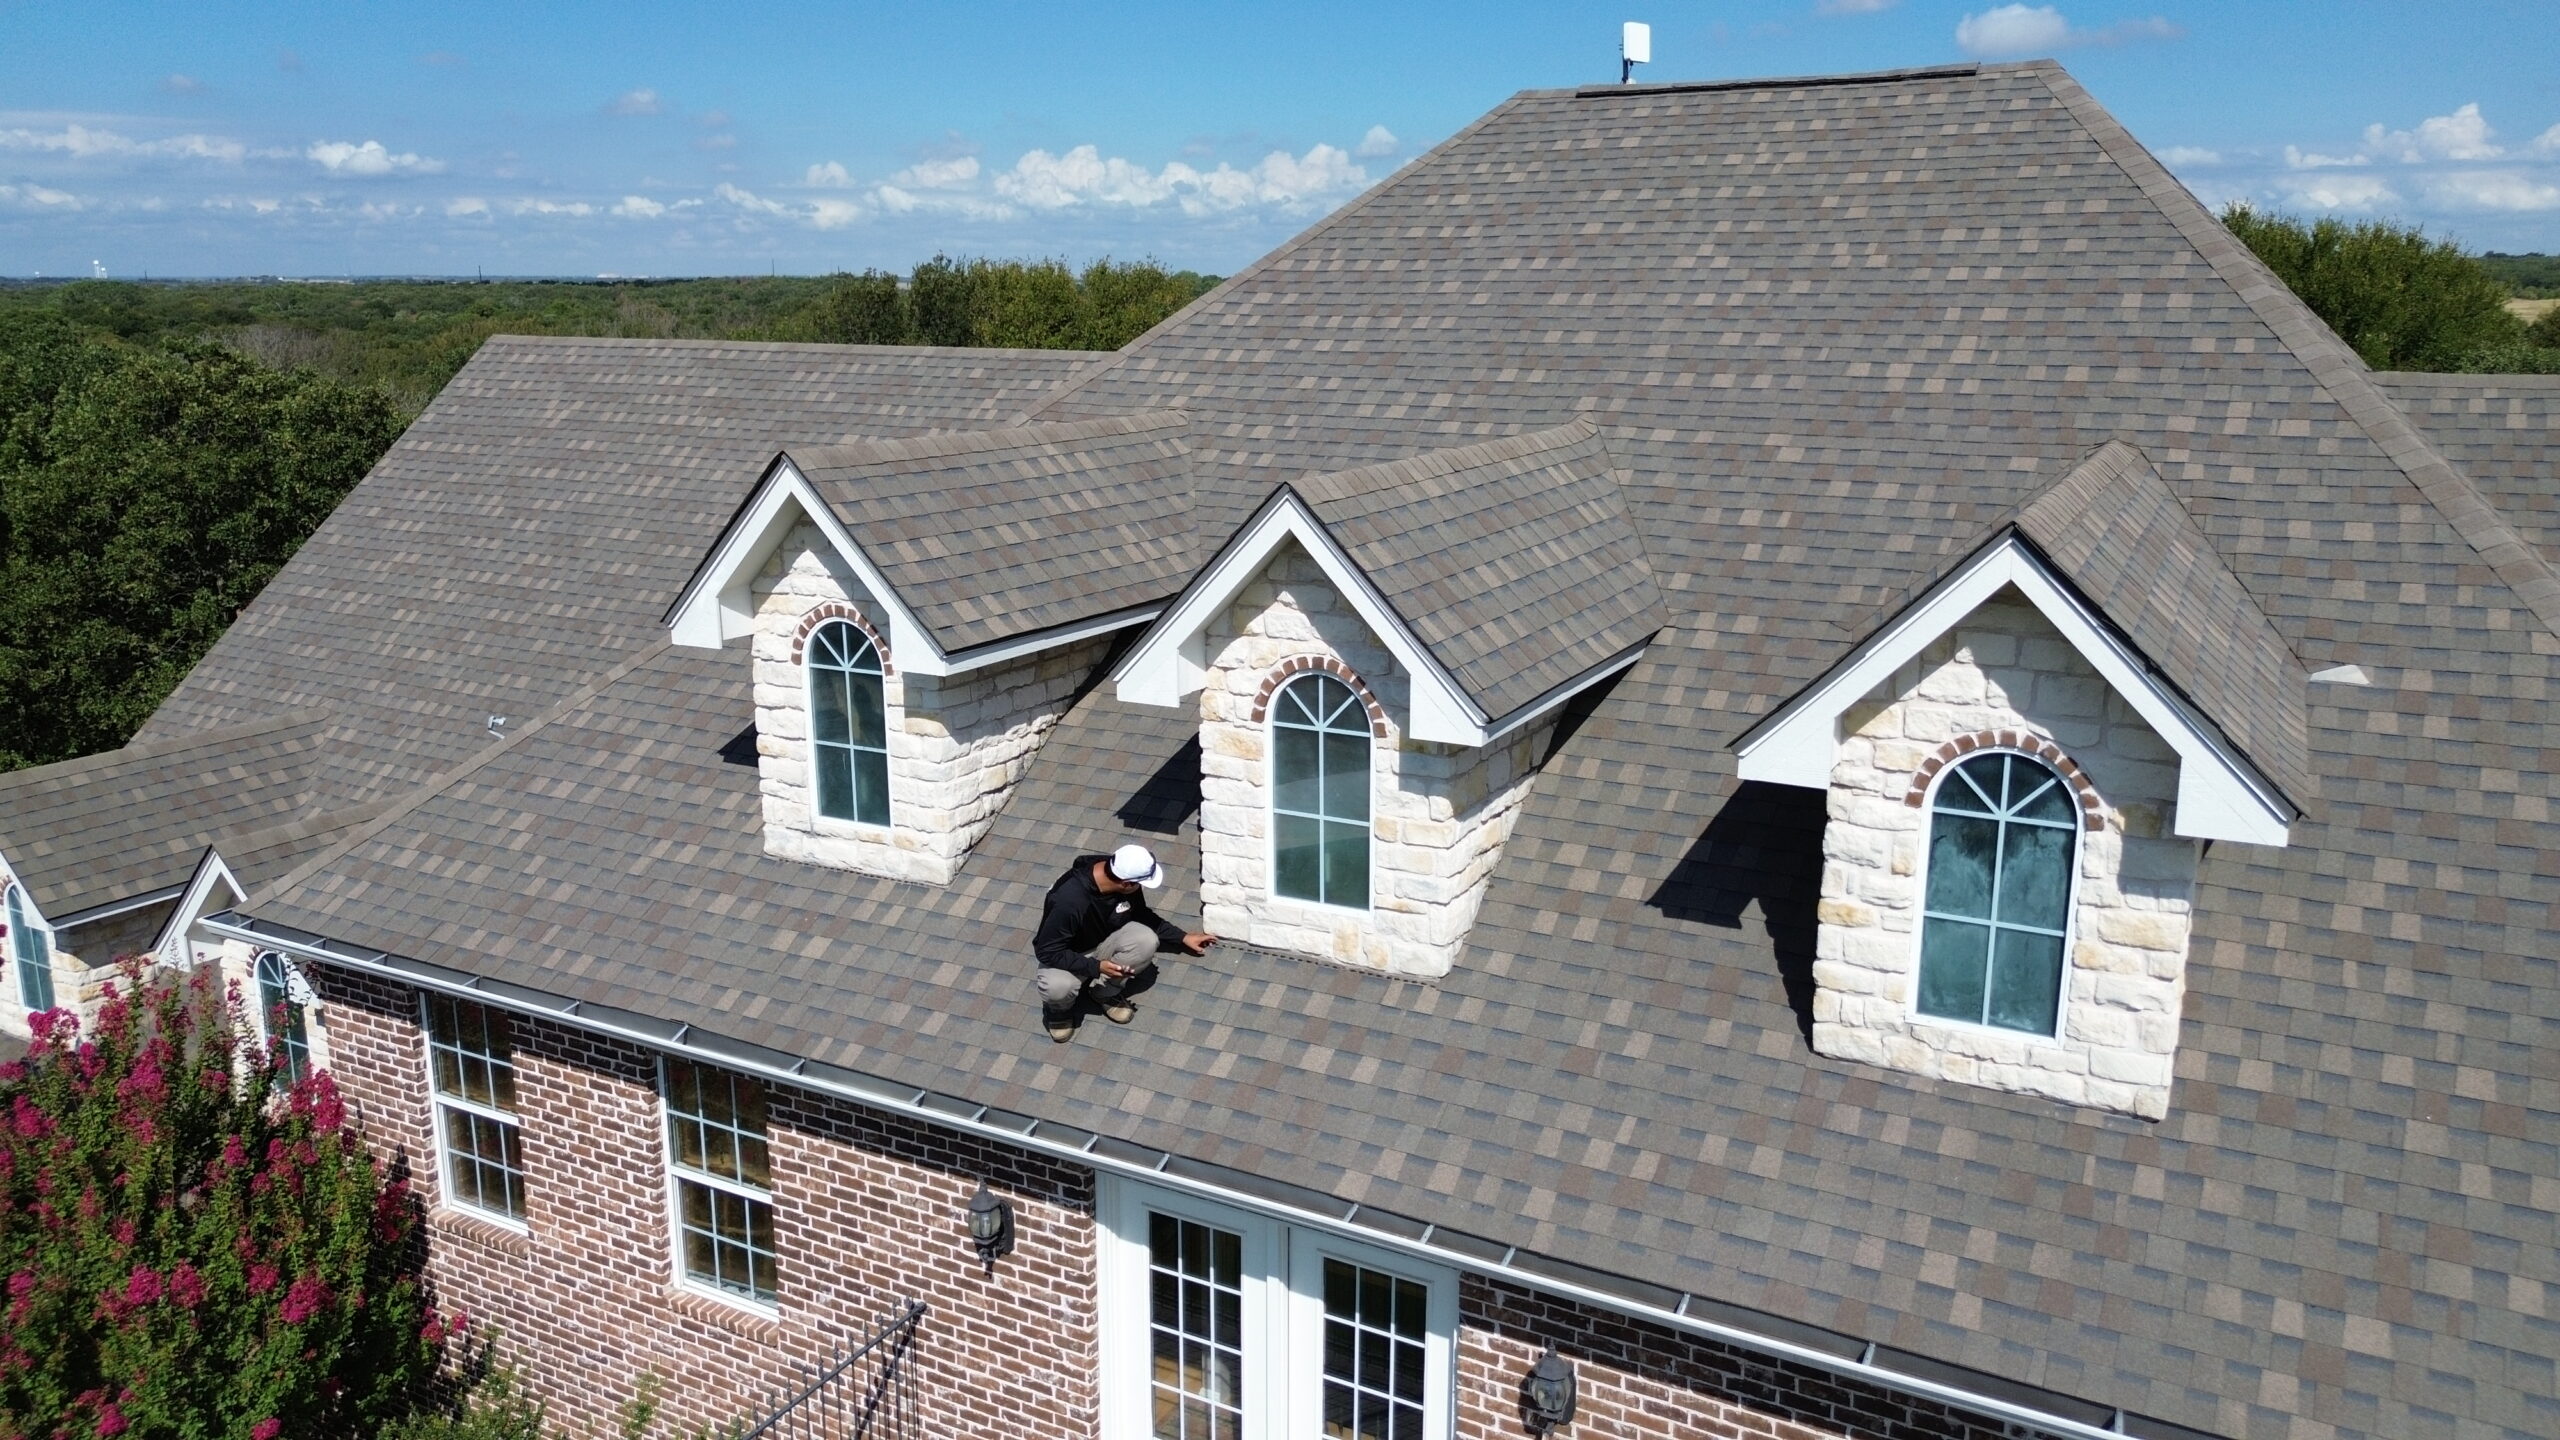
Periodic inspections allow a professional to check the flashing, shingles, chimney crown, mortar joints, and other areas exposed to weather. An inspection is especially worthwhile after severe storms or when a previously repaired area begins showing signs of moisture. Identifying loose flashing or deteriorating masonry early may prevent water from reaching the roof decking and interior spaces.
The inspection schedule should reflect the age and condition of the roof, its exposure to severe weather, and any history of leaks. Older roofing systems or chimneys with previous damage may need closer monitoring. Homeowners should also keep records of repairs and inspection findings to help track recurring issues.
Keep Flashing and Sealant in Good Condition
Flashing should remain securely installed and properly integrated with the surrounding roofing materials. Damaged metal, separated joints, and deteriorating sealant can create openings that allow rainwater to enter. If any of these problems appear, a professional should determine whether a localized repair or flashing replacement is necessary.
Avoid relying on repeated layers of caulk as a permanent solution for a failing flashing system. Sealant can deteriorate under weather exposure and may not correct gaps beneath the roofing materials. A durable repair should restore the complete water-resistant connection between the roof and chimney.
Maintain the Chimney Masonry and Crown
Cracked mortar joints, loose bricks, and a deteriorating chimney crown can allow moisture to enter the structure. Homeowners should arrange appropriate masonry repairs when these problems are identified rather than waiting for an interior leak to appear. A suitable chimney cap can also help keep rain and debris out of the flue.
Masonry maintenance should be carried out with materials appropriate for the existing chimney. Using an unsuitable repair product can create additional problems or fail to accommodate normal material movement. When deterioration is extensive, a qualified masonry professional can recommend the most appropriate corrective work.
Keep Roof Drainage Paths Clear
Leaves, branches, and other debris can interfere with the movement of rainwater across the roof. Although debris is not always the direct cause of a chimney leak, poor drainage may allow water to collect in vulnerable areas. Keeping gutters and other drainage paths clear helps water move away from the roof efficiently.
Homeowners should arrange safe maintenance rather than climbing onto a roof without proper equipment. If water regularly accumulates behind a chimney, a roofer can assess whether the roof configuration needs improved drainage or a properly designed cricket. Correcting these conditions can reduce repeated water exposure around the chimney.
Address Storm Damage Promptly
After strong winds, hail, or heavy rainfall, check the property from the ground for missing shingles, fallen branches, or other visible signs of roof damage. If new ceiling stains or dripping appear, arrange an inspection rather than waiting for the next storm. Prompt action can limit the time water has to affect the building materials.
Keep photographs of visible damage and records of the date it appeared. This documentation can be useful when discussing repair options with a contractor or contacting an insurance company. Avoid attempting roof repairs during wet or windy conditions, as these circumstances increase the risk of injury.
⏱️ How Long Does Chimney Leak Repair Take?
The time required to repair a chimney roof leak depends on the source of the problem, the amount of damage, weather conditions, and material availability. A minor repair may be completed in a few hours, while replacing an extensive flashing system or repairing chimney masonry can take longer. Repairs involving damaged roof decking or interior finishes may require additional visits.
Typical Repair Timelines
| Type of Repair | General Time Estimate |
|---|---|
| Minor sealant or joint repair | A few hours |
| Localized flashing repair | A few hours to one day |
| Chimney flashing replacement | Half a day to one or two days |
| Shingle replacement near the chimney | A few hours to one day |
| Mortar repointing | Several hours to two days |
| Chimney crown repair | Several hours to one day |
| Chimney crown rebuilding | One to several days, including curing time |
| Cricket installation | One to several days |
| Roof decking replacement | One day or longer, depending on damage |
These timelines are approximate and describe the repair work rather than the full scheduling process. Inspection, material ordering, rain delays, and access requirements can extend the time before a project is completed. Masonry materials and sealants may also need adequate curing time before they can withstand normal weather exposure.
Factors That Can Delay Repairs
Rain, high winds, and unsafe roof conditions can prevent contractors from completing exterior work. Hidden damage may also be discovered after shingles or flashing are removed, requiring additional repairs before the roof can be closed up properly. If specialized masonry work is needed, coordinating the roofing and masonry portions may affect the overall schedule.
Homeowners should ask the contractor for an estimated start date, expected work duration, and explanation of possible delays. If water is actively entering the home, ask whether temporary protective measures can be installed safely while permanent repairs are arranged. Temporary protection should not be treated as a substitute for correcting the underlying problem.
📋 What to Expect During a Professional Chimney Leak Repair
Understanding the repair process helps homeowners prepare for the work and know what questions to ask. Although each project is different, a professional chimney leak repair generally begins with an inspection, followed by a written recommendation and the necessary corrective work. The final steps should include checking the repaired area and explaining any remaining maintenance needs.
Initial Inspection and Diagnosis
The contractor examines the roof and chimney to identify potential water entry points. This may include inspecting the flashing, shingles, mortar joints, chimney crown, attic, and visible interior damage. Photographs can help document the problem and show why a particular repair is recommended.
The contractor should explain the suspected cause in clear language and distinguish confirmed damage from conditions that require further investigation. If multiple defects are contributing to the leak, the estimate should identify the relevant repairs. This gives homeowners a better basis for deciding how to proceed.
Written Estimate and Repair Plan
Before work begins, request a written estimate outlining the scope of the project, materials, labor, expected timeline, and payment terms. The proposal should state whether flashing repair, shingle replacement, masonry work, or damaged decking is included. It should also explain how unexpected damage will be handled if additional problems are found after the work starts.
Homeowners should clarify whether disposal, cleanup, and any required permits are included in the quoted price. Ask about applicable workmanship warranties and any manufacturer warranties associated with the materials. Reviewing these details beforehand can reduce misunderstandings during the project.
Completing the Necessary Repairs
Depending on the diagnosis, the contractor may remove damaged materials, replace flashing, repair shingles, restore mortar joints, or address the chimney crown. If water has affected the roof deck, damaged sections may need to be replaced before the roofing materials are reinstalled. The repair should address the actual source of moisture and any related damage included in the agreed scope.
Some projects require coordination between a roofing contractor and a masonry specialist. Homeowners should confirm who is responsible for each portion of the work and how the finished components will connect. This is particularly important when the leak involves both the roof flashing and the chimney structure.
Final Inspection and Cleanup
After the repairs are completed, the contractor should review the repaired area and explain the work performed. Homeowners can ask for photographs of concealed repairs and confirmation that the original defects have been addressed. Any remaining concerns, recommended maintenance, or limitations of the repair should be communicated clearly.
A final inspection cannot guarantee that a roof will never leak again, particularly if other aging components remain. However, checking the completed work and keeping the repair documentation can help with future maintenance. If moisture appears again, contact the contractor promptly and refer to the agreed warranty terms.
⚖️ How to Choose a Chimney Leak Repair Contractor in Denton
Selecting a qualified contractor is an important step toward resolving a chimney roof leak properly. The lowest estimate may not provide the best value if it excludes necessary repairs or relies on a temporary patch. Homeowners should compare the contractor’s experience, proposed methods, documentation, and communication before making a decision.
Look for Relevant Roofing Experience
Chimney leaks require an understanding of roof flashing, shingle installation, drainage, and the connections between roofing materials and masonry. Ask whether the contractor has handled similar leaks and how they determine whether the problem originates in the roof or chimney. A clear explanation of the inspection and repair process can help establish whether the proposed solution addresses the actual issue.
If the chimney has significant brick or mortar damage, ask whether the contractor can complete the masonry work or will coordinate with a qualified specialist. Not every roofing company performs every type of chimney repair. Confirming the scope of expertise beforehand helps avoid incomplete work or confusion over responsibilities.
Verify Insurance and Written Documentation
Ask for evidence of appropriate insurance and any required local credentials before work begins. Request a written estimate that details the materials, labor, repair methods, timeline, and payment schedule. Homeowners should also understand the terms of any workmanship warranty and what circumstances may not be covered.
Be cautious of contractors who pressure you into an immediate decision without explaining the damage or providing clear documentation. A reliable professional should be willing to discuss reasonable repair options and answer questions about the proposed work. Written records help protect both parties by setting clear expectations.
Compare Estimates Based on Scope, Not Just Price
When comparing contractors, check whether each estimate covers the same repair components. One proposal may include flashing replacement and shingle work, while another may only include surface sealant. The prices are not directly comparable unless the work, materials, and expected results are understood.
Ask each contractor to explain any major differences in cost or recommended methods. Consider whether the estimate accounts for potential hidden damage and how additional work would be approved. A well-defined scope helps homeowners make an informed choice without focusing exclusively on the initial price.
🚀 Why Choose Small Town Roofing & Construction for Chimney Leak Repair?
Homeowners dealing with a roof leak around a chimney need a clear understanding of the problem and a practical plan for resolving it. Small Town Roofing & Construction can be considered for roof inspection and repair needs in Denton, TX, including concerns involving damaged shingles, flashing, and weather-related roof deterioration. The appropriate service will depend on the property’s condition and the specific work the company offers.
Inspection Focused on the Source of the Leak
A useful repair process begins by investigating where water is entering rather than simply treating the visible stain. Chimney flashing, nearby shingles, masonry joints, and the upper chimney components may all need to be examined. Understanding the source helps determine whether the project requires a localized repair or a more extensive solution.
Homeowners should ask for an explanation of the findings and a clear description of the recommended work. Photographs and a written estimate can make it easier to understand the condition of the roof. This information also helps when comparing repair options or deciding whether additional masonry expertise is needed.
Repair Options Based on Roof Conditions
Not every chimney leak requires the same type of work. A damaged flashing section may need repair or replacement, while cracked mortar, a deteriorated crown, or weakened decking may require separate attention. The proposed solution should reflect the roof’s condition and the likely cause of the moisture intrusion.
Before authorizing work, homeowners should confirm which repairs are included and whether the contractor handles all required components. Any additional work should be explained and approved before costs are incurred. This approach helps keep the project organized and reduces the risk of misunderstandings.
Protecting Your Home From Further Water Damage
Prompt attention to a chimney leak can help limit moisture exposure and protect surrounding roofing and interior materials. Small Town Roofing & Construction can be contacted to discuss the available inspection and repair services for a roof leak in Denton. Homeowners should ask about scheduling, pricing, insurance, and applicable workmanship warranties before moving forward.
If water is actively entering the home, avoid unsafe roof access and arrange a professional assessment as soon as practical. Document visible damage and take reasonable steps to protect belongings without touching wet electrical components or unstable ceilings. Addressing the source of the leak is the essential step toward restoring the roof’s ability to keep water out.
❓ Frequently Asked Questions About Roof Leaks Around a Chimney in Denton, TX
1. Why does my roof leak around the chimney when it rains?
A chimney roof leak often occurs because flashing has loosened, sealant has deteriorated, shingles are damaged, or the chimney masonry has developed cracks. Heavy rain and strong winds can push water into openings that may not leak during mild weather. A professional inspection can help determine the actual entry point and identify the repair needed to prevent recurring moisture problems.
2. How much does chimney leak repair cost in Denton, TX?
The cost depends on whether the problem involves minor sealant work, flashing replacement, damaged shingles, masonry repairs, or deteriorated roof decking. Simple repairs may cost a few hundred dollars, while extensive flashing or chimney restoration can cost considerably more. Request a written estimate after an inspection because the final price depends on the materials, accessibility, labor, and extent of hidden damage.
3. How do I know if my chimney flashing is damaged?
Common warning signs include water stains near the chimney, loose or visibly corroded metal, cracked sealant, and recurring leaks after rain. Some flashing problems are hidden beneath the shingles, so the absence of visible damage does not necessarily mean the system is sound. A roofer can examine the flashing connections and determine whether repair or replacement is appropriate.
4. Is the leak coming from my chimney or my roof?
Water stains near a chimney can result from damaged roof flashing, cracked mortar, a deteriorated chimney crown, or a nearby roofing defect. Water may travel along framing and appear indoors some distance from its original entry point. Inspecting the roof, chimney, attic, and affected interior area helps distinguish between these possible causes.
5. Can I fix a chimney roof leak myself?
Homeowners can document visible damage, protect belongings, and monitor when the leak occurs, but roof repairs can be hazardous without proper equipment and training. Applying caulk over a gap may not resolve a problem caused by failed flashing or damaged masonry. A professional assessment is recommended when the source is uncertain, the leak continues, or the roof is difficult to access safely.
6. Does homeowners insurance cover a chimney roof leak?
Coverage depends on the policy, the cause of the leak, maintenance history, and the circumstances surrounding the damage. Sudden storm-related damage may be treated differently from gradual deterioration or a leak caused by neglected maintenance. Review your policy, document the damage, and contact your insurer before assuming that repairs will be covered.
7. How long does chimney leak repair take?
A minor flashing or sealant repair may take only a few hours, while replacing flashing or repairing shingles can require a day or longer. Extensive masonry work, a damaged chimney crown, or roof decking replacement may extend the schedule. Weather conditions, material availability, and the discovery of hidden damage can also affect the completion date.
8. Should I replace chimney flashing or just apply caulk?
Caulk or roofing sealant may be suitable for certain small joints, but it is not a dependable substitute for a properly installed flashing system. If the flashing is loose, corroded, missing, or incorrectly integrated with the shingles, the underlying defect should be corrected. A roofer can determine whether a limited repair is sufficient or whether replacing the flashing is the better long-term option.
9. Can a chimney roof leak cause mold or structural damage?
Yes, persistent moisture can damage insulation, drywall, roof decking, and nearby framing, while damp materials may support mold growth. The severity depends on how long the leak continues, how much water enters, and whether the affected materials can dry properly. Fixing the source and assessing any water-damaged materials are important steps in preventing further deterioration.
10. How often should I have my roof and chimney inspected?
Inspection frequency depends on the roof’s age, condition, exposure to severe weather, and history of repairs. A periodic professional inspection and an additional assessment after significant storm damage can help identify problems before they become major leaks. If you notice missing shingles, cracked mortar, ceiling stains, or moisture near the chimney, arrange an inspection rather than waiting for the next scheduled visit.
Conclusion
A roof leak around a chimney in Denton, TX, can result from damaged flashing, deteriorating mortar, cracked chimney crowns, loose shingles, or problems with roof drainage. Because water can travel through concealed spaces before appearing inside the home, finding the true source is essential to choosing an effective repair. Temporary patches may offer short-term relief, but recurring leaks often require a closer look at the roofing and chimney components.
Homeowners can reduce the risk of extensive damage by recognizing early warning signs, maintaining the chimney and roof, and arranging professional inspections when problems appear. Repair costs and timelines vary according to the damage, so a written estimate and clear explanation of the proposed work are important. Comparing contractors based on experience, insurance, scope of work, and warranty terms can help you make a confident decision.
If you notice water stains, damp attic insulation, or dripping near your chimney, consider contacting Small Town Roofing & Construction to discuss your roofing concerns in Denton. A professional assessment can help identify the cause, clarify available repair options, and determine the next steps for protecting your home. Taking action early can help limit additional water damage and support the long-term condition of your roof.
Leave A Comment