
What Is Roof Flashing and Why Does It Matter?
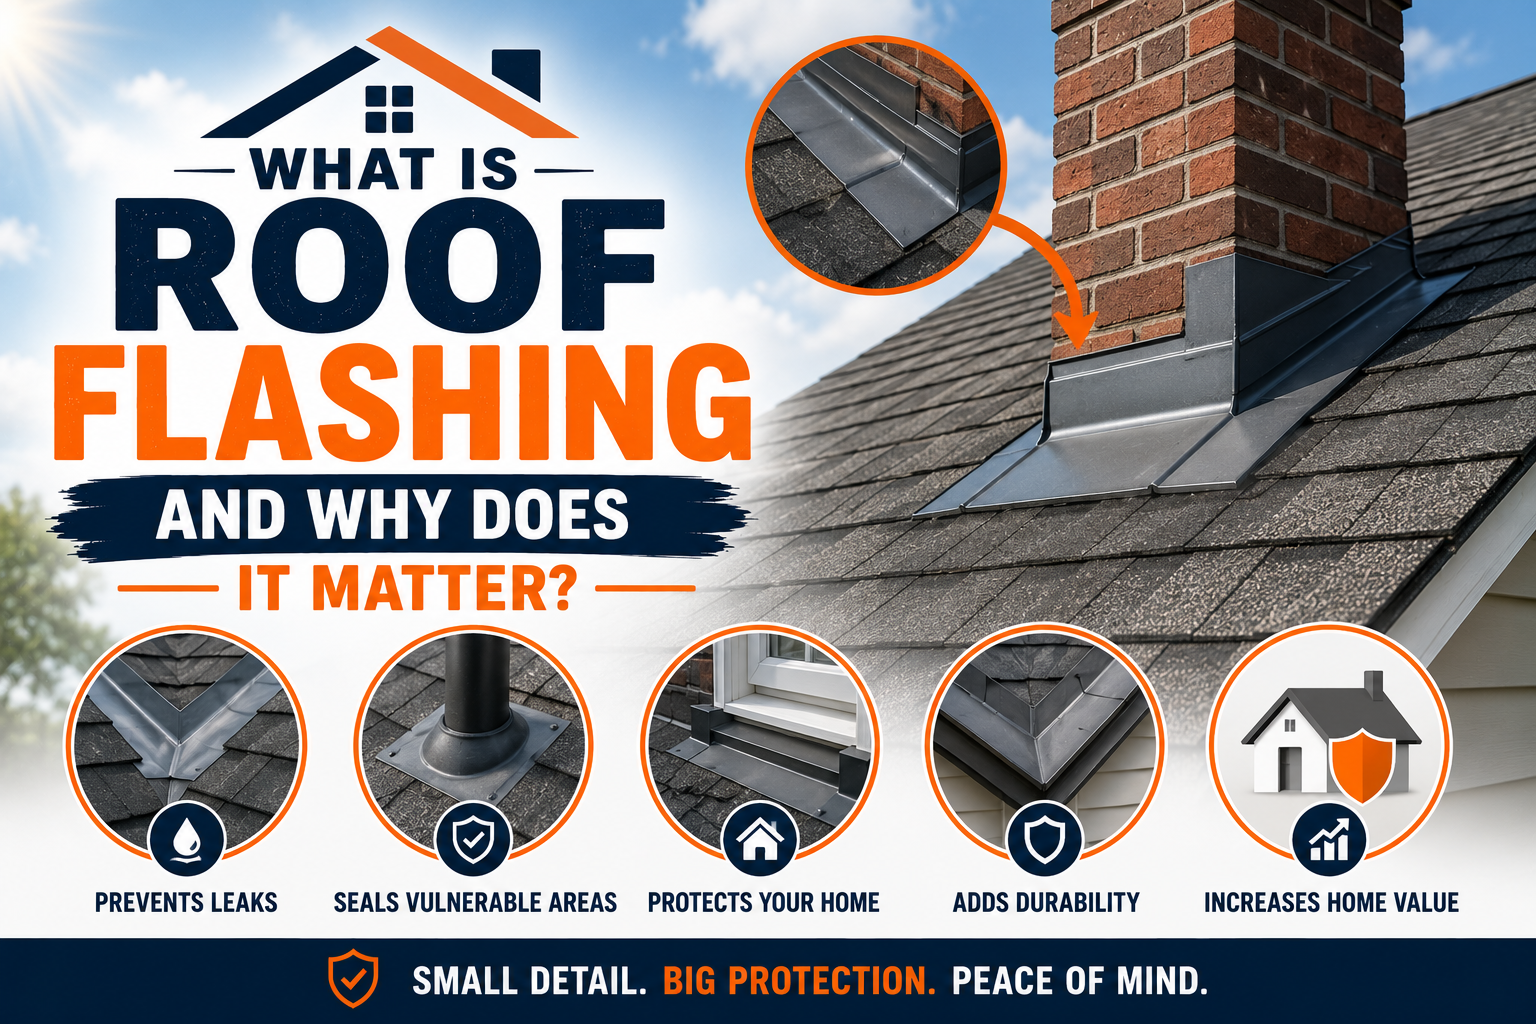
Roof flashing is one of the most important parts of a roofing system, yet many homeowners have never heard of it until a leak appears. Flashing is a thin material installed around vulnerable roof areas to direct water away from seams, joints, and openings. Without proper flashing, even a strong and expensive roof can develop water damage over time.
Many roofing leaks begin around areas where the roof changes direction or where objects penetrate the roof surface. Chimneys, skylights, vents, valleys, and wall connections are all common leak points that require flashing protection. Proper flashing helps create a watertight barrier that keeps moisture from entering the home.
Roof flashing may seem like a small detail, but it plays a major role in protecting the structure of a property. Water intrusion can lead to mold growth, wood rot, insulation damage, ceiling stains, and costly repairs. Understanding how flashing works can help homeowners protect their roofs and avoid expensive issues.
In areas like Texas and Oklahoma, roofs face harsh weather conditions throughout the year. Heavy rain, hailstorms, high winds, heat, and freezing temperatures can all affect roofing materials over time. Flashing helps strengthen weak points on the roof and improves overall weather resistance.
This guide explains what roof flashing is, why it matters, the different types of flashing, signs of flashing problems, repair options, maintenance tips, and how professional roofers install flashing properly. By understanding roof flashing, homeowners can make better decisions about roof maintenance and long term protection.
What Is Roof Flashing?
Roof flashing is a thin material used to prevent water from entering areas where roofing materials meet other surfaces or structures. It is commonly made from metal such as aluminum, galvanized steel, copper, or zinc. Flashing directs water away from seams and toward drainage areas like gutters.
Flashing is installed in locations where leaks are most likely to happen. These areas include roof valleys, chimneys, vent pipes, skylights, dormers, walls, and roof edges. Because these parts of the roof contain joints and openings, they need extra protection against water penetration.
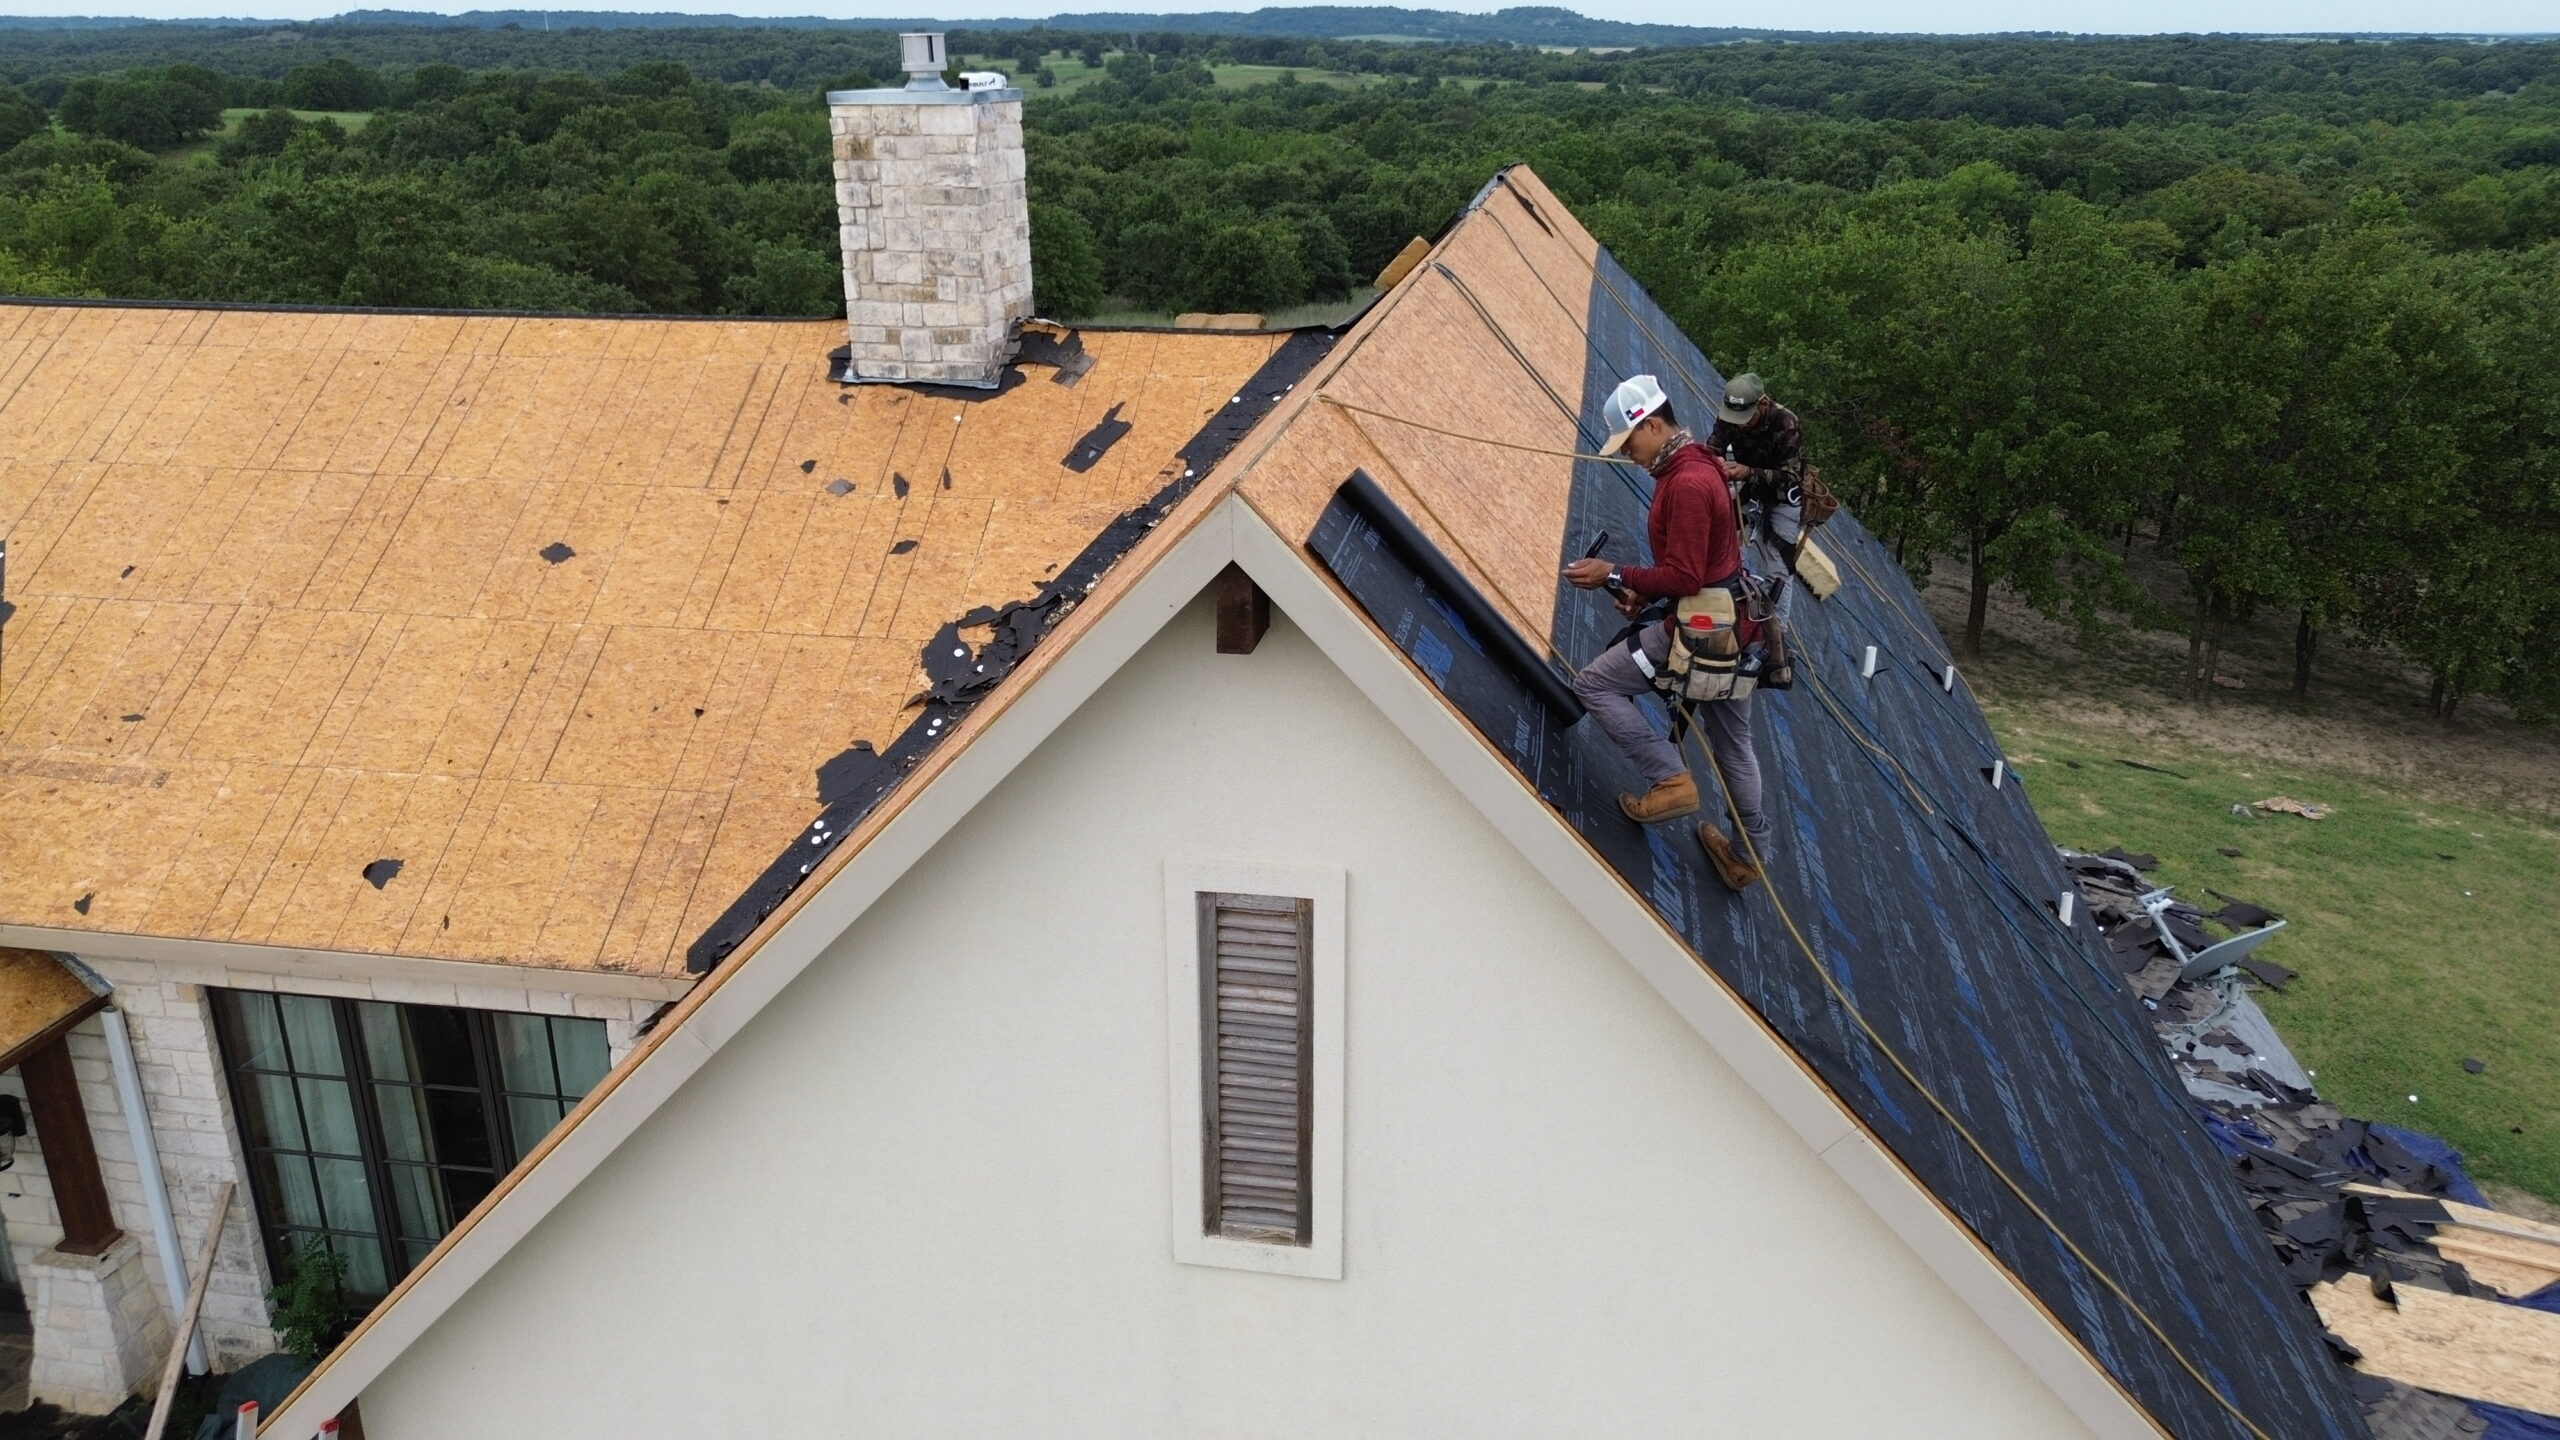
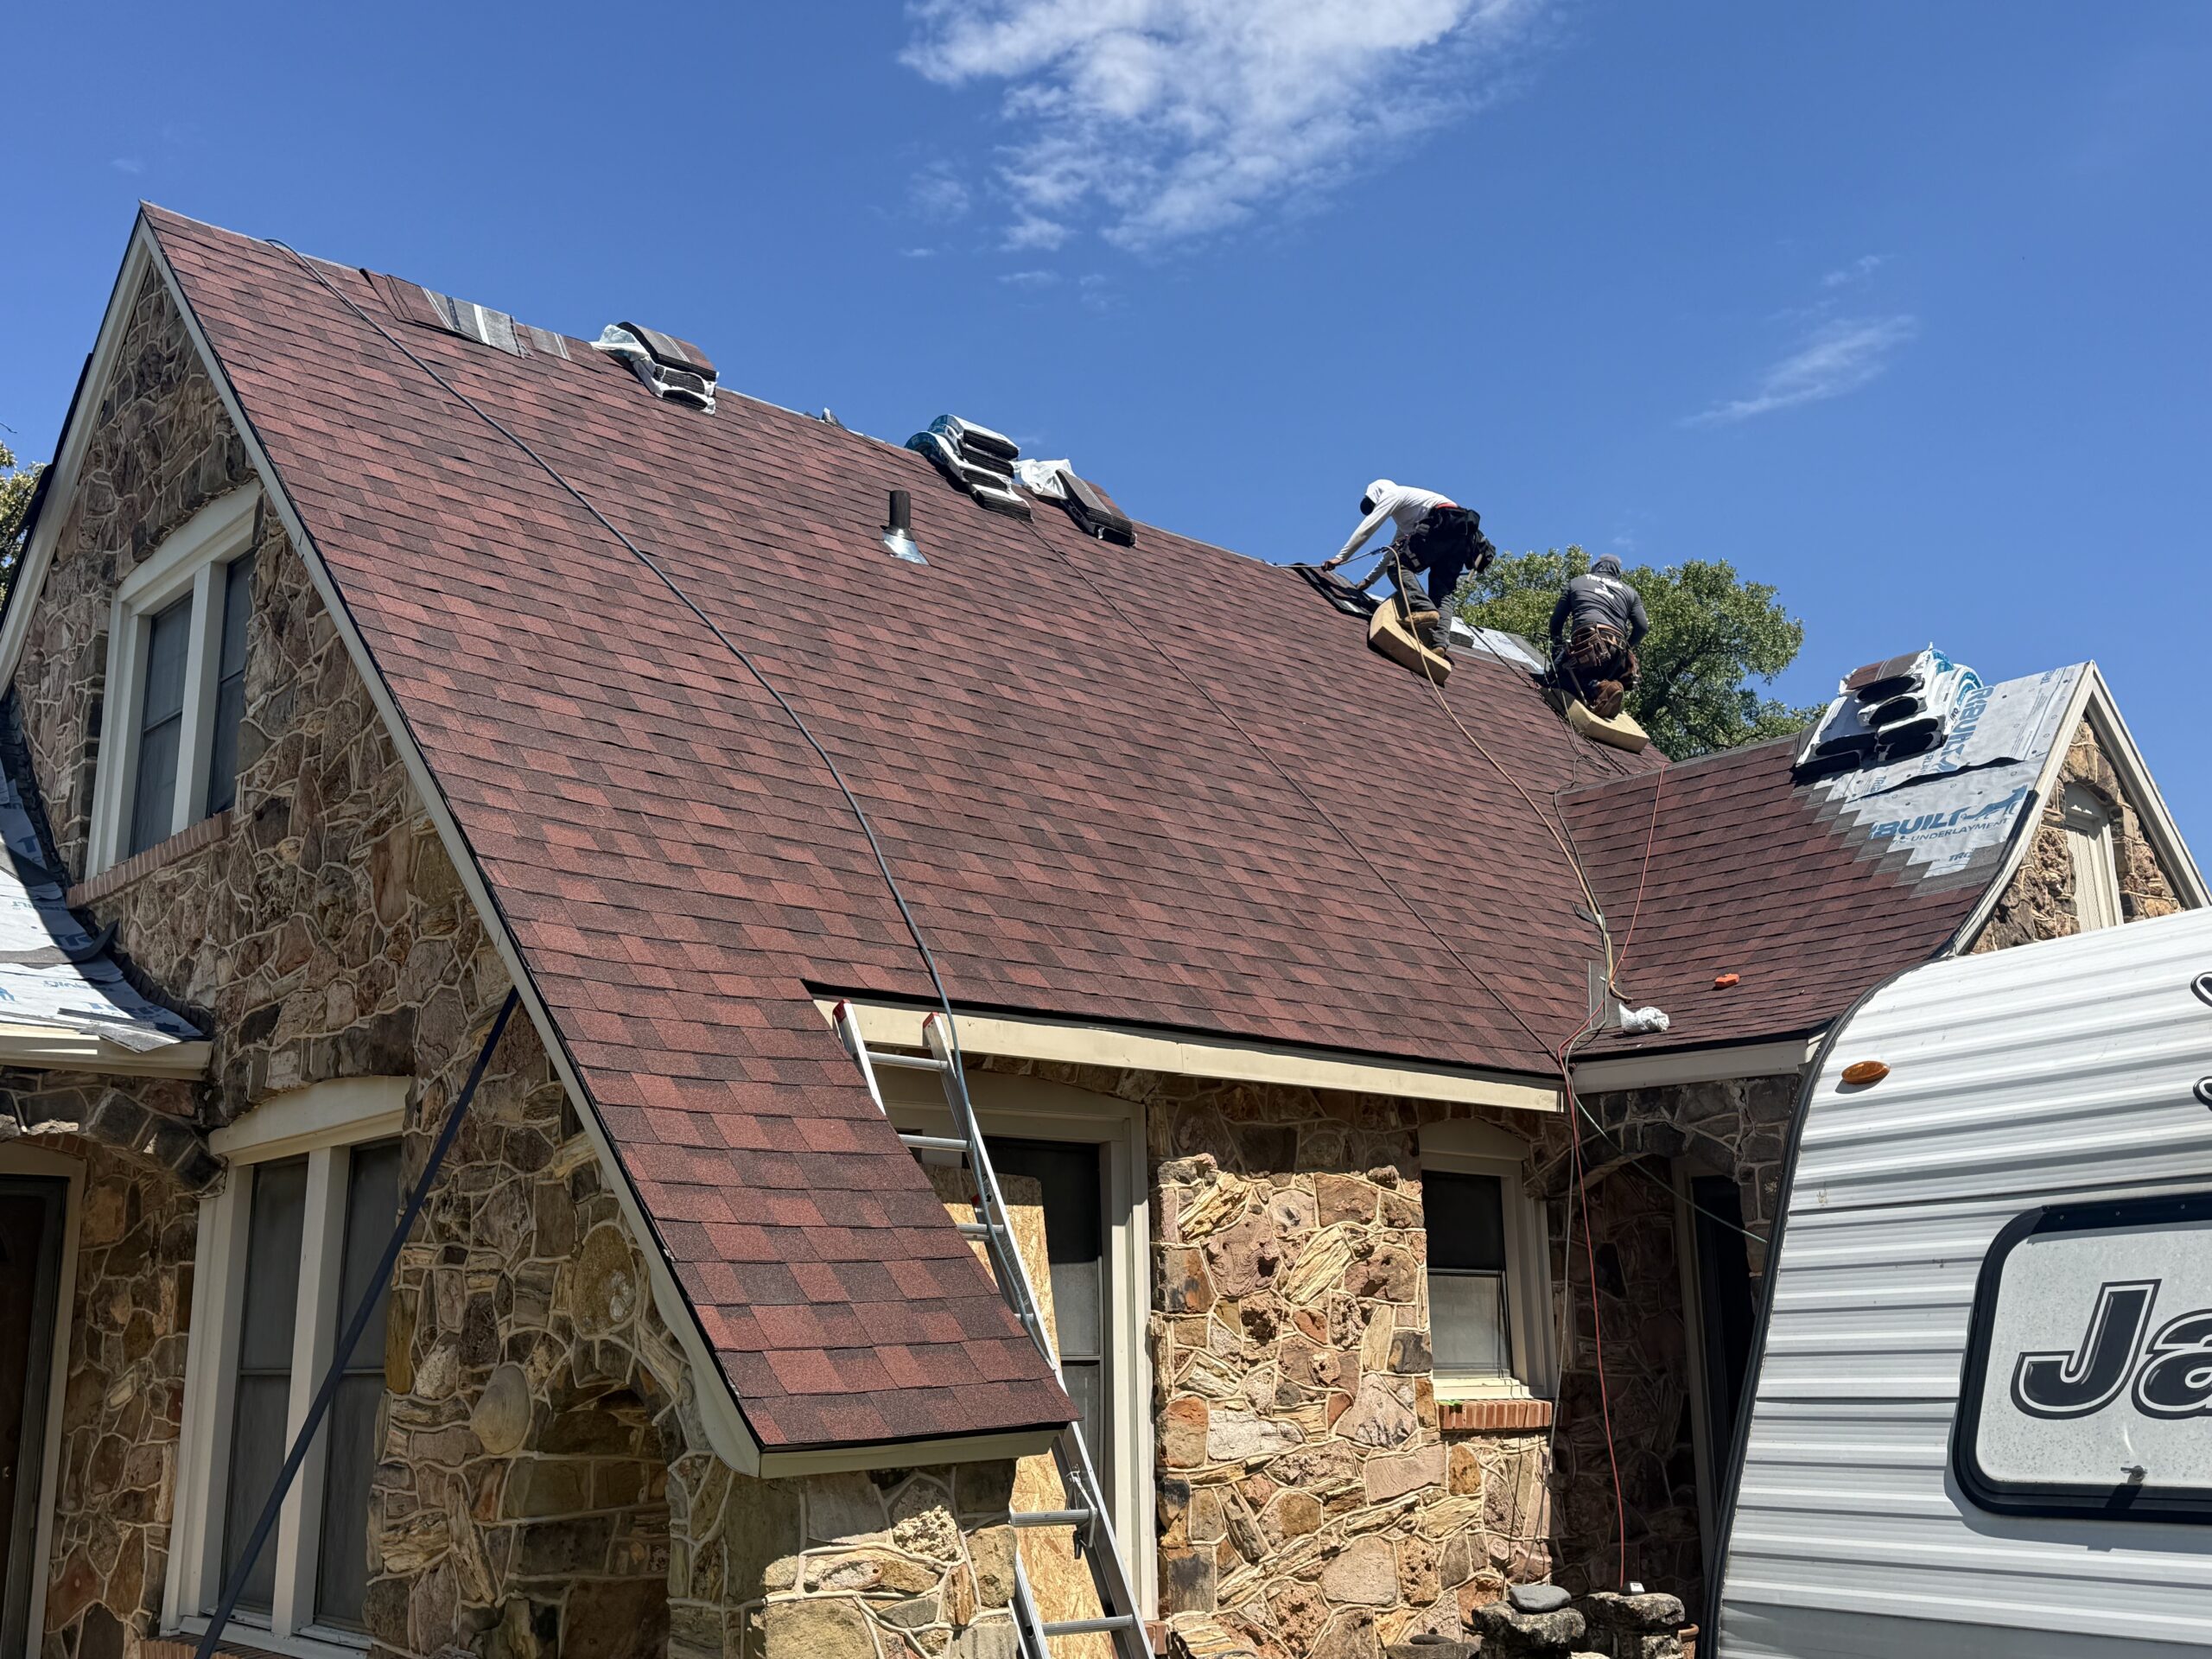
Most flashing materials are shaped and layered carefully to create a waterproof seal. Roofers install flashing underneath shingles or roofing materials so water flows safely off the roof. Proper installation is important because even small gaps can allow water to enter.
Flashing works alongside shingles, underlayment, and other roofing components to create a complete roofing system. While shingles protect the majority of the roof surface, flashing protects the most vulnerable areas. Without flashing, water can quickly damage the roof structure.
Why Roof Flashing Matters
Roof flashing is important because it prevents leaks and protects the home from water damage. Water naturally follows gravity and flows toward roof joints, edges, and penetrations. Flashing helps control water movement and keeps moisture away from exposed areas.
One of the biggest reasons flashing matters is because water damage can become extremely expensive. A small leak around a chimney or vent can eventually damage insulation, drywall, wood framing, and ceilings. Mold growth can also develop if moisture remains trapped inside the structure.
Flashing also helps extend the life of a roofing system. When water enters roofing materials repeatedly, shingles and decking can deteriorate faster. Proper flashing reduces moisture exposure and helps roofing materials perform longer.
Another reason flashing matters is weather protection. Strong storms, heavy rain, and wind driven moisture can force water under shingles if flashing is damaged or missing. Flashing provides an additional defense layer during severe weather conditions.
Professional roofers consider flashing one of the most critical components of roof installation. Even premium roofing materials may fail if flashing is installed incorrectly. Proper flashing protects both residential and commercial properties from long term structural damage.
Common Areas Where Roof Flashing Is Installed
Flashing is installed in several critical roof locations where leaks are more likely to occur. Each area requires specific flashing designs and installation techniques. Understanding these locations helps homeowners recognize why flashing is so important.
Chimneys
Chimneys are one of the most common locations for flashing problems. Because chimneys extend through the roof surface, gaps can form around the base if flashing is damaged or poorly installed. Water can easily enter these gaps during rainstorms.
Roofers typically install step flashing and counter flashing around chimneys. Step flashing overlaps roofing materials while counter flashing seals the upper edge against the chimney structure. Together, these components create a watertight system.
Roof Valleys
Roof valleys are areas where two roof slopes meet and channel large amounts of water downward. Because valleys handle heavy water flow, they require strong flashing protection. Damaged valley flashing can lead to major leaks.
Metal flashing is commonly installed beneath shingles in roof valleys to improve water drainage. Proper valley flashing helps direct water toward gutters and away from the roof structure.
Skylights
Skylights add natural light to homes but also create potential leak points. Flashing around skylights prevents rainwater from entering gaps between the skylight frame and roofing materials.
Poor skylight flashing can cause interior water stains and mold growth around ceiling areas. Professional installation is important to ensure proper waterproofing.
Roof Vents
Vent pipes and exhaust vents require flashing where they pass through the roof. Pipe flashing creates a waterproof seal around the opening and prevents leaks during storms.
Rubber boots or metal collars are often used with vent flashing systems. Over time, these materials can crack or deteriorate due to sun exposure and temperature changes.
Roof Edges
Roof edges need flashing to direct water into gutters and protect fascia boards from moisture damage. Drip edge flashing is installed along roof edges to improve water runoff.
Without drip edge flashing, water can seep behind gutters and damage wooden roof components. This can eventually lead to rot and structural problems.
Dormers and Walls
Dormers and wall intersections require flashing where vertical surfaces meet the roof. Step flashing is often installed in layers beneath shingles to guide water away from these areas.
Improper wall flashing can allow water to penetrate behind siding or roofing materials. Over time, this can damage interior walls and insulation.
Types of Roof Flashing
Several types of flashing are used in roofing systems, and each serves a specific purpose. Choosing the correct flashing type is important for preventing leaks and ensuring proper water drainage.
Step Flashing
Step flashing consists of rectangular metal pieces installed in layers along roof to wall intersections. Each piece overlaps the next piece to guide water safely down the roof.
This type of flashing is commonly used around chimneys and dormers. Step flashing works effectively because it moves with the layered structure of roofing materials.
Counter Flashing
Counter flashing is installed over step flashing to provide additional waterproof protection. It is commonly embedded into masonry surfaces like chimneys.
Counter flashing covers the top edges of step flashing and prevents water from entering behind the metal pieces. Proper counter flashing installation is essential for chimney protection.
Valley Flashing
Valley flashing is installed in roof valleys where water flow is concentrated. Metal flashing helps channel rainwater efficiently toward drainage areas.
Roof valleys are exposed to constant water movement during storms, making durable flashing especially important. Damaged valley flashing can quickly lead to leaks.
Drip Edge Flashing
Drip edge flashing is installed along roof edges to guide water into gutters. It also protects fascia boards and roof decking from moisture exposure.
This type of flashing is required by many building codes because it improves roof drainage and prevents water damage along edges.
Vent Pipe Flashing
Vent pipe flashing seals areas where plumbing vents or exhaust pipes penetrate the roof. It usually includes a metal base combined with a rubber boot.
Over time, rubber components can crack due to weather exposure. Regular inspections help identify aging vent flashing before leaks develop.
Skylight Flashing
Skylight flashing systems are designed specifically for skylight installations. These flashing kits include multiple pieces that work together to prevent leaks.
Proper skylight flashing is critical because skylights interrupt the roof surface and create multiple water entry points.
Common Roof Flashing Materials
Roof flashing is available in several materials, each with different advantages and costs. Choosing the right flashing material depends on climate conditions, roof type, and budget.
Aluminum Flashing
Aluminum flashing is lightweight, affordable, and resistant to rust. It is commonly used in residential roofing systems because it is easy to shape and install.
However, aluminum can corrode when it comes into contact with certain materials. Protective coatings are sometimes used to improve durability.
Galvanized Steel Flashing
Galvanized steel flashing is strong and durable. It features a zinc coating that helps protect against rust and corrosion.
This type of flashing is commonly used in areas exposed to harsh weather conditions. Proper maintenance can help extend its lifespan.
Copper Flashing
Copper flashing is highly durable and visually attractive. It can last for decades and develops a unique patina over time.
Copper flashing is often used on high end homes and historic buildings. Although more expensive, it offers excellent long term performance.
Zinc Flashing
Zinc flashing is corrosion resistant and environmentally friendly. It requires little maintenance and can last many years.
Zinc is commonly used in premium roofing systems where durability and appearance are important priorities.
Signs of Roof Flashing Problems
Recognizing flashing problems early can help homeowners avoid major roof damage. Many leaks begin with small flashing failures that worsen over time.
Water Stains on Ceilings
Ceiling stains are one of the most common signs of flashing problems. Water entering around chimneys, vents, or skylights can travel through the attic before appearing indoors.
Discolored spots, bubbling paint, or peeling drywall may indicate flashing leaks that require professional inspection.
Rust or Corrosion
Metal flashing can rust or corrode over time due to weather exposure. Rust weakens the flashing material and creates openings where water can enter.
Homeowners should inspect visible flashing regularly for signs of discoloration or deterioration.
Cracked Sealant
Roof flashing often includes sealants that help create waterproof connections. Over time, sealants can crack, shrink, or separate due to temperature changes.
Damaged sealant may allow moisture to enter beneath flashing materials. Replacing old sealant can help prevent leaks.
Loose Flashing
Strong winds and storms can loosen flashing components around the roof. Loose flashing may lift away from roofing materials and expose gaps underneath.
If flashing appears bent, detached, or improperly secured, professional repairs may be necessary.
Interior Mold or Moisture
Moisture caused by flashing leaks can create mold growth inside walls or attic spaces. Mold often develops in hidden areas before visible leaks appear.
A musty odor or increased indoor humidity may indicate hidden roof moisture problems.
Missing Flashing Pieces
Storm damage or aging can cause flashing sections to become detached or missing entirely. Missing flashing leaves vulnerable roof areas exposed to rainwater.
After severe weather, homeowners should inspect the roof for visible damage or missing materials.
What Causes Roof Flashing Damage?
Several factors can damage roof flashing over time. Understanding these causes can help homeowners reduce the risk of leaks and expensive repairs.
Weather Exposure
Flashing constantly faces rain, sunlight, wind, hail, and temperature changes. These conditions gradually wear down metal materials and sealants.
Extreme heat can cause expansion while freezing temperatures cause contraction. This movement can loosen flashing connections over time.
Improper Installation
Poor installation is one of the leading causes of flashing problems. Incorrect overlaps, loose fasteners, or improper sealing can create leak points.
Professional roofing contractors follow specific installation methods to ensure proper water drainage and protection.
Aging Materials
Like all roofing components, flashing materials eventually age and deteriorate. Metal may rust while rubber components crack due to sun exposure.
Older roofs often require flashing replacement as part of overall roof maintenance.
Storm Damage
Hailstorms and strong winds can bend, crack, or detach flashing pieces. Flying debris during storms may also damage flashing around roof penetrations.
After severe weather, roof inspections can help identify hidden flashing damage before leaks develop.
Roof Movement
Homes naturally expand and contract over time due to temperature changes and settling. This movement can affect flashing connections around chimneys and walls.
Repeated movement may eventually create small gaps that allow water intrusion.
How Roofers Repair Roof Flashing
Roof flashing repairs vary depending on the extent of the damage. Minor flashing issues may only require resealing while severe damage may require full replacement.
Resealing Flashing
If flashing is still structurally sound, roofers may apply new roofing sealant to close small gaps or cracks. This can improve waterproofing temporarily.
However, sealant alone is not always a permanent solution for severely damaged flashing.
Refastening Loose Flashing
Loose flashing may be secured with roofing nails or screws. Roofers ensure the flashing lies flat and overlaps correctly to direct water properly.
Improper fastening can create additional leak points, so professional repairs are recommended.
Replacing Damaged Sections
Rusty or bent flashing often requires replacement. Roofers remove surrounding shingles carefully to install new flashing materials underneath.
Proper replacement helps restore waterproof protection and improve roof performance.
Chimney Flashing Repairs
Chimney flashing repairs may involve replacing step flashing, counter flashing, or mortar joints. Because chimneys are common leak areas, precise installation is important.
Professional roofers ensure flashing components overlap correctly and seal tightly against masonry surfaces.
Valley Flashing Replacement
Damaged valley flashing requires careful shingle removal and replacement. Roofers install new metal flashing to improve water drainage in high flow areas.
Valley repairs should be completed quickly because leaks in these areas can spread rapidly.
Importance of Professional Flashing Installation
Professional flashing installation is critical for long term roof performance. Even high quality materials may fail if installed incorrectly.
Experienced roofing contractors understand how water flows across different roof designs. They install flashing systems that work together with shingles, underlayment, and drainage components.
Roofers also follow local building codes and manufacturer guidelines during installation. This helps ensure roofs meet safety and warranty requirements.
Hiring professionals can also reduce the risk of hidden leaks and premature roof damage. Poor flashing installation often leads to expensive repairs that could have been avoided.
Homeowners should choose licensed and insured roofing contractors with experience in flashing repairs and installations. Reading reviews and checking references can help identify qualified professionals.
Roof Flashing Maintenance Tips
Regular roof maintenance helps extend the lifespan of flashing and reduce the risk of leaks. Homeowners can take several steps to protect flashing systems.
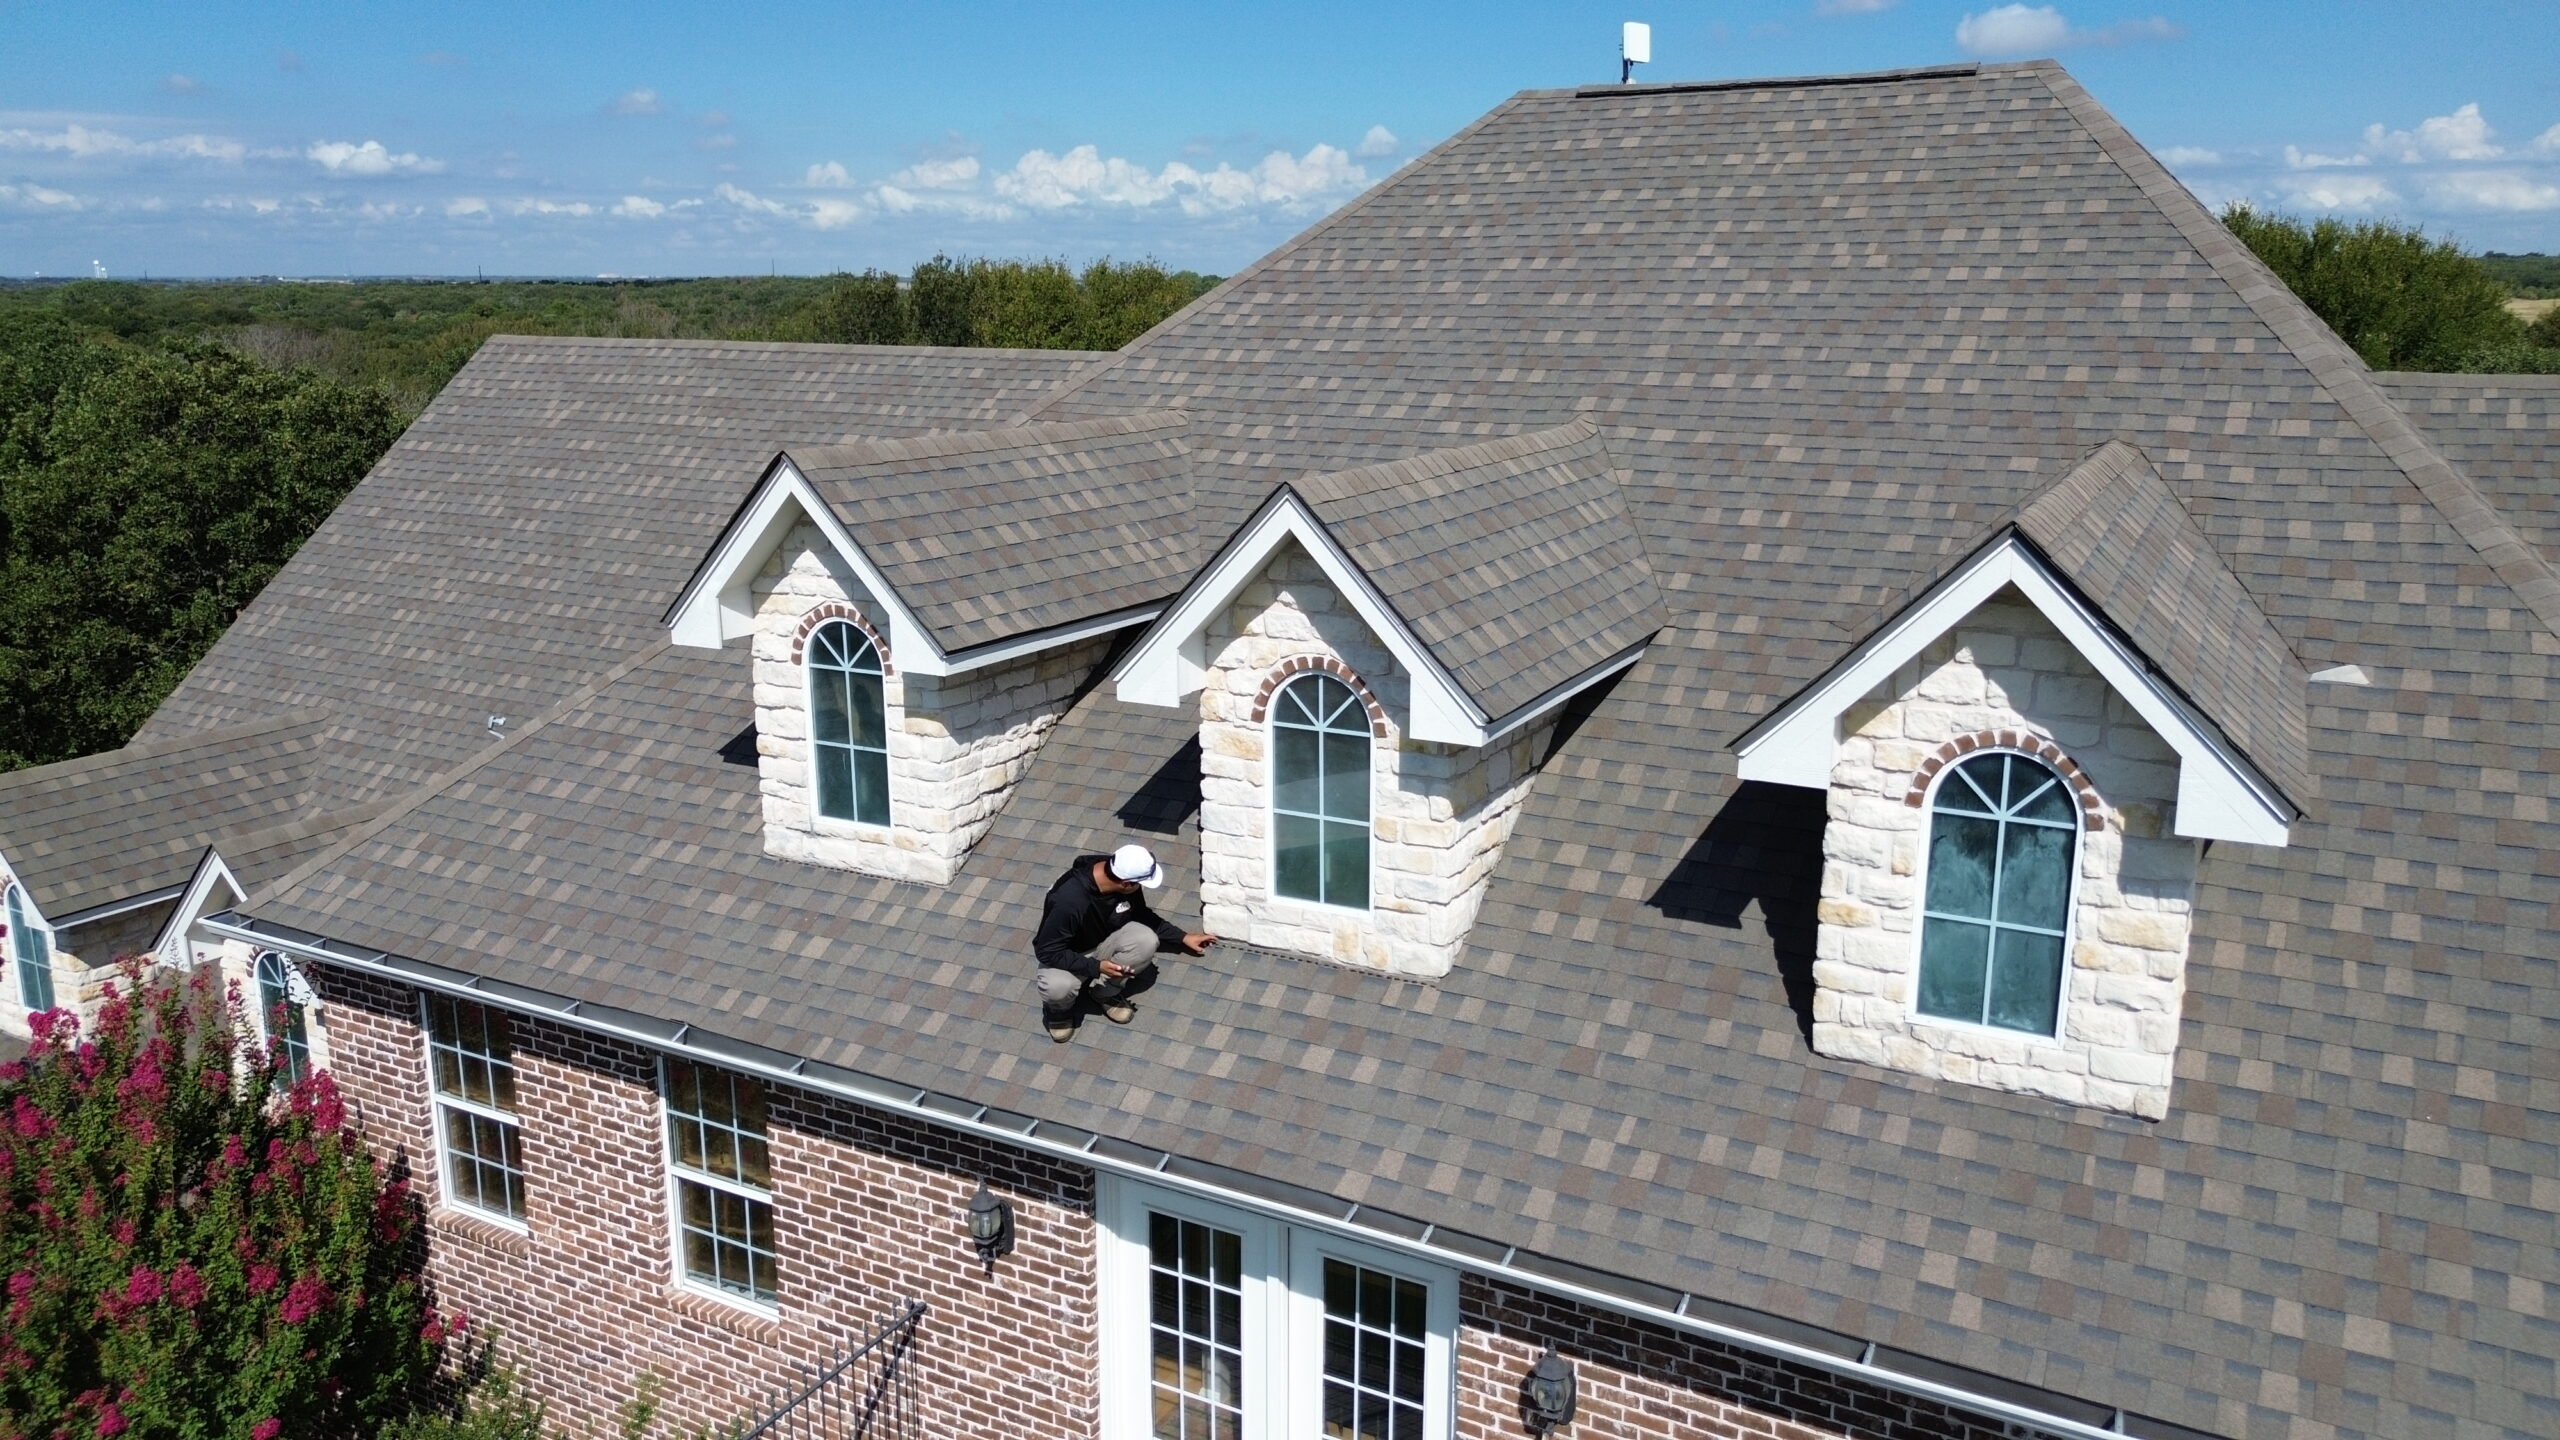
Schedule Regular Roof Inspections
Professional roof inspections can identify flashing problems early before major leaks develop. Many roofing experts recommend inspections at least once or twice per year.
Storm inspections are especially important in areas prone to hail and high winds.
Clean Gutters Regularly
Clogged gutters can cause water to back up onto the roof and increase moisture exposure around flashing areas. Cleaning gutters improves drainage and protects roof edges.
Homeowners should remove leaves, branches, and debris regularly.
Trim Nearby Trees
Overhanging branches can scrape roofing materials and flashing during storms or windy conditions. Falling limbs may also damage flashing components.
Keeping trees trimmed helps reduce the risk of physical roof damage.
Check Attic Moisture
Attic inspections can help identify hidden roof leaks before visible damage appears indoors. Moisture stains, mold, or damp insulation may indicate flashing issues.
Proper attic ventilation also helps reduce moisture buildup.
Repair Small Issues Quickly
Minor flashing problems can worsen rapidly if ignored. Small gaps or loose sections may allow water intrusion during storms.
Prompt repairs help prevent larger structural damage and higher repair costs.
Roof Flashing and Insurance Claims
Roof flashing damage may sometimes be covered by homeowner insurance policies if caused by storms or sudden events. Hail, wind, and falling debris can damage flashing during severe weather.
Insurance companies typically inspect roofs to determine whether flashing damage resulted from covered events or normal wear and tear. Proper documentation can support insurance claims.
Homeowners should take photos of visible damage after storms and schedule professional inspections quickly. Roofing contractors can often help identify storm related flashing issues.
It is important to review insurance policy details carefully because coverage varies between providers. Some policies may limit coverage for older roofs or maintenance related problems.
Roof Flashing in Texas and Oklahoma
Roof flashing is especially important in Texas and Oklahoma because roofs face extreme weather conditions throughout the year. These states experience hailstorms, strong winds, tornadoes, heavy rain, and intense summer heat.
Hail can dent or crack flashing materials while strong winds may loosen flashing around roof penetrations. Flashing systems must withstand repeated weather exposure to protect homes effectively.
High temperatures in Texas can cause roofing materials to expand significantly during summer months. Repeated expansion and contraction may weaken flashing connections over time.
Winter storms in Oklahoma can also affect flashing performance. Ice buildup and freezing temperatures may create stress around flashing areas and increase leak risks.
Because of these climate conditions, regular inspections and professional installation are especially important for homeowners in these regions.
How Long Does Roof Flashing Last?
The lifespan of roof flashing depends on the material type, installation quality, weather conditions, and maintenance. In many cases, flashing can last between 20 and 40 years.
Copper and zinc flashing often last longer than aluminum or galvanized steel. However, even durable materials require regular inspections to identify wear or damage.
Poor installation can shorten flashing lifespan significantly. Incorrect overlaps or exposed fasteners may fail much sooner than properly installed systems.
Routine maintenance and prompt repairs can help maximize flashing performance and extend roof life.
Can Roof Flashing Be Reused?
In some situations, roof flashing may be reused during roofing projects if it remains in excellent condition. However, many roofing professionals recommend replacing flashing during roof replacement.
Old flashing may contain hidden wear, rust, or weak points that could cause future leaks. Installing new flashing with a new roof provides better long term protection.
Reusing damaged flashing to save money can lead to costly repairs later. Roof replacement projects are often the best opportunity to upgrade flashing systems.
Homeowners should discuss flashing replacement options with their roofing contractor during inspections or roof installations.
DIY Flashing Repairs vs Professional Repairs
Some homeowners attempt small flashing repairs themselves, especially when applying sealant or clearing debris. However, roofing work can be dangerous and improper repairs may worsen leaks.
Professional roofers have the experience and equipment needed to repair flashing safely and correctly. They also understand how flashing interacts with roofing materials and drainage systems.
DIY repairs may void roofing warranties if improper materials or installation methods are used. Safety risks are another major concern because roof work involves heights and slippery surfaces.
For significant flashing damage, professional repairs are usually the safest and most effective option.
How Roof Flashing Protects Home Value
A properly functioning roof protects more than just the structure itself. Roof flashing helps preserve home value by preventing moisture damage and extending roof lifespan.
Visible leaks, water stains, or mold problems can reduce property value and discourage potential buyers. Flashing maintenance helps homeowners avoid these issues.
Roof inspections during home sales often include flashing evaluations. Damaged flashing may raise concerns about hidden roof leaks or future repair costs.
Keeping flashing in good condition demonstrates responsible home maintenance and improves overall property appearance.
Questions Homeowners Should Ask Roofing Contractors
When hiring a roofing contractor for flashing work, homeowners should ask several important questions.
- Are you licensed and insured?
- Do you have experience with flashing installation and repair?
- What flashing materials do you recommend?
- Will you replace flashing during roof replacement?
- Do you provide warranties for flashing work?
Asking these questions can help homeowners choose qualified professionals and avoid poor workmanship.
Conclusion
Roof flashing is one of the most important yet overlooked parts of a roofing system. It protects vulnerable roof areas from water intrusion and helps prevent expensive structural damage. Proper flashing installation improves roof performance, extends roofing lifespan, and reduces the risk of leaks.
Flashing is installed around chimneys, skylights, vents, valleys, roof edges, and wall intersections where moisture problems are most likely to occur. Different types of flashing work together to guide water safely off the roof and into drainage systems.
Homeowners should understand the warning signs of flashing problems, including ceiling stains, rust, loose flashing, cracked sealants, and moisture issues. Regular inspections and prompt repairs can help prevent small flashing problems from becoming major roofing emergencies.
Professional roofing contractors play a major role in proper flashing installation and maintenance. Experienced roofers understand how to install flashing systems correctly for long term durability and weather protection.
In Texas and Oklahoma, where roofs face severe storms, hail, heat, and high winds, flashing is especially important for protecting homes. Investing in quality flashing materials and professional installation can save homeowners significant repair costs in the future.
Whether installing a new roof or maintaining an existing one, homeowners should never overlook the importance of roof flashing. It may seem like a small roofing component, but it plays a critical role in protecting homes from water damage and preserving long term property value.
Leave A Comment