
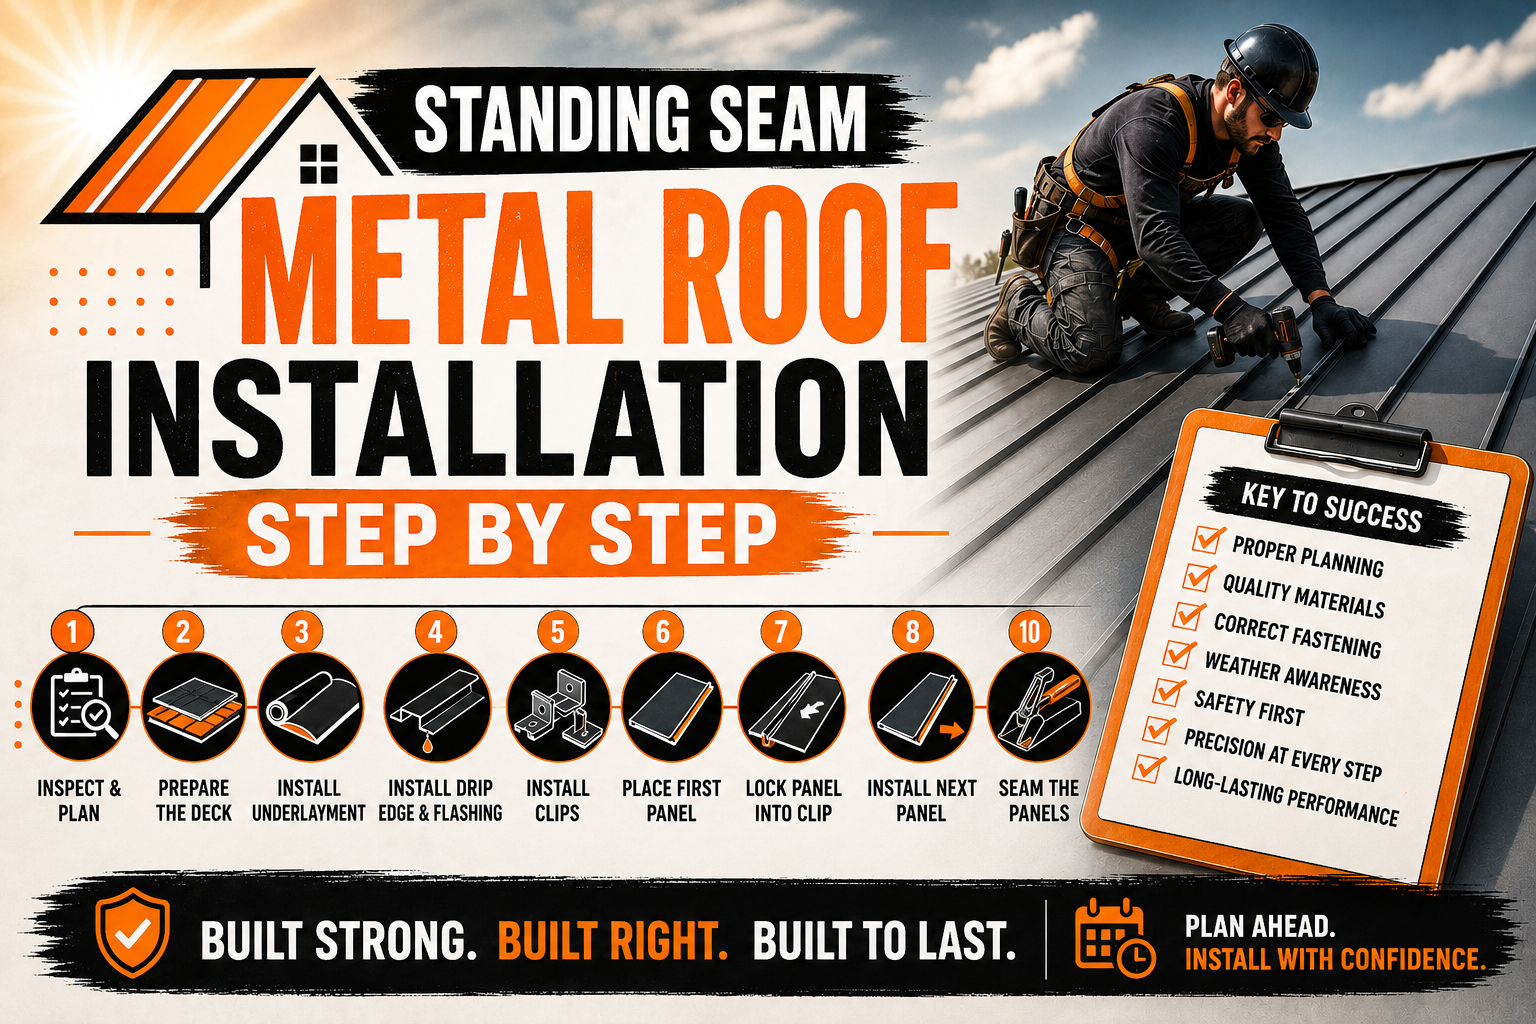
Standing Seam Metal Roof Installation Step by Step
Introduction
Standing seam metal roofing has become one of the most trusted roofing systems for homeowners, commercial property owners, and builders who value durability, weather resistance, and modern design. Unlike traditional exposed fastener metal roofs, standing seam systems feature concealed fasteners hidden beneath raised seams. This unique design improves weather protection while creating a clean and attractive appearance that complements a wide range of architectural styles.
Although standing seam roofing is known for its premium performance, the installation process requires careful planning and precision. Every stage, from inspecting the roof structure to installing underlayment and preparing the first panel, contributes to the roof’s long term reliability. Missing even a small detail during preparation can affect the entire roofing system and lead to costly repairs in the future.
Understanding how a standing seam roof is installed helps homeowners make informed decisions when planning a roofing project. Even if you intend to hire professional installers, knowing the installation process allows you to communicate more effectively with contractors and recognize quality workmanship throughout the project.
This guide explains the complete standing seam metal roof installation process in simple, beginner friendly language. In this first part, we will focus on understanding the roofing system, selecting materials, inspecting the roof, gathering tools, following safety practices, and preparing the roof before the first panel is installed.
What Is a Standing Seam Metal Roof?
A standing seam metal roof is a roofing system made from long metal panels connected by raised vertical seams. These seams lock together mechanically or snap into place, concealing the fasteners beneath the panel edges instead of exposing them to weather. This design significantly improves water resistance and reduces maintenance compared to many traditional metal roofing systems.
The raised seams typically extend one to two inches above the flat surface of the roofing panels. Besides creating a distinctive architectural appearance, these seams help direct water downward toward the gutters while reducing opportunities for moisture infiltration.
Standing seam roofing systems are manufactured using several different metals, including galvanized steel, Galvalume steel, aluminum, zinc, and copper. Each material offers unique advantages depending on climate conditions, budget, and design preferences.
One of the defining features of this roofing system is its ability to accommodate thermal movement. Because the fastening clips remain hidden beneath the seams, the panels can expand and contract naturally as temperatures change without placing excessive stress on the fasteners.
Modern standing seam roofs are available in numerous colors, finishes, and panel widths. This allows homeowners to select a design that complements both contemporary and traditional architecture while maintaining the performance benefits associated with metal roofing.
The combination of concealed fasteners, durable materials, and engineered panel systems makes standing seam roofing one of the most reliable roofing options available for both residential and commercial buildings.
Benefits of Standing Seam Metal Roofing
Standing seam metal roofing offers several advantages that explain its growing popularity among property owners. While the initial investment is often higher than some traditional roofing materials, the long term benefits frequently outweigh the additional upfront cost.
One of the greatest advantages is durability. Properly installed standing seam roofs can withstand harsh weather conditions, including heavy rain, snow, hail, and strong winds. Their concealed fastening system also reduces the number of exposed openings where moisture could potentially enter the roofing system.
Another important benefit is longevity. With proper installation and regular maintenance, many standing seam roofs remain in excellent condition for several decades. This long service life often reduces the need for costly roof replacements over time.
Energy efficiency is another reason many homeowners choose standing seam roofing. Reflective coatings help reduce heat absorption during warmer months, lowering attic temperatures and reducing cooling costs. This improved energy performance contributes to a more comfortable indoor environment throughout the year.
Standing seam roofs also require relatively little maintenance. Since the fasteners remain protected beneath the seams, they experience less exposure to sunlight, rain, and temperature changes. This helps preserve the integrity of the fastening system over many years.
The sleek appearance of standing seam roofing enhances curb appeal as well. Clean vertical lines create a modern architectural style that remains attractive for decades without appearing outdated.
Finally, many standing seam roofing materials are recyclable. Their long lifespan and recyclable composition make them an environmentally responsible roofing option for homeowners seeking sustainable building materials.
Understanding the Components of a Standing Seam Roof System
A standing seam roof consists of several specialized components that work together to create a durable, weather resistant roofing system. Understanding these parts helps beginners appreciate why every stage of installation is important.
The roof deck serves as the structural base that supports the entire roofing system. Typically constructed from plywood or oriented strand board, it must remain solid, level, and free from damage before installation begins.
Above the roof deck lies the underlayment. This protective layer acts as a secondary moisture barrier beneath the metal panels, helping prevent water from reaching the structural decking if moisture passes beneath the roofing surface.
Standing seam panels form the visible exterior of the roof. These long metal sheets are manufactured with raised edges that lock together to create weather resistant seams while concealing the fastening system.
Panel clips secure each roofing panel to the roof deck. Rather than fastening directly through the panel surface, clips allow the metal to expand and contract naturally without creating exposed screw penetrations.
Flashing protects areas where different roof surfaces intersect. Valleys, chimneys, skylights, plumbing vents, and wall transitions all require carefully installed flashing to prevent water intrusion.
Trim components such as drip edges, gable trim, eave trim, and ridge caps provide both protection and a finished appearance. These pieces cover exposed panel edges while directing water safely away from vulnerable areas.
Ventilation products complete the roofing system by allowing continuous airflow beneath the roof. Proper ventilation helps regulate attic temperatures, reduce condensation, and extend the lifespan of both the roofing materials and the roof structure itself.
Every component performs a specific function. When installed correctly and combined into a complete roofing system, they provide exceptional protection against weather while maintaining structural stability for many years.
Types of Standing Seam Metal Roof Panels
Standing seam roofing systems are available in several panel designs, each developed to meet different structural and installation requirements. Selecting the appropriate panel profile is an important part of the planning process.
Snap lock panels are among the most popular residential options. Their seams simply snap together over concealed clips, making installation faster than mechanically seamed systems while still providing excellent weather protection.
Mechanically seamed panels require specialized equipment that folds adjacent panel edges together after installation. This creates an exceptionally strong seam capable of performing well in regions with heavy rainfall, snow, or high winds.
Nail strip panels eliminate separate clips by incorporating an integrated fastening flange. Although installation may be somewhat simpler, these panels generally allow less thermal movement than clip based systems.
Double lock standing seam systems provide maximum weather resistance for demanding environments. Their seams undergo multiple folding operations, producing a secure connection suitable for commercial buildings and challenging climates.
Panel width and rib height also vary between manufacturers. Wider panels reduce the number of seams across the roof, while narrower panels may create a more traditional architectural appearance.
Material thickness, commonly referred to as gauge, affects both strength and performance. Thicker panels generally provide improved durability but may also increase overall project costs.
Selecting the right panel profile depends on roof design, local climate, architectural style, budget, and manufacturer recommendations.
Planning the Installation Project
Successful standing seam roof installation begins with careful planning. Thorough preparation helps prevent delays, reduces material waste, and ensures the installation progresses efficiently from beginning to end.
The first planning task involves obtaining accurate roof measurements. Every roof section, valley, ridge, dormer, chimney, skylight, and overhang must be measured carefully before materials are ordered.
Material calculations extend beyond the roofing panels themselves. Installers must also account for panel clips, underlayment, flashing, trim pieces, fasteners, closure strips, ridge vents, sealants, and specialized accessories required by the selected roofing system.
Project scheduling should consider seasonal weather conditions. Installing metal roofing during heavy rain, snow, or strong winds increases safety risks while making accurate installation more difficult.
Building permits and local regulations may also affect project planning. Some jurisdictions require inspections before, during, or after roofing work. Verifying these requirements in advance helps avoid unnecessary delays.
Material delivery should be coordinated carefully. Long roofing panels require adequate storage space where they remain elevated, dry, and protected from damage before installation begins.
Finally, installers establish a detailed work sequence before arriving on site. Planning each stage in advance improves efficiency while reducing the possibility of overlooked installation steps.
Roof Inspection and Structural Preparation
Before any roofing materials are installed, the existing roof structure must undergo a complete inspection. This evaluation confirms the building can safely support the new roofing system while identifying repairs that should be completed beforehand.
The roof deck is examined first. Water damage, rot, mold, delamination, or structural weakness must be corrected before installation proceeds because standing seam panels require a stable and level foundation.
Roof framing also receives careful attention. Rafters and trusses should remain structurally sound without signs of excessive sagging, cracking, or deterioration. Although metal roofing is relatively lightweight, existing structural issues should always be repaired before installing new materials.
The roof slope is another important consideration. Every standing seam roofing system has minimum pitch requirements established by the manufacturer. Installing an unsuitable panel profile on an excessively low slope may reduce weather resistance.
Existing flashing around roof penetrations should also be evaluated. Old flashing that shows corrosion, deformation, or previous repair attempts is typically replaced during installation to ensure consistent waterproofing.
Installers inspect fascia boards, soffits, gutters, and roof edges for damage that could interfere with the new roofing system. Addressing these issues before installation produces a cleaner and more durable finished roof.
Attic ventilation is reviewed during the inspection as well. Balanced ventilation helps reduce condensation beneath the roof while improving energy efficiency throughout the home.
Completing a comprehensive structural assessment before installation minimizes unexpected complications later in the project.
Essential Safety Equipment
Standing seam roof installation involves working at significant heights while handling long metal panels and specialized tools. Maintaining a safe work environment protects both installers and the quality of the roofing project.
Personal protective equipment should always be worn throughout installation. Safety glasses protect against flying metal fragments, while heavy duty gloves reduce the risk of cuts from sharp panel edges. Hard hats provide additional protection whenever materials are being lifted onto the roof.
Roof harnesses are essential when working on elevated surfaces. Properly secured fall protection systems significantly reduce the risk of serious accidents, particularly on steep roof slopes.
Footwear also plays an important role. Non slip work boots with soft soles provide improved traction while minimizing the possibility of scratching finished metal panels during installation.
Ladders should be inspected before use and positioned on stable ground. They should extend above the roof edge to allow safe access while climbing onto or descending from the roof.
The work area should remain organized throughout the project. Loose tools, packaging materials, and scattered fasteners create unnecessary tripping hazards that can easily be prevented through regular cleanup.
Weather conditions deserve constant attention as well. Wet metal surfaces become extremely slippery, making installation dangerous during rain, frost, or high winds. Suspending work until conditions improve helps protect both workers and roofing materials.
Tools and Materials Required
Installing a standing seam metal roof requires specialized tools designed for accurate measurements, clean cuts, secure fastening, and proper seam formation. Using the correct equipment improves installation quality while reducing unnecessary material damage.
The following tools are commonly required before installation begins:
- Tape measure
- Chalk line
- Utility knife
- Aviation snips
- Metal cutting saw with an approved blade
- Screw gun
- Drill
- Hand seamer
- Mechanical seaming tool where required
- Level
- Ladder
- Roof safety harness
In addition to these tools, installers prepare all necessary materials before work begins. These include standing seam panels, concealed panel clips, underlayment, ice and water shield where required, flashing components, ridge caps, trim pieces, closure strips, sealants, ventilation products, and manufacturer approved fasteners.
Organizing both tools and materials before installation improves efficiency throughout the project. Workers spend less time searching for equipment and more time focusing on accurate installation.
Installing the Drip Edge and Starter Trim
With the roof deck fully prepared and the underlayment securely installed, the next stage is installing the drip edge and starter trim. These components may seem minor compared to the roofing panels, but they play a major role in protecting the roof from water infiltration and ensuring the panels are installed accurately.
The drip edge is installed along the eaves and rake edges of the roof. Its primary purpose is to guide rainwater into the gutter system while preventing moisture from reaching the roof deck. Without a properly installed drip edge, water can seep beneath the roofing materials and eventually damage the underlying structure.
Starter trim is installed after the drip edge and serves as the foundation for the first standing seam panel. It provides a secure attachment point and ensures the first panel remains perfectly aligned throughout the installation process. Since every remaining panel follows the first one, even a small error at this stage can affect the entire roof.
Manufacturers often provide starter trim designed specifically for their standing seam systems. Using compatible components helps ensure proper fit, easier installation, and compliance with warranty requirements. Mixing products from different manufacturers can sometimes create fitment issues that compromise roof performance.
The starter trim is carefully fastened according to the manufacturer’s recommended spacing. Installers use measuring tools repeatedly during this process because maintaining a perfectly straight reference line is essential for achieving uniform panel alignment.
Once the drip edge and starter trim have been securely installed, the roof is ready for the precise layout work that determines the position of every standing seam panel.
Measuring and Laying Out the Roof
Accurate layout is one of the most important aspects of standing seam roof installation. Proper measurements ensure the panels are evenly distributed across the roof and help avoid narrow panels or uneven spacing near the roof edges.
Installers begin by measuring the overall roof width and comparing it with the selected panel width. This calculation helps determine whether panel spacing should be adjusted slightly so the roof appears balanced once installation is complete.
Chalk lines are then snapped across the roof surface to establish straight installation guides. These reference lines help installers maintain consistent alignment from the eave to the ridge while preventing gradual shifts in panel position.
The roof is also checked for squareness before panel installation begins. Older homes occasionally have roof structures that are not perfectly square, making careful layout even more important. Minor adjustments during the planning stage help maintain a professional finished appearance.
Measurements are verified multiple times before the first panel is positioned. Although this process requires additional time, correcting layout errors early prevents much larger problems later in the installation.
Special attention is given to roof valleys, hips, dormers, skylights, and chimneys. Planning panel placement around these features reduces unnecessary cutting while improving both appearance and weather resistance.
The layout process may seem simple, but it provides the foundation for the entire roofing system. Careful preparation during this stage contributes significantly to the overall quality of the finished installation.
Installing Panel Clips and Fastening Systems
Unlike exposed fastener metal roofing, standing seam systems rely on concealed clips to secure the panels. These clips remain hidden beneath the raised seams, protecting the fasteners from direct exposure to sunlight, rain, and changing weather conditions.
Each clip is attached directly to the roof deck using manufacturer approved fasteners. The clips are positioned according to specified spacing requirements that vary depending on panel design, roof slope, wind loads, and local building codes.
Clip installation requires careful attention because every clip influences the alignment of the roofing panels. Incorrect spacing may cause the panels to shift slightly during installation, affecting seam engagement and overall roof appearance.
One of the greatest advantages of concealed clips is their ability to accommodate thermal expansion. Metal expands during warm weather and contracts during colder temperatures. Properly installed clips allow controlled panel movement while maintaining structural stability.
Installers inspect each clip before continuing with panel installation. Loose fasteners, bent clips, or incorrect placement should be corrected immediately because these issues become much more difficult to repair after the panels have been installed.
Some roofing systems use fixed clips, while others incorporate sliding clips designed specifically for longer panel lengths. Sliding clips provide additional flexibility by allowing greater movement during seasonal temperature changes.
By completing clip installation carefully, installers create a secure fastening system that supports the roof for decades while preserving its clean, fastener free appearance.
Positioning and Installing the First Standing Seam Panel
The first standing seam panel is arguably the most important panel on the entire roof. Every additional panel depends on its alignment, making accuracy essential from the very beginning.
The panel is carefully lifted onto the roof using multiple workers whenever necessary. Long metal panels can bend if handled improperly, so careful transportation and positioning help prevent accidental damage before installation begins.
The panel is placed against the starter trim and aligned with the previously established chalk lines. Installers verify measurements repeatedly before securing the panel because even a slight deviation can affect every remaining panel.
Once the panel has been positioned correctly, the concealed clips are engaged along the panel edge. Fasteners secure the clips to the roof deck while leaving the panel surface free from exposed screw penetrations.
The panel should sit flat against the roof without twisting or lifting at the edges. Any irregularities discovered during this stage are corrected before additional panels are installed.
Installers also confirm that the panel overhang at the eaves matches manufacturer recommendations. Proper overhang allows efficient water drainage into the gutters while minimizing wind uplift.
Completing the first panel correctly establishes a reliable foundation for the remainder of the roofing system. Patience during this stage saves considerable time and effort later in the project.
Installing Additional Panels and Locking the Seams
After the first panel has been secured successfully, the remaining panels are installed sequentially across the roof. Each new panel connects to the previous one using the standing seam profile designed by the manufacturer.
The second panel is positioned carefully so its edge engages the concealed clips already attached to the roof deck. The adjacent panel seam is then snapped or mechanically folded into place depending on the roofing system being used.
Mechanical seaming systems require specialized equipment that folds the panel edges together. This creates an exceptionally strong connection capable of resisting severe weather while maintaining excellent waterproof performance.
Snap lock systems simplify installation by allowing the seams to lock together without specialized folding equipment. Although easier to install, they still require careful alignment to ensure complete engagement along the entire panel length.
Throughout installation, workers frequently verify panel alignment using measuring tapes and chalk lines. Small alignment corrections made early help maintain consistent spacing across the roof surface.
Installers avoid dragging panels over one another because this can scratch protective finishes. Instead, panels are lifted into position and lowered carefully before engaging the seams.
As each panel is installed, the roof begins developing its characteristic appearance of clean vertical lines extending continuously from the eaves to the ridge.
Cutting Panels Around Roof Penetrations
Most roofs include features that interrupt the panel layout, including plumbing vents, chimneys, skylights, dormers, roof windows, and ventilation pipes. These areas require careful panel modification to maintain both appearance and weather resistance.
Accurate measurements are essential before any cutting begins. Installers measure each opening carefully and transfer those dimensions to the roofing panel using appropriate marking tools.
Metal cutting should be performed using tools recommended by the panel manufacturer. Aviation snips, electric shears, or approved metal cutting equipment produce clean edges while minimizing damage to protective coatings.
High speed abrasive cutting wheels are generally avoided because they generate excessive heat. This heat may damage factory finishes and increase the possibility of corrosion over time.
After each cut, metal shavings are removed immediately from both the panel and the roof surface. Leaving these particles in place can result in rust stains after exposure to moisture.
Pipe penetrations receive specially designed flashing boots that create watertight seals around circular openings. Chimneys and skylights require custom flashing systems that integrate with the standing seams while directing water safely around the penetration.
Each modified panel is test fitted before final installation. Confirming proper fit before fastening helps maintain a clean appearance while reducing unnecessary material waste.
Installing Valleys, Flashing, and Sidewall Details
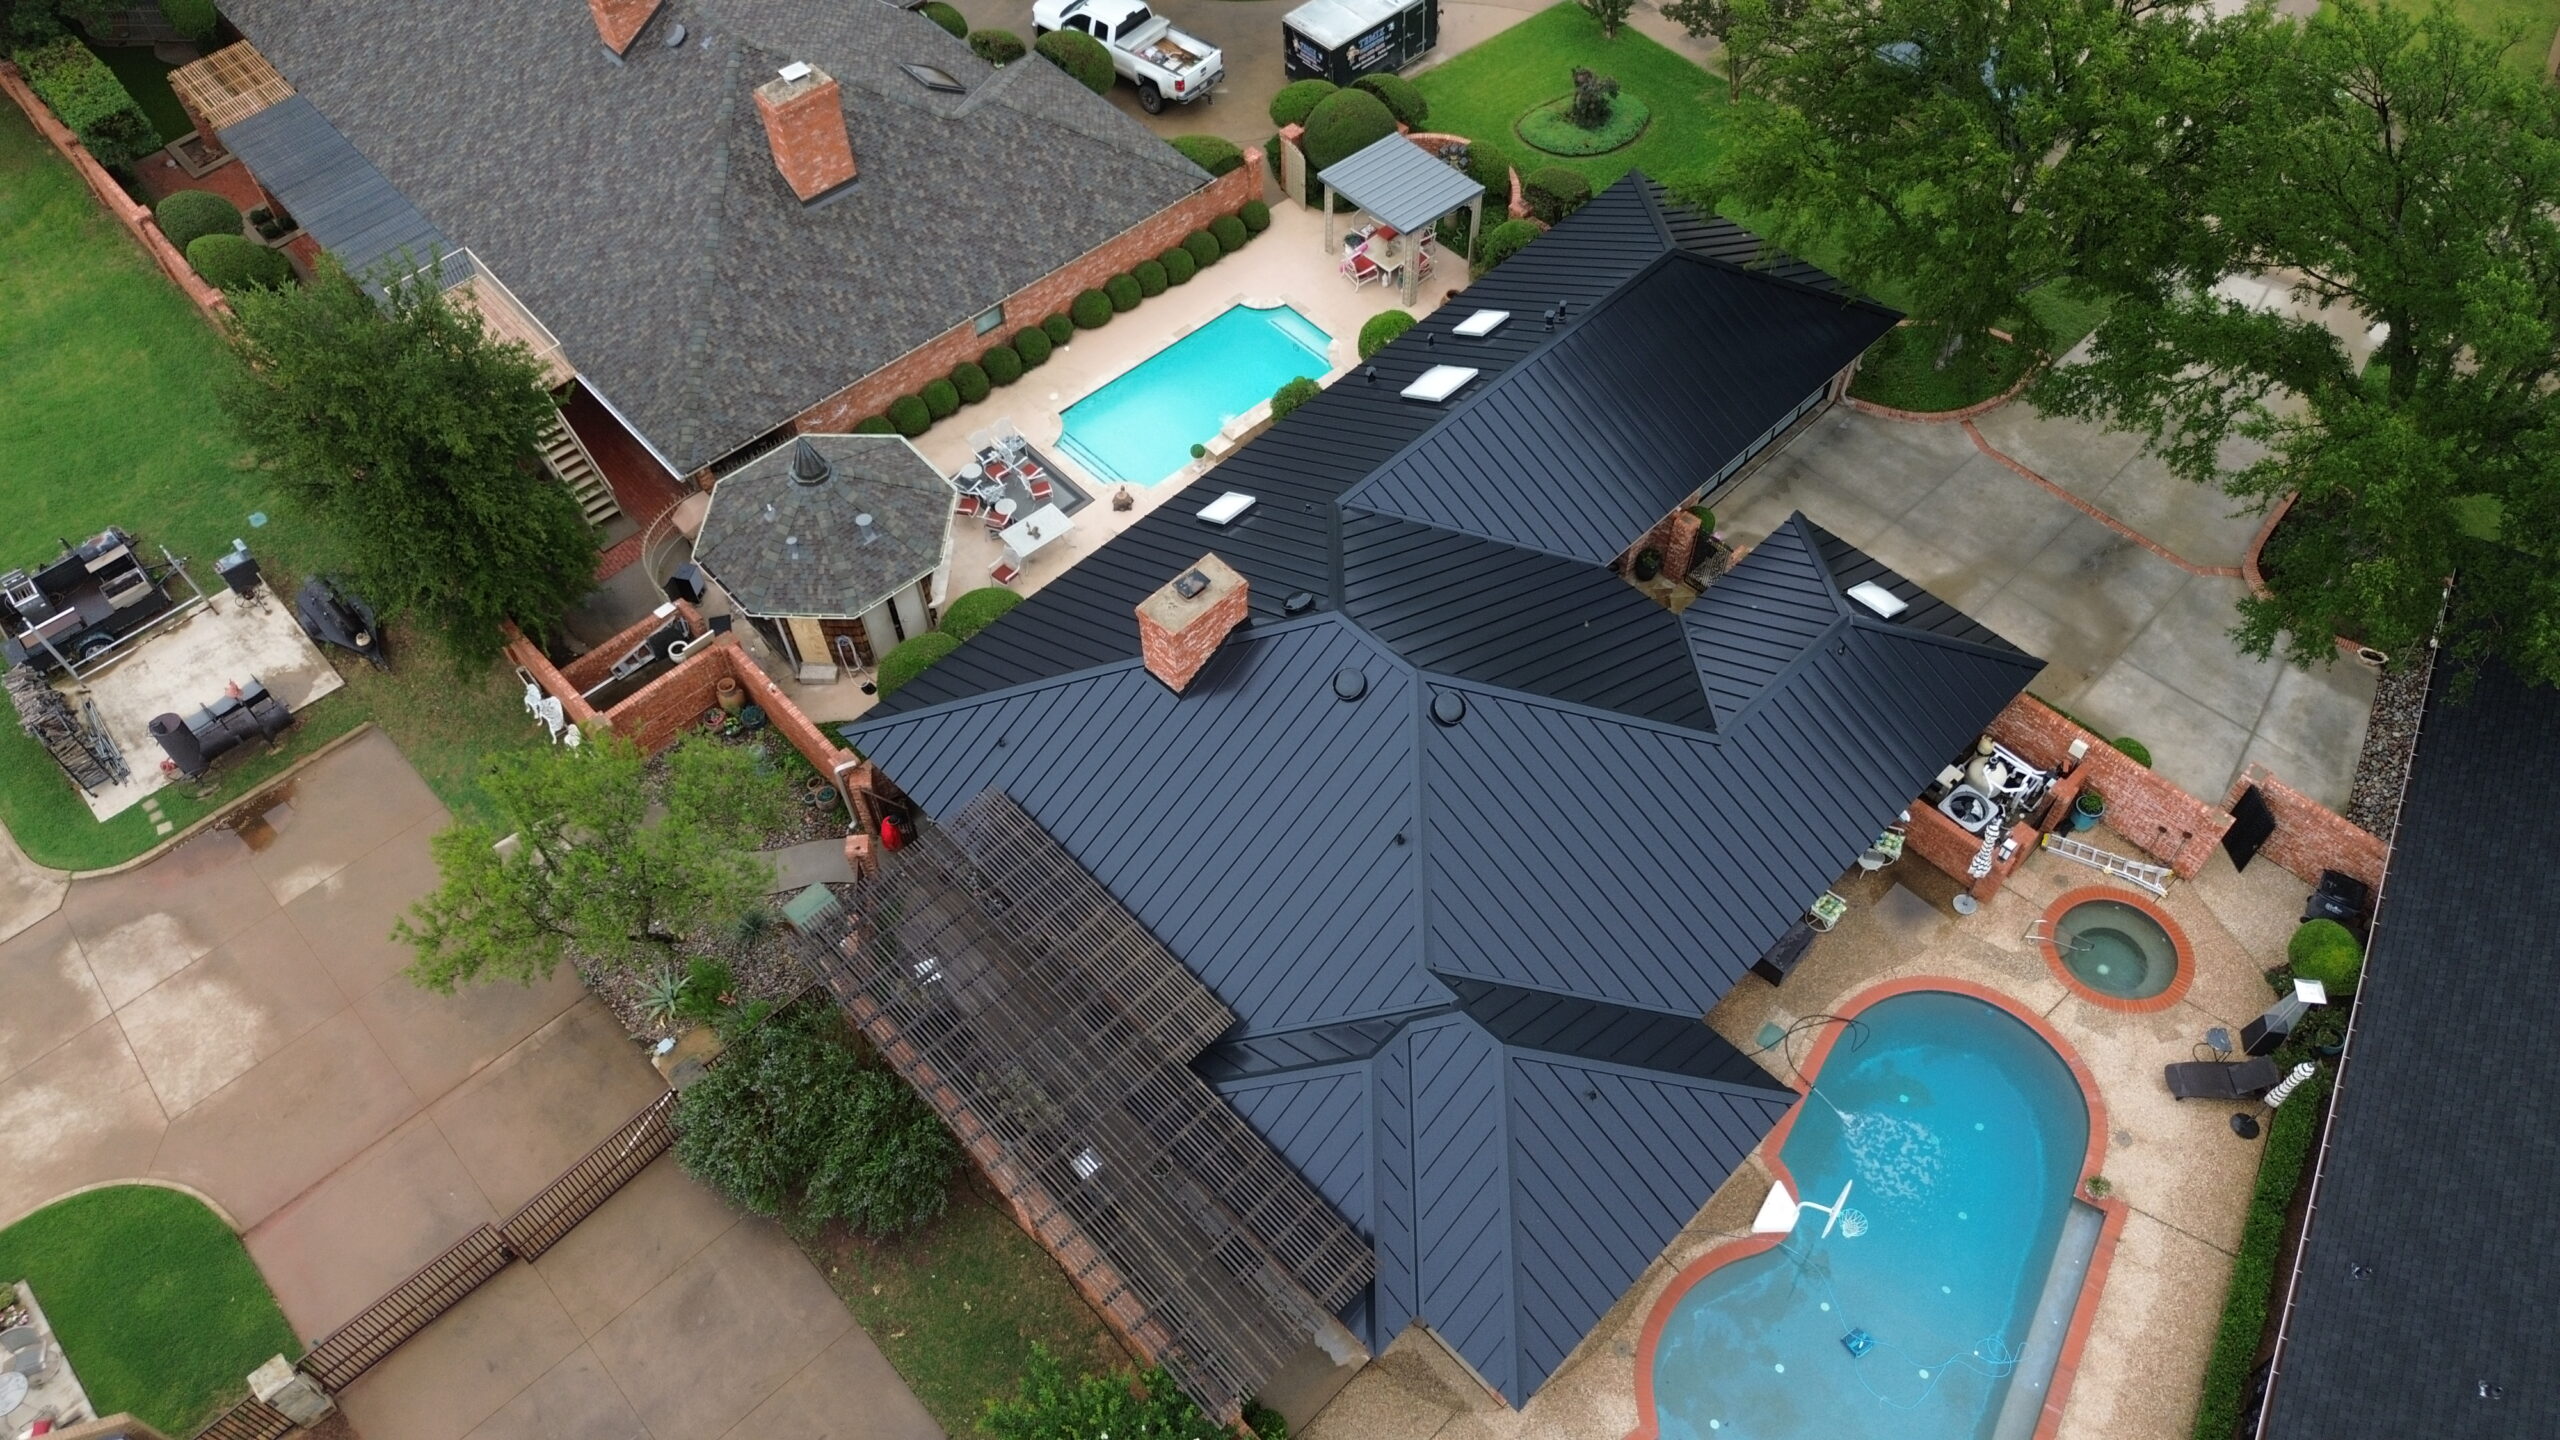
Roof valleys and wall intersections require some of the most detailed workmanship during standing seam roof installation. These areas experience concentrated water flow, making proper flashing installation essential for long term leak prevention.
Valley flashing is installed before the adjacent roofing panels. Wide metal valley sections create a durable drainage channel that directs water safely toward the gutters during heavy rainfall.
Sidewall flashing is installed where the roof meets a vertical wall. Each flashing section overlaps the roofing panels correctly while extending behind the wall covering to prevent moisture intrusion.
Chimney flashing usually consists of multiple individual components rather than a single piece. Base flashing, step flashing, and counter flashing work together to create a complete waterproof system around the chimney.
Endwall flashing protects areas where roofing panels terminate against vertical surfaces. Proper overlap ensures water flows over the flashing rather than beneath it.
Installers carefully inspect every flashing joint during installation. Even small alignment errors in these critical areas can eventually allow moisture to penetrate beneath the roofing system.
Taking extra time during flashing installation significantly improves the roof’s long term performance. Many roofing problems originate around penetrations rather than across the open roof surface.
Ridge Vent Installation and Ridge Cap Placement
Once the roofing panels have reached the ridge, the installation enters its finishing stage. Proper ridge construction provides both weather protection and effective attic ventilation.
If the roofing system includes ridge ventilation, ventilation material is installed before the ridge cap. The vent allows warm, moist attic air to escape while preventing insects, rain, and debris from entering beneath the roofing system.
Ridge caps are then positioned over the peak of the roof. These components cover the upper panel ends while protecting the ridge from direct weather exposure.
Closure strips are often installed beneath the ridge cap to seal the spaces created by the panel profile. These strips help prevent wind driven rain from entering while maintaining appropriate airflow through vented systems.
Fasteners used for ridge caps are installed according to manufacturer recommendations. Consistent spacing and proper tightening help maintain both appearance and structural integrity.
Installers verify that ridge sections overlap correctly before completing the installation. Proper overlap directs water away from joints and contributes to the roof’s overall weather resistance.
With the ridge cap securely installed, the standing seam roofing system is structurally complete. The remaining work focuses on finishing details, inspection, maintenance guidance, and quality assurance.
Common Standing Seam Installation Mistakes to Avoid
Standing seam roofing offers exceptional durability, but only when installed correctly. Several common mistakes can reduce roof performance, shorten its lifespan, or void manufacturer warranties.
One frequent mistake is beginning installation with an improperly aligned first panel. Even a small alignment error becomes increasingly noticeable as additional panels are installed across the roof.
Incorrect clip spacing is another common problem. Clips positioned too far apart or secured improperly may affect panel stability and reduce the roof’s ability to accommodate thermal movement.
Improper seam engagement can also create serious issues. Snap lock seams that are not fully engaged or mechanically seamed panels that are folded incorrectly may allow water infiltration during severe weather.
Some installers accidentally over tighten fasteners securing the clips. Excessive tightening can restrict panel movement, increasing stress on the roofing system as temperatures fluctuate throughout the year.
Using incompatible flashing components is another avoidable mistake. Mixing products from different manufacturers may create gaps or improper fitment that compromise waterproof performance.
Cutting panels with unsuitable tools can damage factory protective coatings. Excessive heat generated during cutting may increase the risk of corrosion while reducing the roof’s long term durability.
Finally, neglecting manufacturer installation instructions remains one of the most serious errors. Every standing seam roofing system has unique fastening patterns, clip spacing requirements, seam engagement methods, and flashing details that must be followed carefully.
Installing Gable Trim and Finishing Components
Once the standing seam panels, flashing, valleys, and ridge caps have been installed, the final finishing components are added to complete the roofing system. These parts improve the roof’s appearance while also providing important protection against wind, rain, insects, and debris. Although they are installed near the end of the project, their role in the roof’s long term performance should not be underestimated.
Gable trim is installed along the sloping edges of the roof where the panels terminate at the gable ends. This trim covers exposed panel edges, giving the roof a clean and finished appearance while protecting them from wind driven rain. Properly installed gable trim also reduces the possibility of wind lifting the panel edges during severe weather.
Eave trim receives one final inspection to ensure it remains aligned with the drip edge and starter trim installed earlier. Since rainwater flows directly toward the eaves, proper positioning is essential for efficient drainage into the gutter system. Even a slight misalignment can affect water flow over time.
Transition trim is installed wherever different roof sections meet. This may include areas where roof pitches change or where additions connect to the original structure. Transition pieces must fit tightly against the roofing panels while maintaining the natural flow of rainwater across the roof.
End wall and sidewall trim are also inspected and adjusted if necessary. These components create secure transitions between the roof and adjacent walls, reducing the possibility of water entering behind siding or masonry. Proper overlap between flashing and trim remains essential throughout these areas.
Decorative trim pieces may also be added depending on the roof design. While these components enhance the overall appearance, they should never interfere with ventilation or drainage. Every finishing component should contribute to both appearance and functionality.
After all trim has been secured, installers perform a complete visual inspection of the roof edges. Uniform spacing, straight lines, and consistent fastening demonstrate careful workmanship and provide confidence that the installation has been completed according to manufacturer recommendations.
Final Inspection and Quality Control
A professional standing seam roof installation is not considered complete until every component has been carefully inspected. The final quality control process helps identify small issues before the roof is exposed to years of changing weather conditions.
The inspection begins by evaluating the overall appearance of the roof. Installers confirm that all standing seams remain straight from the eaves to the ridge without noticeable waviness or misalignment. Consistent panel spacing contributes to both structural integrity and visual appeal.
Each concealed fastening clip is checked indirectly by inspecting the panel alignment and seam engagement. Since the clips remain hidden beneath the seams, installers verify their performance by ensuring the panels remain securely positioned without visible movement.
Flashing receives detailed attention because roof penetrations are among the most common locations for future leaks. Chimneys, skylights, plumbing vents, valleys, and wall intersections are examined carefully to verify proper overlap and secure attachment.
The ridge cap and ventilation system are inspected to confirm they provide balanced airflow while preventing rain or debris from entering beneath the roof. Proper ventilation plays an important role in preventing condensation and extending the lifespan of the roofing system.
Fasteners used for trim pieces and ridge caps are checked individually. Every screw should be seated correctly with sealing washers compressed evenly but not excessively. Loose or damaged fasteners are replaced immediately before the project is completed.
Many professional contractors perform a controlled water test on selected roof sections. Water is directed over flashing and drainage areas to verify proper runoff while confirming that no leaks develop beneath the roofing system.
The attic is also inspected from inside the building. Looking upward allows installers to detect any unexpected daylight around penetrations or roof transitions that may indicate incomplete sealing.
Finally, project documentation is prepared for the homeowner. This typically includes warranty information, maintenance recommendations, manufacturer documentation, and photographs showing the completed installation. Keeping these records organized provides valuable reference material for future inspections and maintenance.
Cleaning the Roof After Installation
Cleaning the roof is one of the final tasks before the project is officially completed. Construction activities often leave behind small debris that should be removed immediately to preserve both the appearance and performance of the roofing system.
Metal shavings produced while cutting panels are among the most important materials to remove. These tiny fragments can rust after exposure to rain and stain painted roof panels if they remain on the surface. Thorough cleaning prevents unnecessary cosmetic damage.
Protective plastic film, packaging materials, sealant containers, unused fasteners, and scrap metal should also be collected from the roof. Leaving construction debris behind creates unnecessary maintenance issues and reduces the professional appearance of the finished project.
Gutters and downspouts are cleaned to remove any metal fragments or construction waste that may have accumulated during installation. Proper drainage allows rainwater to flow efficiently away from the building while preventing future blockages.
The roof surface may be washed using methods recommended by the manufacturer. Soft cloths, low pressure water, and approved cleaning solutions are generally preferred because they remove dirt without damaging protective coatings.
Harsh chemicals, abrasive brushes, or pressure washing equipment should usually be avoided unless specifically approved by the roofing manufacturer. Excessive cleaning force may damage painted finishes or protective coatings designed to resist corrosion.
Surrounding landscaping also deserves attention. Installers carefully inspect lawns, flower beds, and walkways for loose screws or metal fragments that could become hazardous during routine yard maintenance.
A clean roof not only looks better but also begins its service life without unnecessary contaminants that might affect long term performance.
Maintenance Tips for Standing Seam Metal Roofs
One of the greatest advantages of standing seam roofing is its relatively low maintenance requirement. Nevertheless, routine inspections and simple preventive care help maximize the roof’s lifespan while reducing the likelihood of expensive repairs.
Homeowners should inspect the roof visually at least twice each year, preferably during spring and autumn. Additional inspections following severe storms help identify damage caused by high winds, hail, or falling tree branches before small issues become larger problems.
The following maintenance practices are recommended:
- Remove leaves, branches, and accumulated debris from the roof surface.
- Clean gutters and downspouts regularly to maintain proper drainage.
- Inspect flashing around chimneys, skylights, and roof penetrations.
- Check trim pieces for signs of movement after severe storms.
- Trim nearby tree branches that may scrape the roof during windy conditions.
- Schedule professional inspections every few years for a comprehensive evaluation.
Standing seam roofs should be walked on only when necessary. Although they are extremely durable, unnecessary foot traffic increases the possibility of cosmetic damage or accidental denting. When roof access is required, proper walking techniques should always be followed according to manufacturer recommendations.
Cleaning should be performed only with products approved for painted metal roofing. Mild detergents and soft cleaning materials remove dirt effectively without damaging the protective finish.
Any scratches that penetrate the protective coating should be repaired promptly using manufacturer approved touch up products. Addressing minor cosmetic damage early helps prevent corrosion from developing later.
Maintaining written records of inspections, maintenance activities, and repairs provides valuable information for warranty purposes and future property resale.
Expected Lifespan and Long Term Performance
Standing seam metal roofing is widely recognized as one of the most durable roofing systems available. When manufactured from high quality materials and installed correctly, it can provide reliable protection for several decades with relatively little maintenance.
The following table compares standing seam roofing with several other common roofing materials.
| Roofing Material | Typical Lifespan | Maintenance Level | Fastener Exposure |
|---|---|---|---|
| Asphalt Shingles | 15 to 30 years | Moderate | Exposed |
| Corrugated Metal Roofing | 30 to 50 years | Moderate | Exposed |
| Standing Seam Steel | 40 to 70 years | Low | Concealed |
| Standing Seam Aluminum | 40 to 60 years | Low | Concealed |
| Copper Standing Seam | 70 years or more | Very Low | Concealed |
One reason standing seam roofs last so long is their concealed fastening system. Because the fasteners remain protected beneath the raised seams, they are not directly exposed to sunlight, rain, or temperature fluctuations. This reduces the likelihood of fastener deterioration over time.
Modern paint systems also contribute significantly to long term durability. High performance coatings resist fading, chalking, corrosion, and ultraviolet damage while maintaining an attractive appearance for many years.
Standing seam roofs perform exceptionally well in severe weather conditions. Properly installed systems can resist heavy rainfall, strong winds, hail, and substantial snow loads without compromising structural integrity.
Energy efficiency remains another important long term benefit. Reflective coatings reduce solar heat gain, helping lower cooling costs during warmer months while improving indoor comfort throughout the year.
Fire resistance further increases the value of standing seam roofing. Metal roofing materials are noncombustible and provide an additional level of protection in areas where wildfire risk is a concern.
Cost Factors for Standing Seam Metal Roof Installation
Standing seam roofing is considered a premium roofing system, and several factors influence its overall installation cost. Understanding these variables helps homeowners prepare realistic project budgets while comparing contractor estimates.
Material selection is one of the largest cost factors. Galvanized steel generally offers the most economical option, while aluminum, zinc, and copper require larger investments due to their specialized performance characteristics and material costs.
Roof size naturally affects the amount of material and labor required. Larger roofs require additional panels, concealed clips, flashing, trim, underlayment, and installation time, increasing the total project cost.
Roof complexity also plays an important role. Multiple valleys, dormers, skylights, chimneys, intersecting rooflines, and steep slopes increase labor requirements because they involve more detailed flashing and panel modifications.
The condition of the existing roof structure influences cost as well. Damaged roof decking, deteriorated fascia boards, or structural repairs identified during inspection must be corrected before installation can proceed.
Labor costs vary according to contractor experience, regional market conditions, and project complexity. Highly experienced installers often charge more, but their expertise frequently results in better workmanship, stronger warranties, and fewer future repairs.
Additional features such as upgraded underlayment, snow retention systems, premium coatings, enhanced ventilation, custom trim, or architectural accents may further increase project costs.
Although standing seam roofing requires a higher initial investment than many traditional roofing materials, its exceptional lifespan, reduced maintenance requirements, and energy savings often provide excellent long term value.
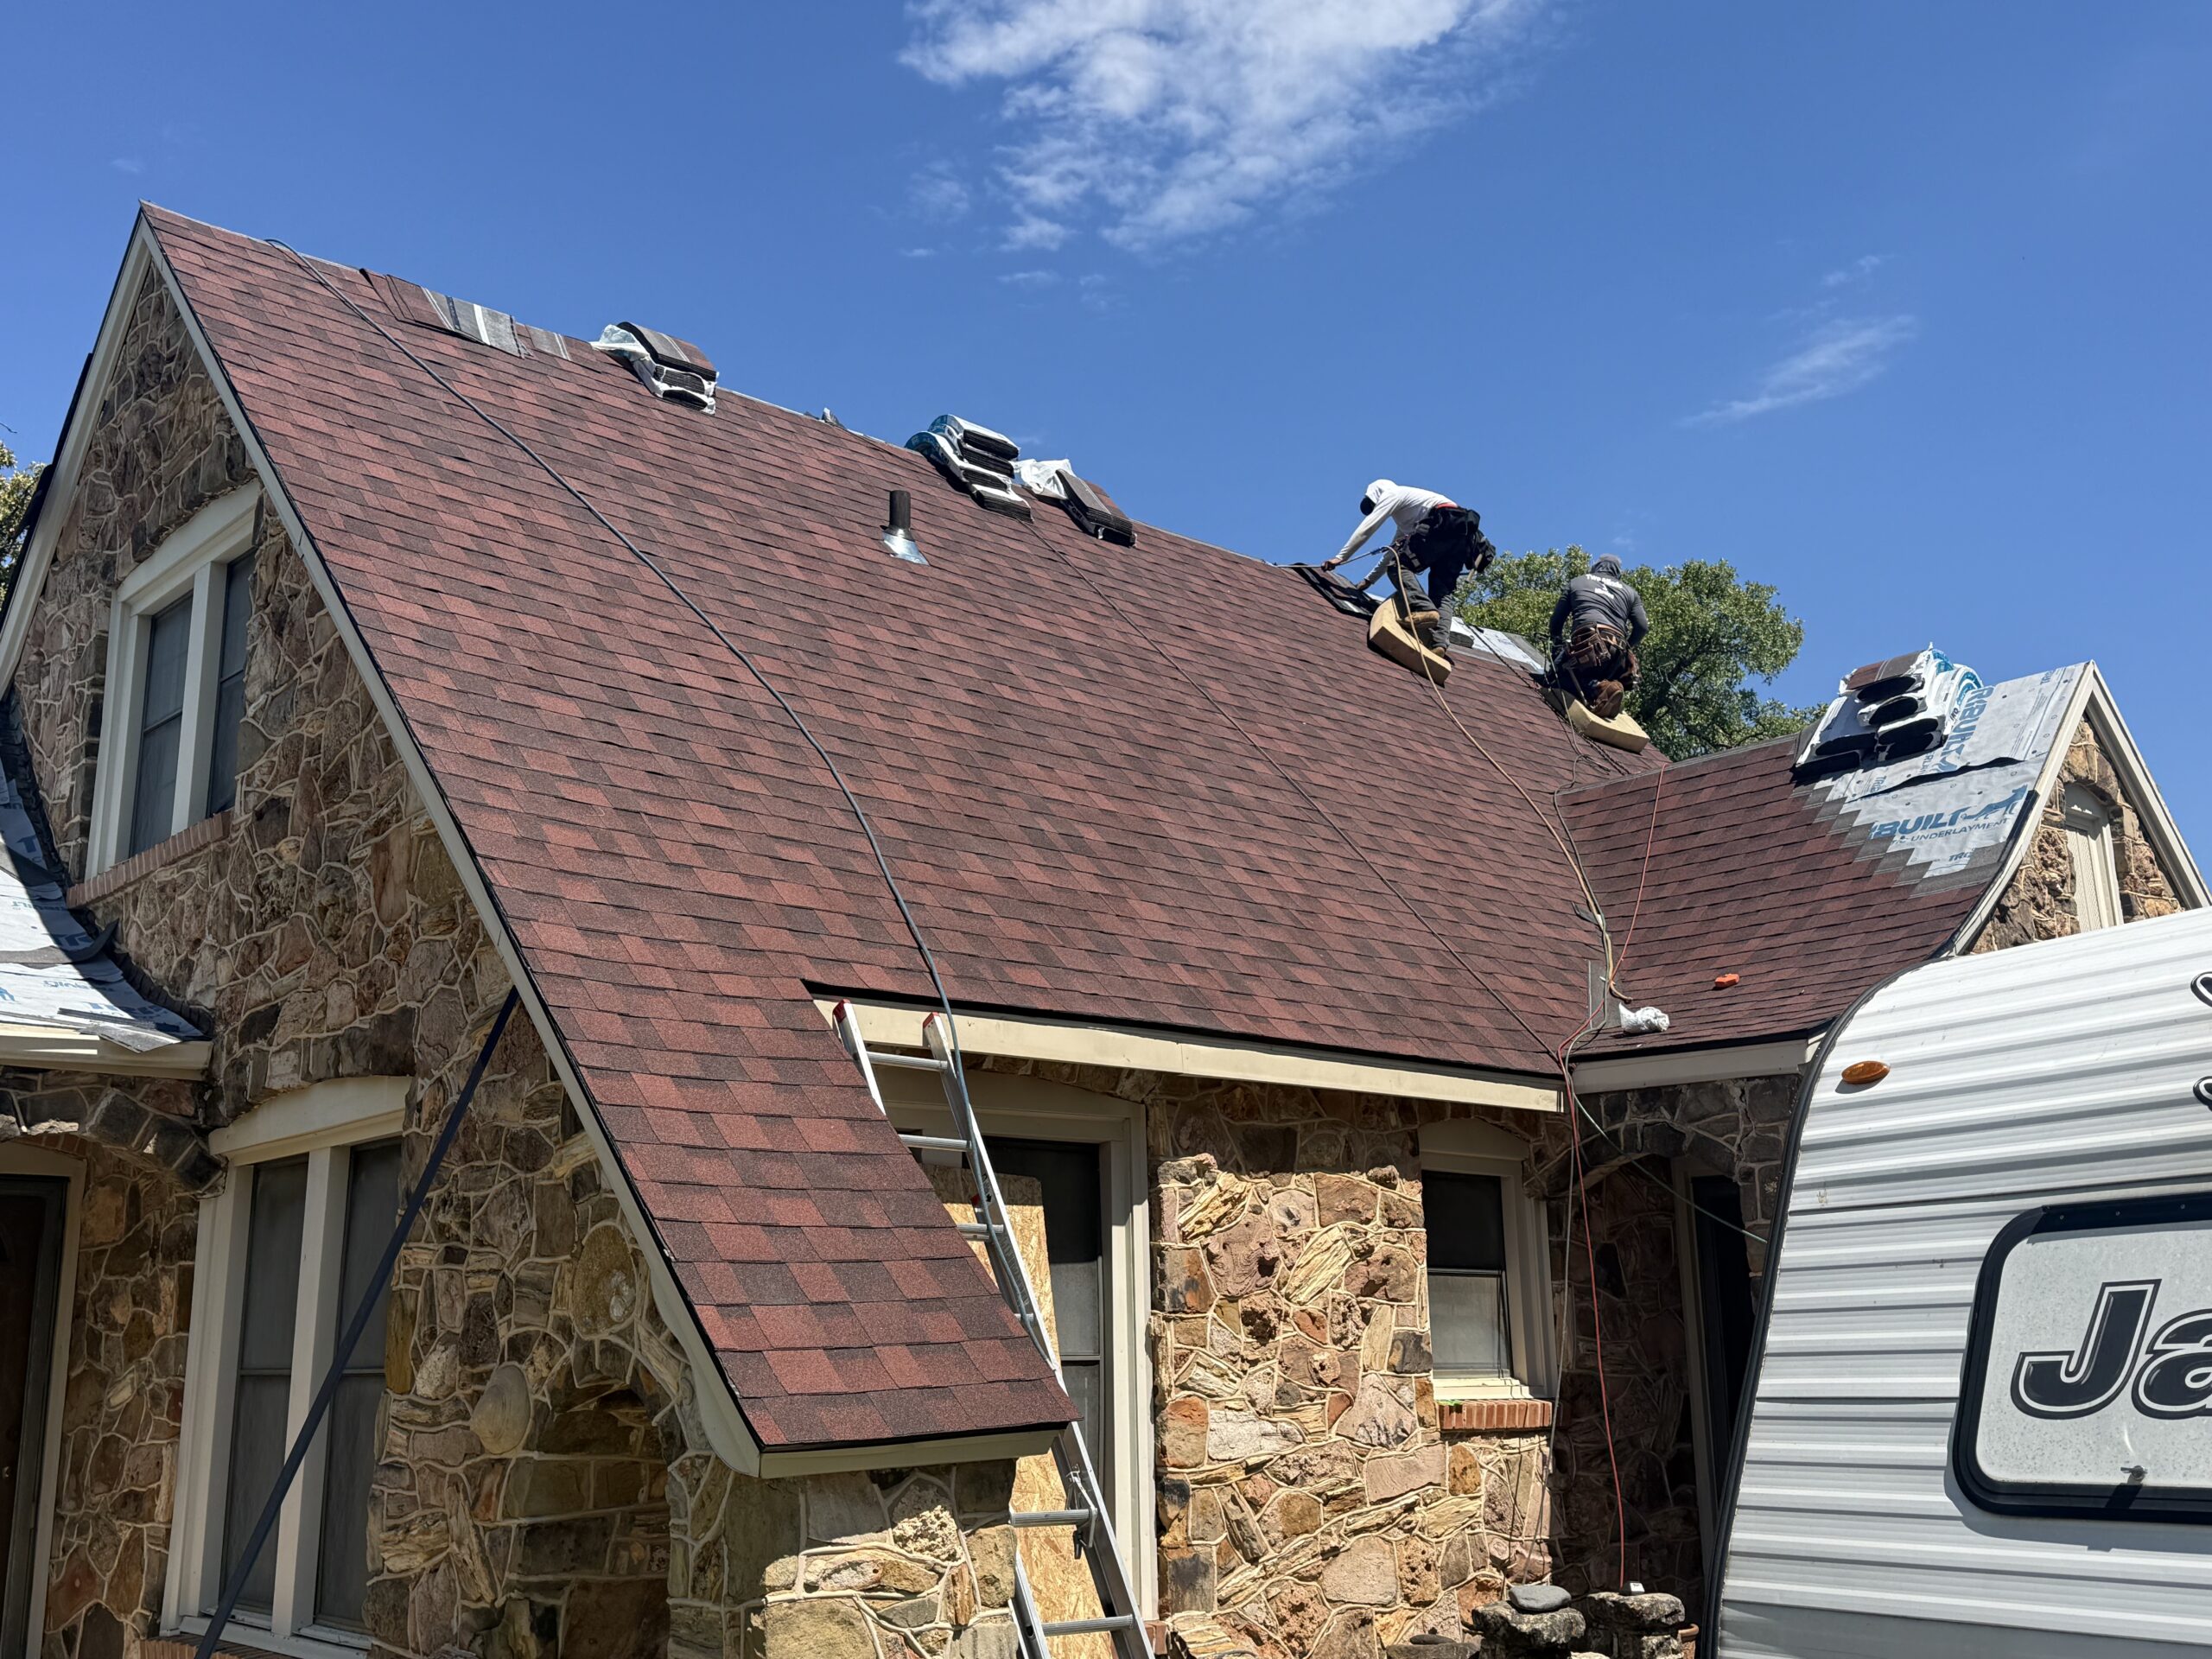
DIY vs Professional Installation
Many homeowners enjoy completing improvement projects themselves, but standing seam metal roofing presents challenges that require careful consideration before choosing a do it yourself approach.
Installing standing seam panels requires specialized tools, including seam forming equipment for mechanically seamed systems. Purchasing or renting these tools can significantly increase project costs for a one time installation.
Long roofing panels are difficult to handle safely without multiple workers. Improper lifting techniques may bend or scratch the panels before they are even installed, affecting both appearance and performance.
Complex roof designs with valleys, dormers, chimneys, and skylights demand advanced flashing techniques that require experience to perform correctly. Improper flashing remains one of the leading causes of roof leaks.
Professional roofing contractors understand manufacturer installation requirements, local building codes, ventilation principles, and weatherproofing methods. Their experience helps minimize installation errors while preserving warranty coverage.
Safety is another important consideration. Working at height while handling long metal panels and power tools presents significant risks, particularly on steep roof slopes or during changing weather conditions.
For homeowners considering installation themselves, the following checklist provides a practical starting point:
- Evaluate your roofing experience honestly.
- Confirm you have the required safety equipment.
- Review the manufacturer’s complete installation manual.
- Verify local building code requirements.
- Consider warranty implications before beginning work.
- Compare DIY costs with professional installation estimates.
Small structures such as sheds or detached workshops may provide suitable opportunities for experienced DIY enthusiasts. Larger residential roofs, however, generally benefit from professional installation that ensures long term performance and reliable warranty protection.
Frequently Asked Questions
How is a standing seam roof different from exposed fastener metal roofing?
Standing seam roofing conceals all primary fasteners beneath raised seams, reducing weather exposure and improving long term durability.
Can standing seam panels be installed over existing shingles?
In some cases they can, provided local building codes, manufacturer recommendations, and the existing roof condition permit this installation method.
How long does installation usually take?
Most residential standing seam roof installations require several days, although larger or more complex projects may take longer depending on weather conditions and roof design.
Does a standing seam roof require frequent maintenance?
No. Routine inspections, gutter cleaning, and occasional removal of debris are generally sufficient to keep the roof performing well.
Can standing seam roofing be installed on low slope roofs?
Yes, but only if the selected panel profile meets the manufacturer’s minimum slope requirements.
Will the roof fade over time?
Modern factory applied coatings are designed to resist fading and weathering for many years, especially when routine maintenance is performed.
Conclusion
Standing seam metal roof installation is a precise process that combines careful planning, quality materials, specialized fastening systems, and skilled workmanship. Every stage, from preparing the roof deck to installing concealed clips, locking the seams, and completing the finishing trim, contributes to the strength and durability of the finished roofing system. When each step is performed correctly, the result is a roof capable of providing reliable protection for decades.
Preparation is the foundation of every successful installation. Accurate measurements, structural inspections, proper underlayment, and carefully positioned starter components ensure the roofing panels can be installed with consistent alignment and dependable weather resistance. Attention to detail during these early stages helps prevent costly issues later.
The concealed fastening system distinguishes standing seam roofing from many other metal roofing options. By protecting fasteners beneath the raised seams, the roof gains improved resistance to moisture, reduced maintenance requirements, and greater flexibility during seasonal temperature changes. Combined with high quality flashing and effective ventilation, this design creates one of the most dependable roofing systems available today.
Long term performance depends not only on proper installation but also on regular maintenance. Periodic inspections, prompt repairs, clean drainage systems, and careful roof cleaning help preserve the roof’s appearance and structural integrity for many years. These simple maintenance practices maximize the value of the original investment.
Whether you are planning a new construction project or replacing an existing roof, understanding the standing seam metal roof installation process allows you to make informed decisions with confidence. A professionally installed standing seam roof offers exceptional durability, energy efficiency, modern aesthetics, and outstanding long term value, making it one of the finest roofing solutions available for residential and commercial properties alike.