

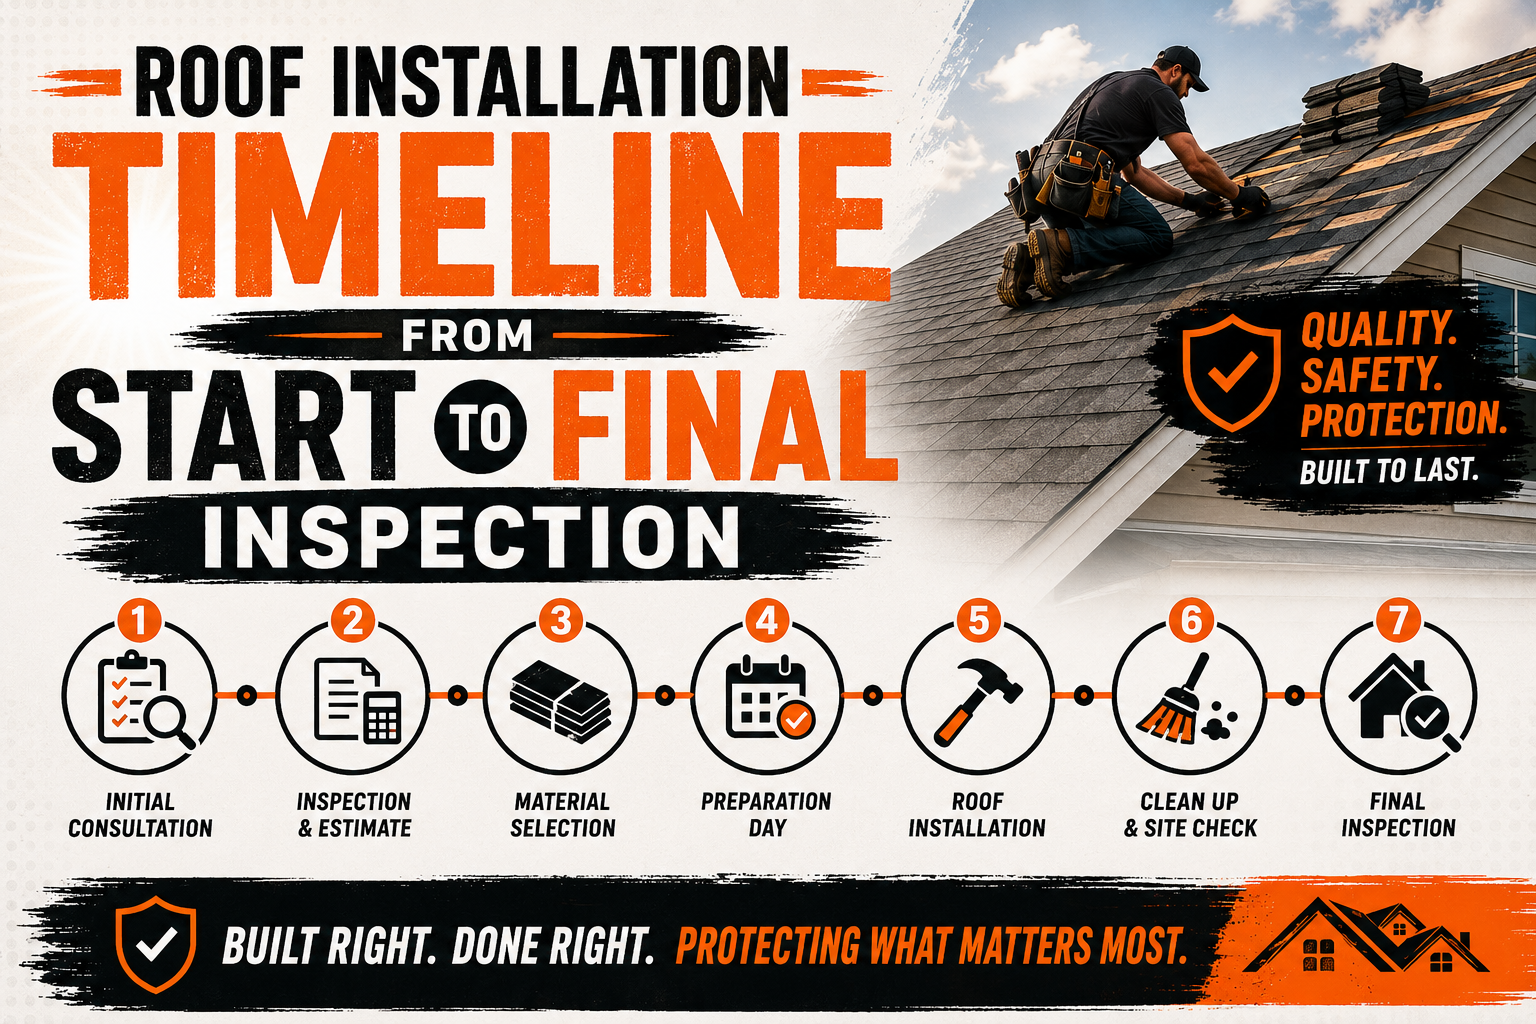
Roof Installation Timeline From Start to Final Inspection
Introduction
A roof installation project is one of the most significant improvements a homeowner can make to a property. Whether the roof is being replaced because of age, storm damage, or extensive wear, understanding the timeline helps homeowners know what to expect before work begins. A clear understanding of each phase also makes communication with roofing contractors much easier throughout the project.
Many people assume roof installation only involves removing old shingles and placing new ones on the roof. In reality, the process includes inspections, planning, material selection, permits, structural evaluations, installation of multiple roofing components, and final quality checks. Every stage builds upon the previous one to create a durable roofing system that protects the home for decades.
The overall timeline varies depending on several factors, including roof size, design complexity, weather conditions, material availability, and the condition of the existing structure. Some projects move quickly without interruptions, while others require additional repairs that naturally extend the schedule. Knowing these possibilities helps homeowners prepare for realistic completion dates.
Professional roofing contractors carefully organize every stage of installation to maintain quality while minimizing disruption to the homeowner. Planning ahead allows materials, equipment, inspections, and labor to be coordinated efficiently. This organized approach reduces delays and ensures every roofing component is installed according to manufacturer recommendations.
Understanding the complete roof installation timeline also helps homeowners appreciate why certain stages require patience. Rushing through structural repairs or waterproofing measures can reduce the lifespan of the entire roofing system. Allowing sufficient time for each phase ultimately leads to a stronger, safer, and more reliable roof.
This guide follows the complete roof installation timeline from the initial inspection through the preparation stages that occur before the primary roofing materials are installed. By understanding how each step fits into the overall process, homeowners can approach their roofing project with greater confidence and realistic expectations.
Understanding the Complete Roof Installation Timeline
Every roof installation follows a structured sequence designed to ensure quality workmanship and long term durability. While individual projects differ, professional contractors generally complete the work in a logical order that allows each stage to support the next. Skipping or rushing important steps can compromise the performance of the finished roof.
The timeline begins with evaluating the condition of the existing roof and determining whether replacement is necessary. After this assessment, homeowners select materials, approve estimates, obtain permits, and schedule construction. These planning activities often take longer than the installation itself but are essential for avoiding complications later.
Once work begins, contractors prepare the property before removing the existing roofing materials. The roof deck is then inspected for structural problems before moisture barriers, flashing, and roofing materials are installed. Finishing work, inspections, and cleanup complete the final stages of the project.
Each phase serves a specific purpose within the roofing system. Structural components provide strength, waterproofing materials prevent moisture intrusion, and exterior roofing materials create the visible protective surface. Understanding this sequence helps homeowners recognize why every stage deserves careful attention.
Although installation may appear straightforward from the ground, experienced roofing professionals coordinate numerous activities behind the scenes. Material deliveries, inspection schedules, weather monitoring, and crew management all contribute to keeping the project on track.
Factors That Influence the Roof Installation Schedule
No two roofing projects follow exactly the same timeline because every home presents different conditions and challenges. Several factors determine how quickly work progresses, making it important for homeowners to understand why some projects require more time than others.
Roof size is one of the most obvious influences on installation time. Larger homes require more materials, additional labor, and longer inspection periods compared to smaller residential properties. Complex roof layouts with multiple slopes or architectural features also increase installation time.
Weather conditions play an equally important role throughout construction. Heavy rain, high winds, or extreme temperatures may temporarily delay roofing work to protect both workers and installation quality. Professional contractors prioritize proper workmanship over meeting unrealistic deadlines during unfavorable weather.
Material availability can also affect scheduling. Standard asphalt shingles are usually available quickly, while specialty roofing products or custom colors may require additional ordering time. Planning material deliveries well in advance helps reduce unnecessary project interruptions.
The condition of the existing roof is another important consideration. Hidden structural damage, deteriorated decking, or moisture problems discovered after the old roof is removed often require repairs before installation can continue. Although these repairs extend the timeline, they create a stronger foundation for the new roofing system.
Initial Roof Inspection and Project Evaluation
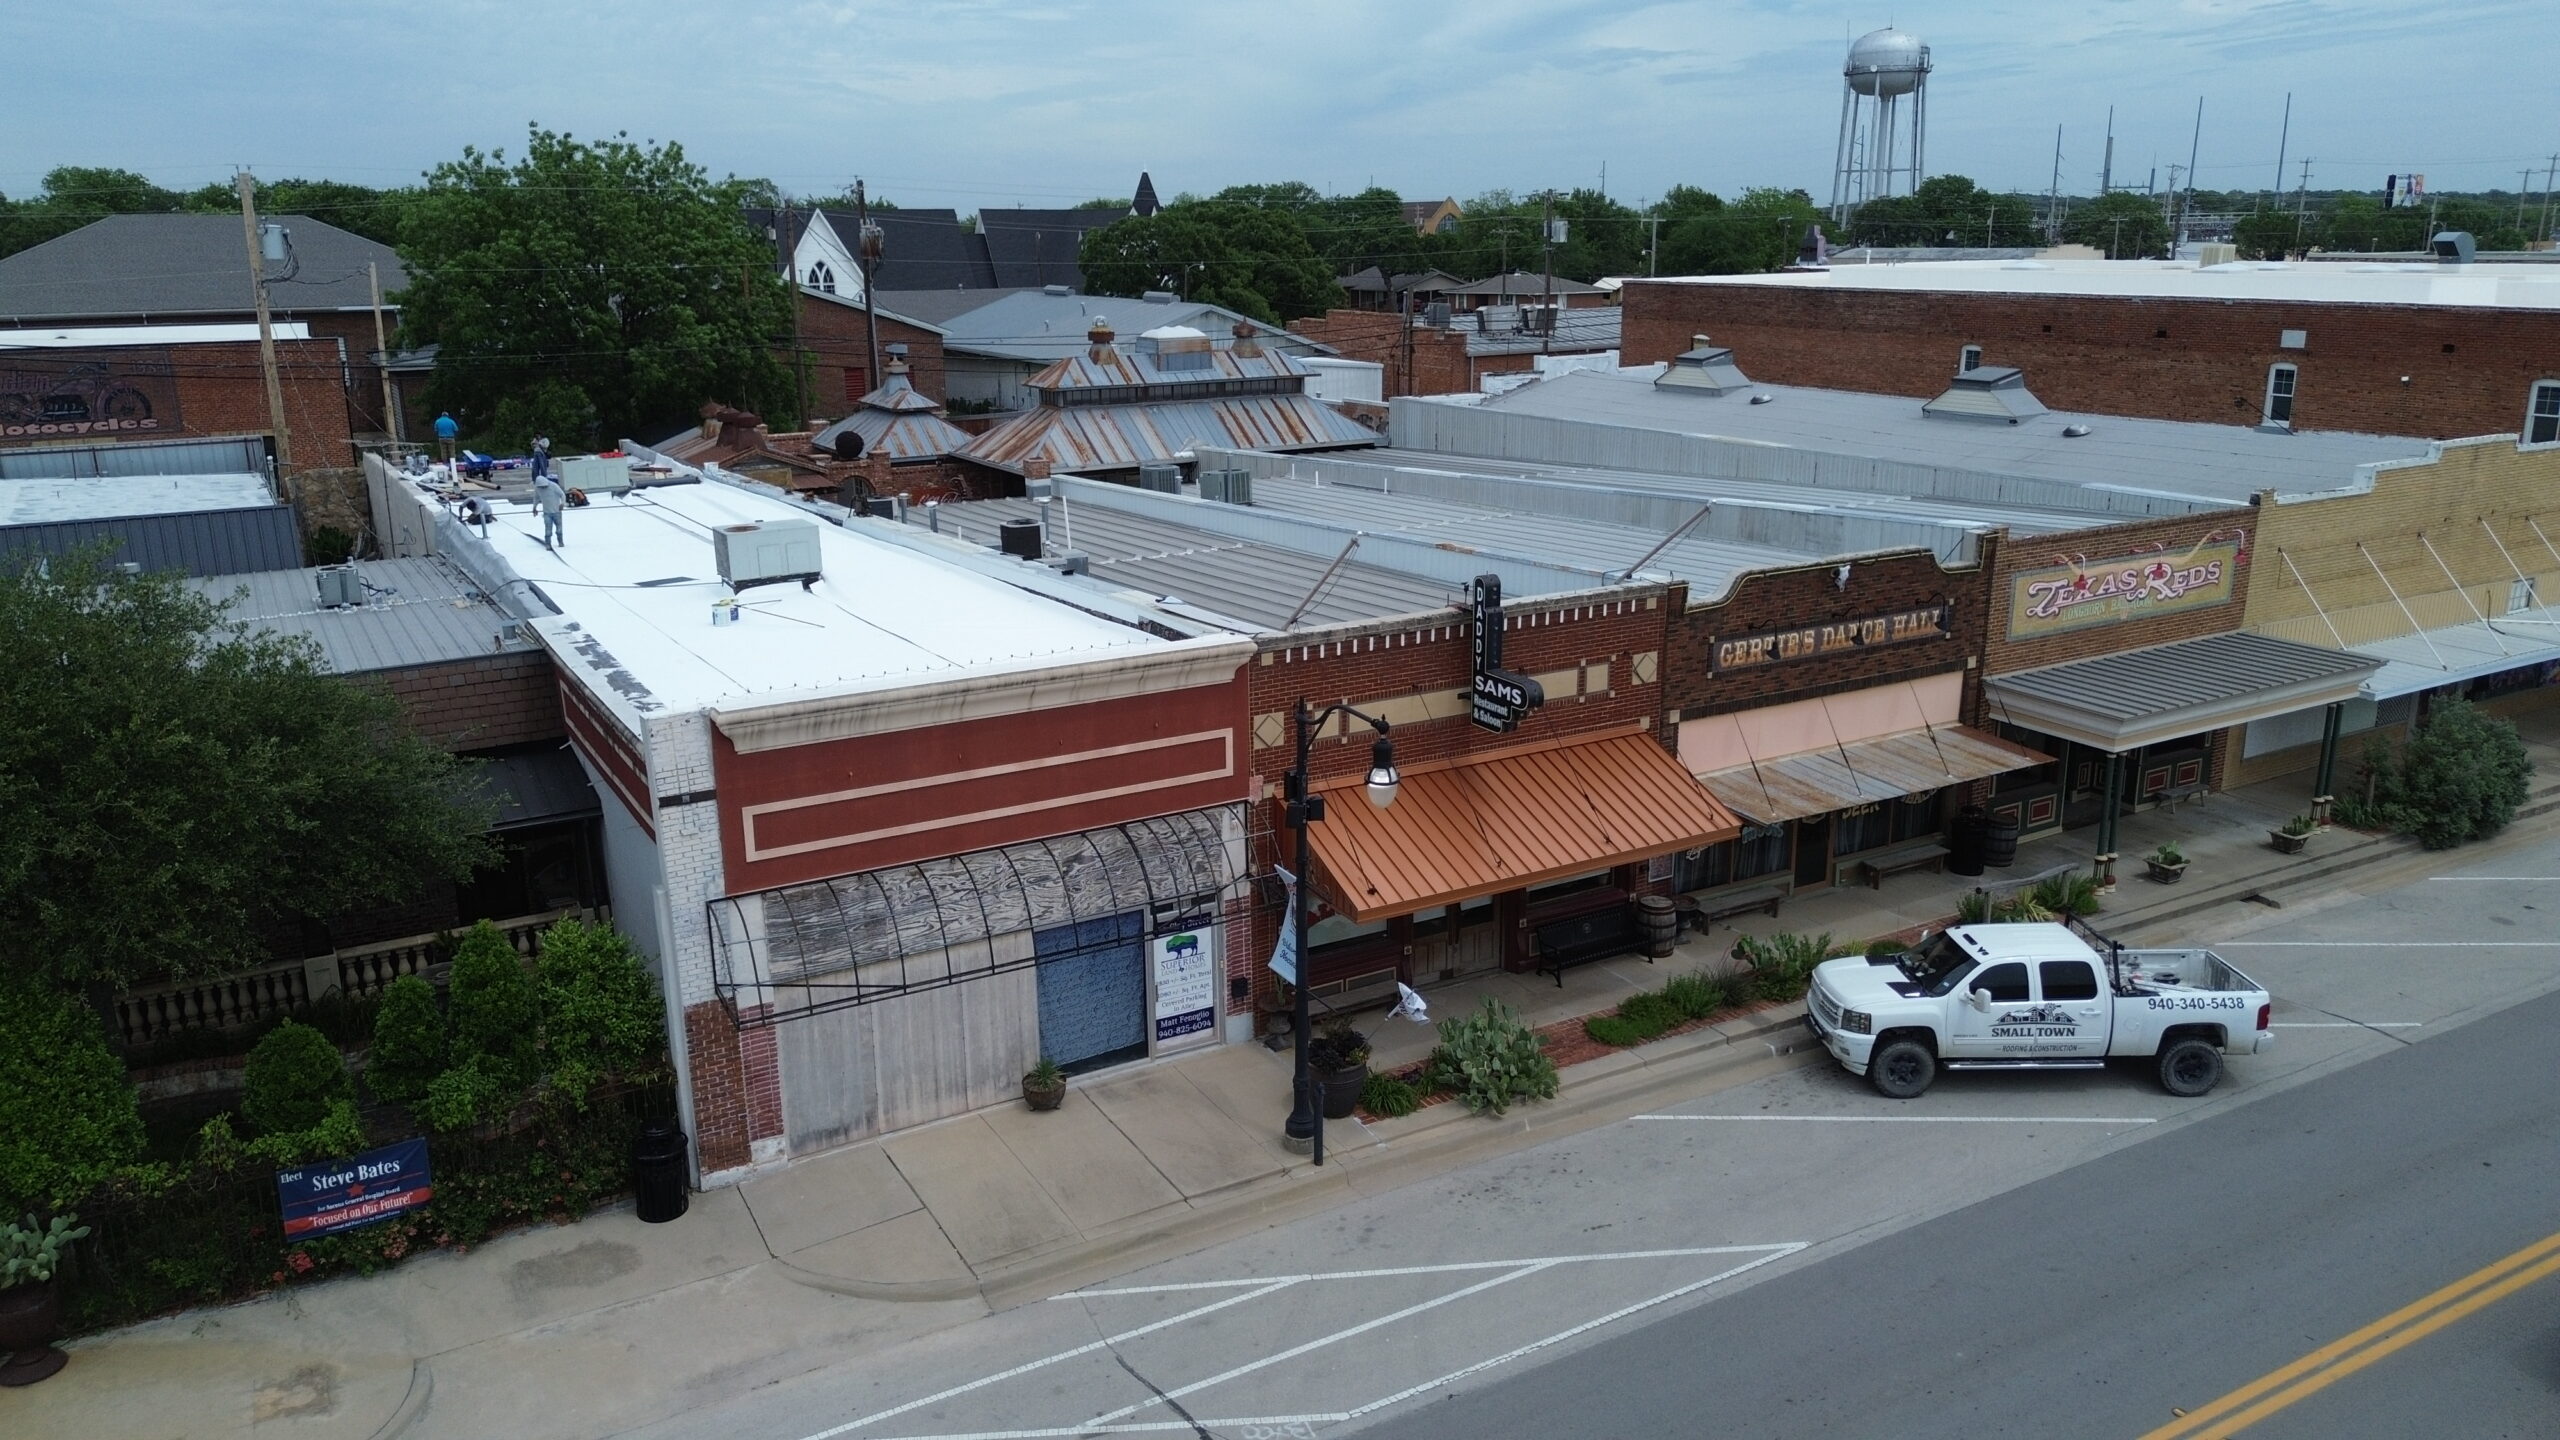
Every successful roof installation begins with a thorough inspection of the existing roofing system. This evaluation allows contractors to determine the condition of the roof while identifying any structural concerns that may affect the installation process. A detailed inspection also helps homeowners understand the scope of the project before committing to replacement.
During the inspection, contractors examine shingles, flashing, gutters, roof valleys, ventilation components, and visible structural elements. They also look for signs of leaks, sagging, moisture damage, missing materials, and previous repair work. These observations provide valuable information when preparing the installation plan.
Interior inspections are equally important because some roofing problems originate beneath the visible roof surface. Contractors may inspect the attic for water stains, mold growth, damaged insulation, or inadequate ventilation. Identifying these issues early prevents unexpected surprises once construction begins.
Photographs and written reports often accompany professional inspections. These documents help homeowners understand the roof’s current condition while providing a clear explanation of recommended repairs or replacement. Visual evidence also improves communication between contractors and property owners.
Following the inspection, contractors discuss available roofing options, estimated project timelines, and expected costs. This consultation provides homeowners with the information needed to make confident decisions before moving to the planning stage.
Choosing Roofing Materials and Finalizing the Contract
Once the roof evaluation is complete, homeowners begin selecting the materials that will be used during installation. This decision influences not only the appearance of the finished roof but also its durability, maintenance requirements, and overall project timeline. Choosing materials carefully helps maximize the long term value of the investment.
Asphalt shingles remain the most common roofing material because they offer dependable performance at an affordable price. Metal roofing continues to gain popularity because of its exceptional lifespan and energy efficiency. Other options, including tile, wood shakes, and synthetic materials, provide additional design flexibility depending on the home’s architectural style.
Contractors explain the advantages and limitations of each material while considering regional weather conditions, roof slope, maintenance expectations, and homeowner preferences. Selecting the most suitable roofing system involves balancing performance, appearance, and budget rather than focusing on price alone.
Once material selections are finalized, the roofing contract is prepared. A professional contract clearly outlines project costs, installation procedures, payment schedules, warranty information, estimated completion dates, and responsibilities for both the contractor and homeowner. Careful review of this document helps prevent misunderstandings during construction.
Homeowners should also verify licensing, insurance, and warranty coverage before signing the agreement. Taking time to review these details creates confidence before the installation process officially begins.
Permits, Planning, and Project Scheduling
After the contract is approved, the project enters the planning phase. Although little visible work occurs during this stage, careful organization helps ensure the installation proceeds efficiently once construction begins. Proper planning reduces delays while keeping every stage of the project coordinated.
Most roofing projects require permits from local building authorities before installation can begin. These permits verify that the planned work complies with current building codes and safety standards. Experienced contractors often handle the permit application process, allowing homeowners to focus on preparing for construction.
Scheduling is another important part of project planning. Contractors coordinate labor availability, material deliveries, inspection appointments, and weather forecasts to establish an efficient construction timeline. Careful scheduling helps reduce downtime between installation stages.
Communication also becomes especially important during this phase. Homeowners receive information about expected start dates, estimated project duration, parking arrangements, equipment placement, and temporary changes that may affect daily routines. Understanding these details helps everyone prepare for installation day.
Planning also includes confirming that all required materials have been ordered and will arrive on schedule. Proper coordination prevents delays caused by missing supplies or unavailable equipment.
Preparing the Property Before Installation
Before roofing crews arrive, homeowners should prepare the property to support safe and efficient construction. A well organized work site reduces the likelihood of accidental damage while allowing contractors to focus entirely on installation. Simple preparations completed in advance can significantly improve the overall experience.
Vehicles should be moved away from the driveway and areas surrounding the home to create space for material deliveries and construction equipment. Roofing crews often require room for dumpsters, trailers, and supply vehicles throughout the project. Keeping these areas clear improves access and job site safety.
Outdoor furniture, decorative items, grills, and potted plants should also be relocated away from roof edges whenever possible. Removing these belongings protects them from falling debris during the removal of existing roofing materials. Contractors may also place protective coverings over sensitive landscaping before work begins.
Inside the home, fragile decorations and valuable items stored in the attic should be secured or temporarily covered. Construction vibrations may cause hanging objects to shift slightly while roofing crews work overhead. Preparing interior spaces helps reduce the risk of accidental damage.
Homeowners should also discuss any specific property concerns with the contractor before installation begins. Pointing out delicate landscaping, underground irrigation systems, or limited access areas allows the roofing crew to plan accordingly.
Material Delivery and Site Preparation
Material delivery marks the beginning of visible project activity. Roofing products, equipment, and safety supplies are typically delivered shortly before construction starts to ensure everything is ready when the crew arrives. Organizing materials properly contributes to a smoother installation process.
Roofing materials are placed strategically to distribute weight evenly across the roof whenever appropriate. This careful placement prevents unnecessary stress on structural components while allowing workers convenient access throughout installation. Efficient material organization also reduces unnecessary movement during construction.
In addition to roofing products, contractors deliver ladders, scaffolding, safety equipment, protective coverings, and waste containers. Every piece of equipment serves a specific purpose in maintaining both efficiency and worker safety throughout the project. Organized preparation creates a more productive job site.
Before work begins, contractors inspect the property once more to verify that access points remain clear and protective measures have been installed where necessary. Safety barriers may also be positioned around work areas to protect residents and visitors during construction.
Material deliveries often generate increased activity around the home for a short period. Understanding this temporary disruption helps homeowners prepare while recognizing that proper organization supports a more efficient installation.
Removing the Existing Roof
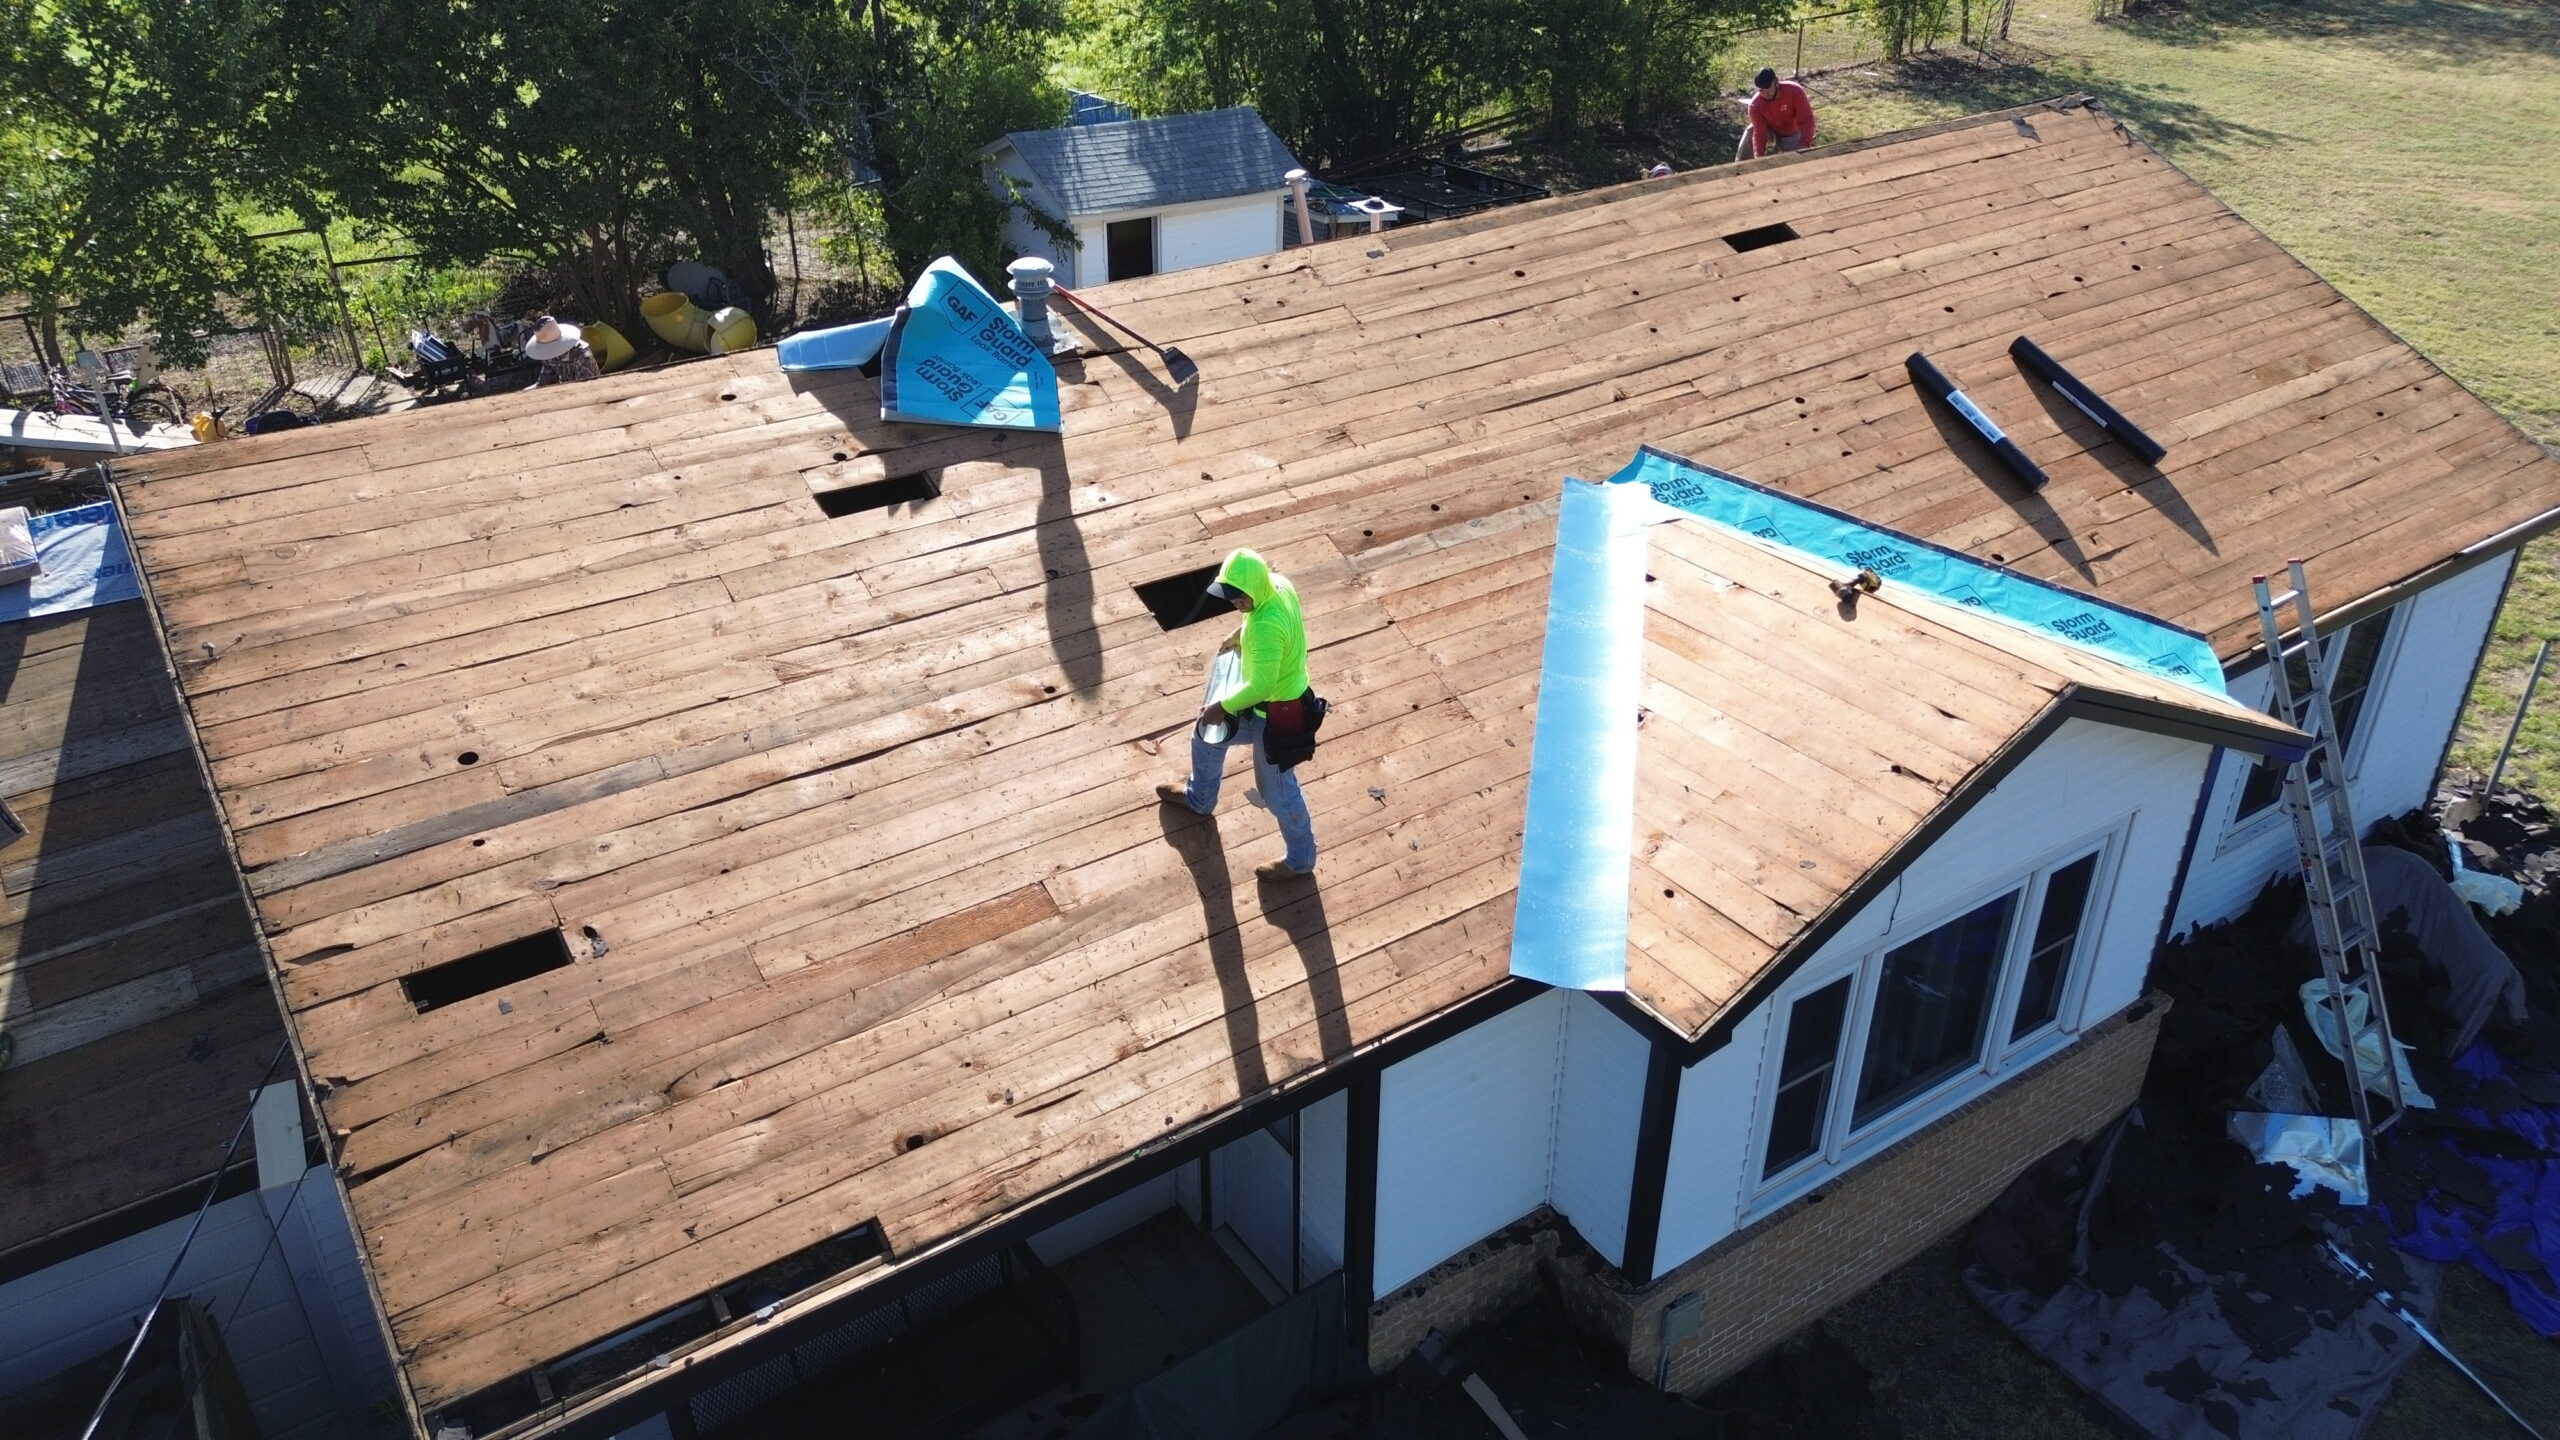
With preparations complete, roofing crews begin removing the existing roofing materials. This phase reveals the structural condition of the roof while creating the foundation for the new roofing system. Careful removal helps minimize damage to the roof deck beneath.
Contractors remove shingles, underlayment, flashing, ridge caps, and other roofing components in a systematic manner. Materials are transferred directly into designated waste containers to maintain an organized and safe work environment. Continuous cleanup throughout removal helps reduce hazards around the property.
During removal, workers pay close attention to any signs of hidden moisture damage or structural deterioration. Areas showing unusual wear receive additional inspection before installation continues. Identifying these issues now prevents future roofing problems.
Although roof removal can be one of the noisiest stages of the project, it is also one of the most important. Proper removal allows contractors to evaluate the roof thoroughly before covering it with new materials.
Roof Deck Inspection and Structural Repairs
Once the old roofing materials have been removed, the roof deck becomes fully visible for inspection. This stage determines whether the existing structure can safely support the new roofing system or whether repairs are necessary before installation continues. Thorough inspections at this point contribute significantly to the roof’s long term durability.
Contractors examine the decking for signs of water damage, wood rot, loose fasteners, and structural weakness. They also verify that the surface remains level and capable of supporting new roofing materials. Any damaged sections are replaced before moving to the next stage of construction.
Structural repairs sometimes extend the installation timeline, but they should never be skipped to save time. Installing new roofing materials over weakened decking would reduce the performance and lifespan of the completed roof. Correcting these issues now provides a stronger foundation for every remaining roofing component.
Building inspectors may also review completed structural repairs when required by local regulations. Their approval confirms that the roof meets current building standards before waterproofing materials are installed.
Installing Underlayment and Moisture Protection
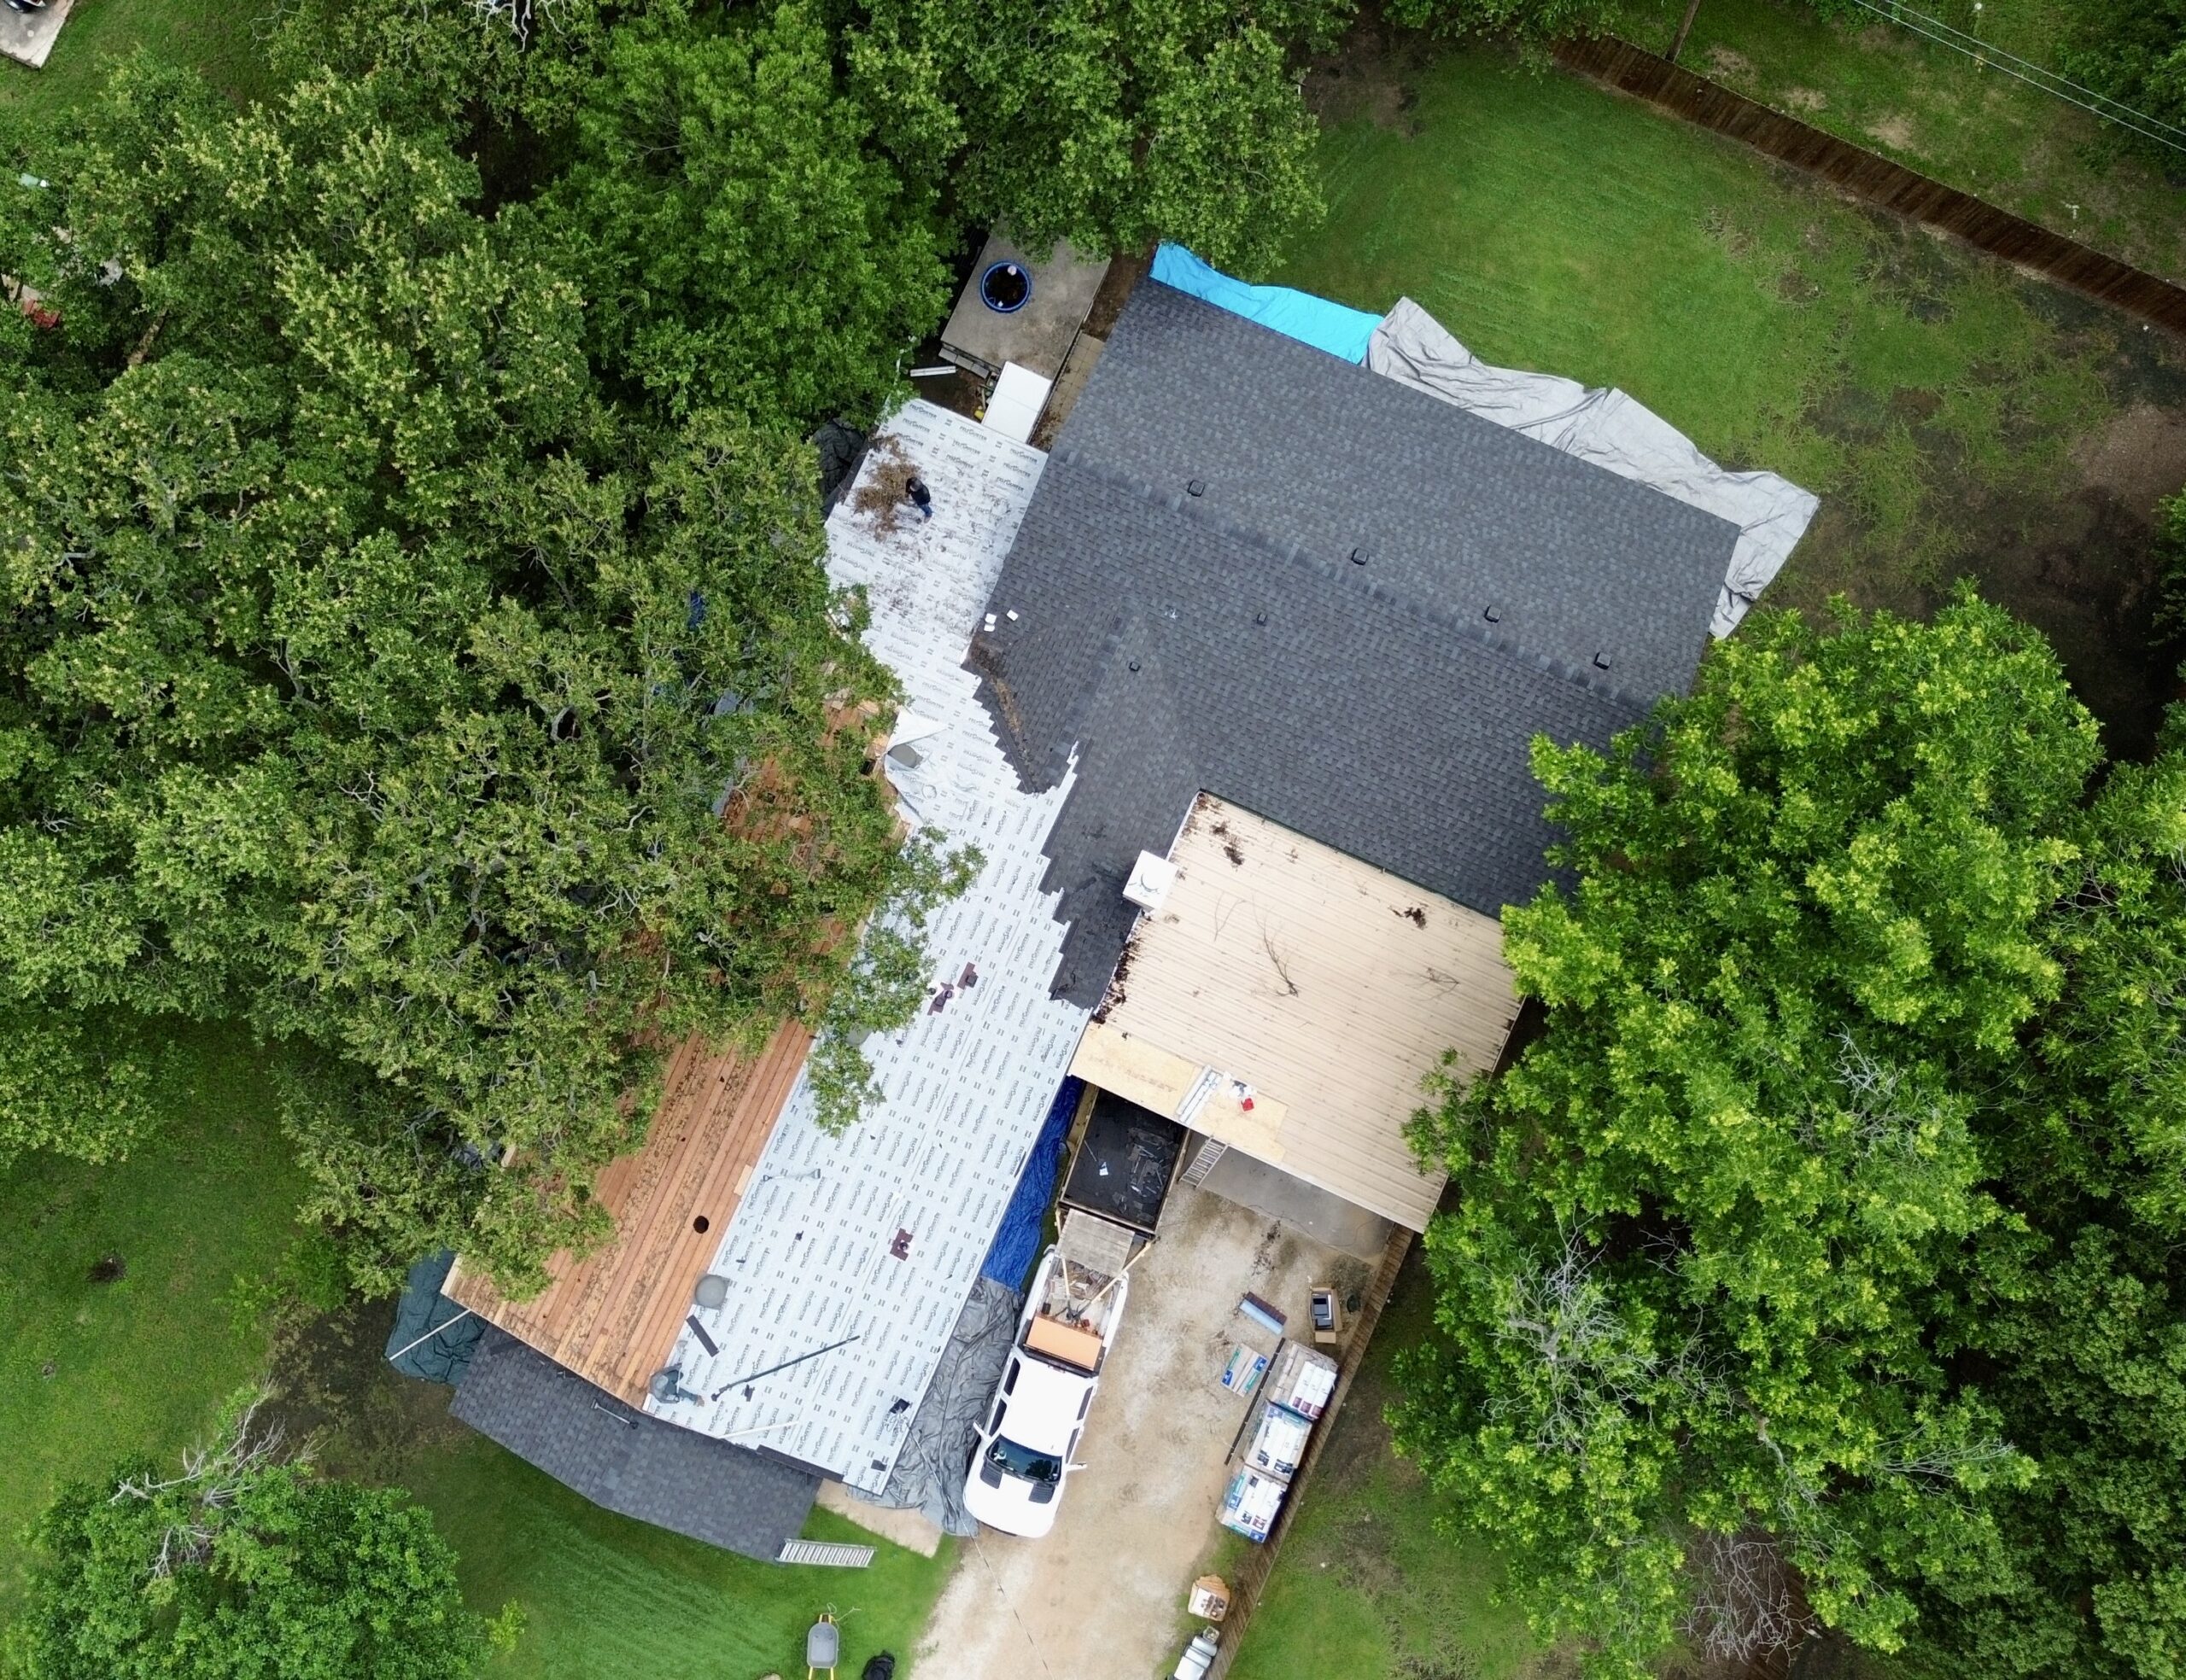
After structural repairs have been completed, contractors install the underlayment that serves as the roof’s secondary moisture barrier. Although this layer remains hidden after construction, it plays an essential role in protecting the roof deck from water intrusion. Proper installation at this stage greatly improves the overall performance of the roofing system.
Underlayment is installed beginning at the lowest edge of the roof and gradually progresses upward toward the ridge. Each section overlaps the previous one, creating a continuous barrier that directs water safely away from the roof deck. Contractors carefully inspect seams and fastening points throughout installation to ensure complete coverage.
Additional waterproof membranes are often installed in roof valleys, around chimneys, and near other areas that experience increased water flow. Strengthening these vulnerable locations reduces the likelihood of future leaks while improving overall weather resistance. Careful attention to these details supports the long term reliability of the completed roof.
At the end of this stage, the roof has a fully protected structural foundation and is ready for the installation of the primary roofing materials. The project now moves from preparation into the highly visible phases that transform the roof into its finished appearance.
Installing the Primary Roofing Material
With the underlayment securely in place, the installation enters one of the most recognizable stages of the project. This is when the primary roofing material is installed, transforming the roof from a protected structural surface into the finished exterior that homeowners see from the ground. Although this phase creates the roof’s final appearance, it also provides the first line of defense against rain, wind, sunlight, and changing temperatures.
The installation process varies depending on the selected roofing material. Asphalt shingles, metal panels, clay tiles, and synthetic roofing products each have unique fastening methods and layout requirements. Professional roofing crews follow manufacturer instructions carefully to ensure both performance and warranty compliance.
Most installations begin at the lower edge of the roof and progress upward toward the ridge. This approach allows each row of roofing material to overlap the previous one, creating a layered system that naturally directs water toward the gutters. Maintaining proper alignment throughout the installation also gives the finished roof a clean and uniform appearance.
Contractors frequently check spacing, fastening patterns, and material placement as work progresses. Small corrections made during installation help prevent larger issues later while ensuring the roof performs as designed. Careful workmanship during this stage has a direct impact on the roof’s lifespan.
Flashing Installation Around Roof Features
Flashing is one of the most important waterproofing elements in any roofing system. While the primary roofing material protects large roof surfaces, flashing seals the areas where water is most likely to enter the home. Proper installation during this stage is essential for preventing leaks around roof penetrations and structural transitions.
Roofing contractors install flashing around chimneys, skylights, plumbing vents, roof valleys, and any location where different roof sections meet. Each flashing component is shaped and positioned to direct water safely away from vulnerable joints. This layered design allows rainwater to continue flowing across the roof without reaching the underlying structure.
Metal flashing is commonly manufactured from aluminum, galvanized steel, or copper because these materials provide long lasting corrosion resistance. Contractors select flashing materials that are compatible with the chosen roofing system to avoid premature deterioration caused by chemical reactions between different metals.
Careful sealing and overlap are especially important around valleys where large amounts of rainwater naturally collect. These areas experience continuous water flow during storms, making precise flashing installation essential for long term protection. Even small installation errors can eventually allow moisture to reach the roof deck.
Once flashing has been installed, contractors inspect every connection before continuing with the remaining roofing materials. This attention to detail strengthens the overall waterproofing performance of the completed roof.
Roof Ventilation Installation
Roof ventilation is an essential part of a modern roofing system because it regulates airflow throughout the attic space. Proper ventilation helps control temperature, reduce moisture buildup, and improve the efficiency of insulation. Installing these components during roof construction contributes significantly to the long term health of both the roof and the home.
Most residential roofs use a balanced ventilation system consisting of intake vents near the lower roof edges and exhaust vents located close to the ridge. Cooler outside air enters through the intake vents while warmer attic air exits through the upper vents. This continuous airflow helps maintain a stable attic environment throughout the year.
Without proper ventilation, heat and moisture can accumulate beneath the roof. Excessive attic temperatures may shorten the lifespan of roofing materials, while trapped humidity can contribute to mold growth, wood deterioration, and reduced insulation performance. Proper ventilation minimizes these risks while improving overall energy efficiency.
Contractors calculate ventilation requirements based on attic size, roof design, insulation levels, and local building regulations. Achieving the correct balance between intake and exhaust airflow ensures the roofing system performs efficiently under different seasonal conditions.
Before completing this stage, roofing crews verify that all vents remain unobstructed and properly integrated with the surrounding roofing materials. This inspection confirms that airflow will function as intended once the project is complete.
Ridge Caps and Finishing Components
As roofing materials reach the highest point of the roof, contractors install ridge caps that cover the joints where opposing roof slopes meet. These specialized components complete the roofing system while providing additional protection against weather exposure. Ridge caps also contribute to the roof’s finished appearance by creating a smooth and consistent profile.
Modern ridge cap systems are designed to work alongside ridge ventilation products when required. This combination allows warm attic air to escape while preventing rain, insects, and debris from entering the ventilation openings. Proper integration of these components improves both weather resistance and energy efficiency.
Roofing crews carefully align ridge caps to maintain a straight appearance along the roof peak. Fasteners are positioned according to manufacturer recommendations to maximize durability while minimizing exposure to weather. Consistent installation helps preserve both structural performance and visual appeal.
Additional finishing details may include sealing exposed fasteners, trimming roofing materials around roof edges, and verifying that all visible components are securely attached. These final adjustments create a polished appearance while strengthening the roof’s resistance to harsh weather conditions.
At this point, the primary roofing system has been fully installed. The remaining stages focus on drainage, inspections, cleanup, and quality verification before the project is officially completed.
Gutter Installation and Drainage Integration
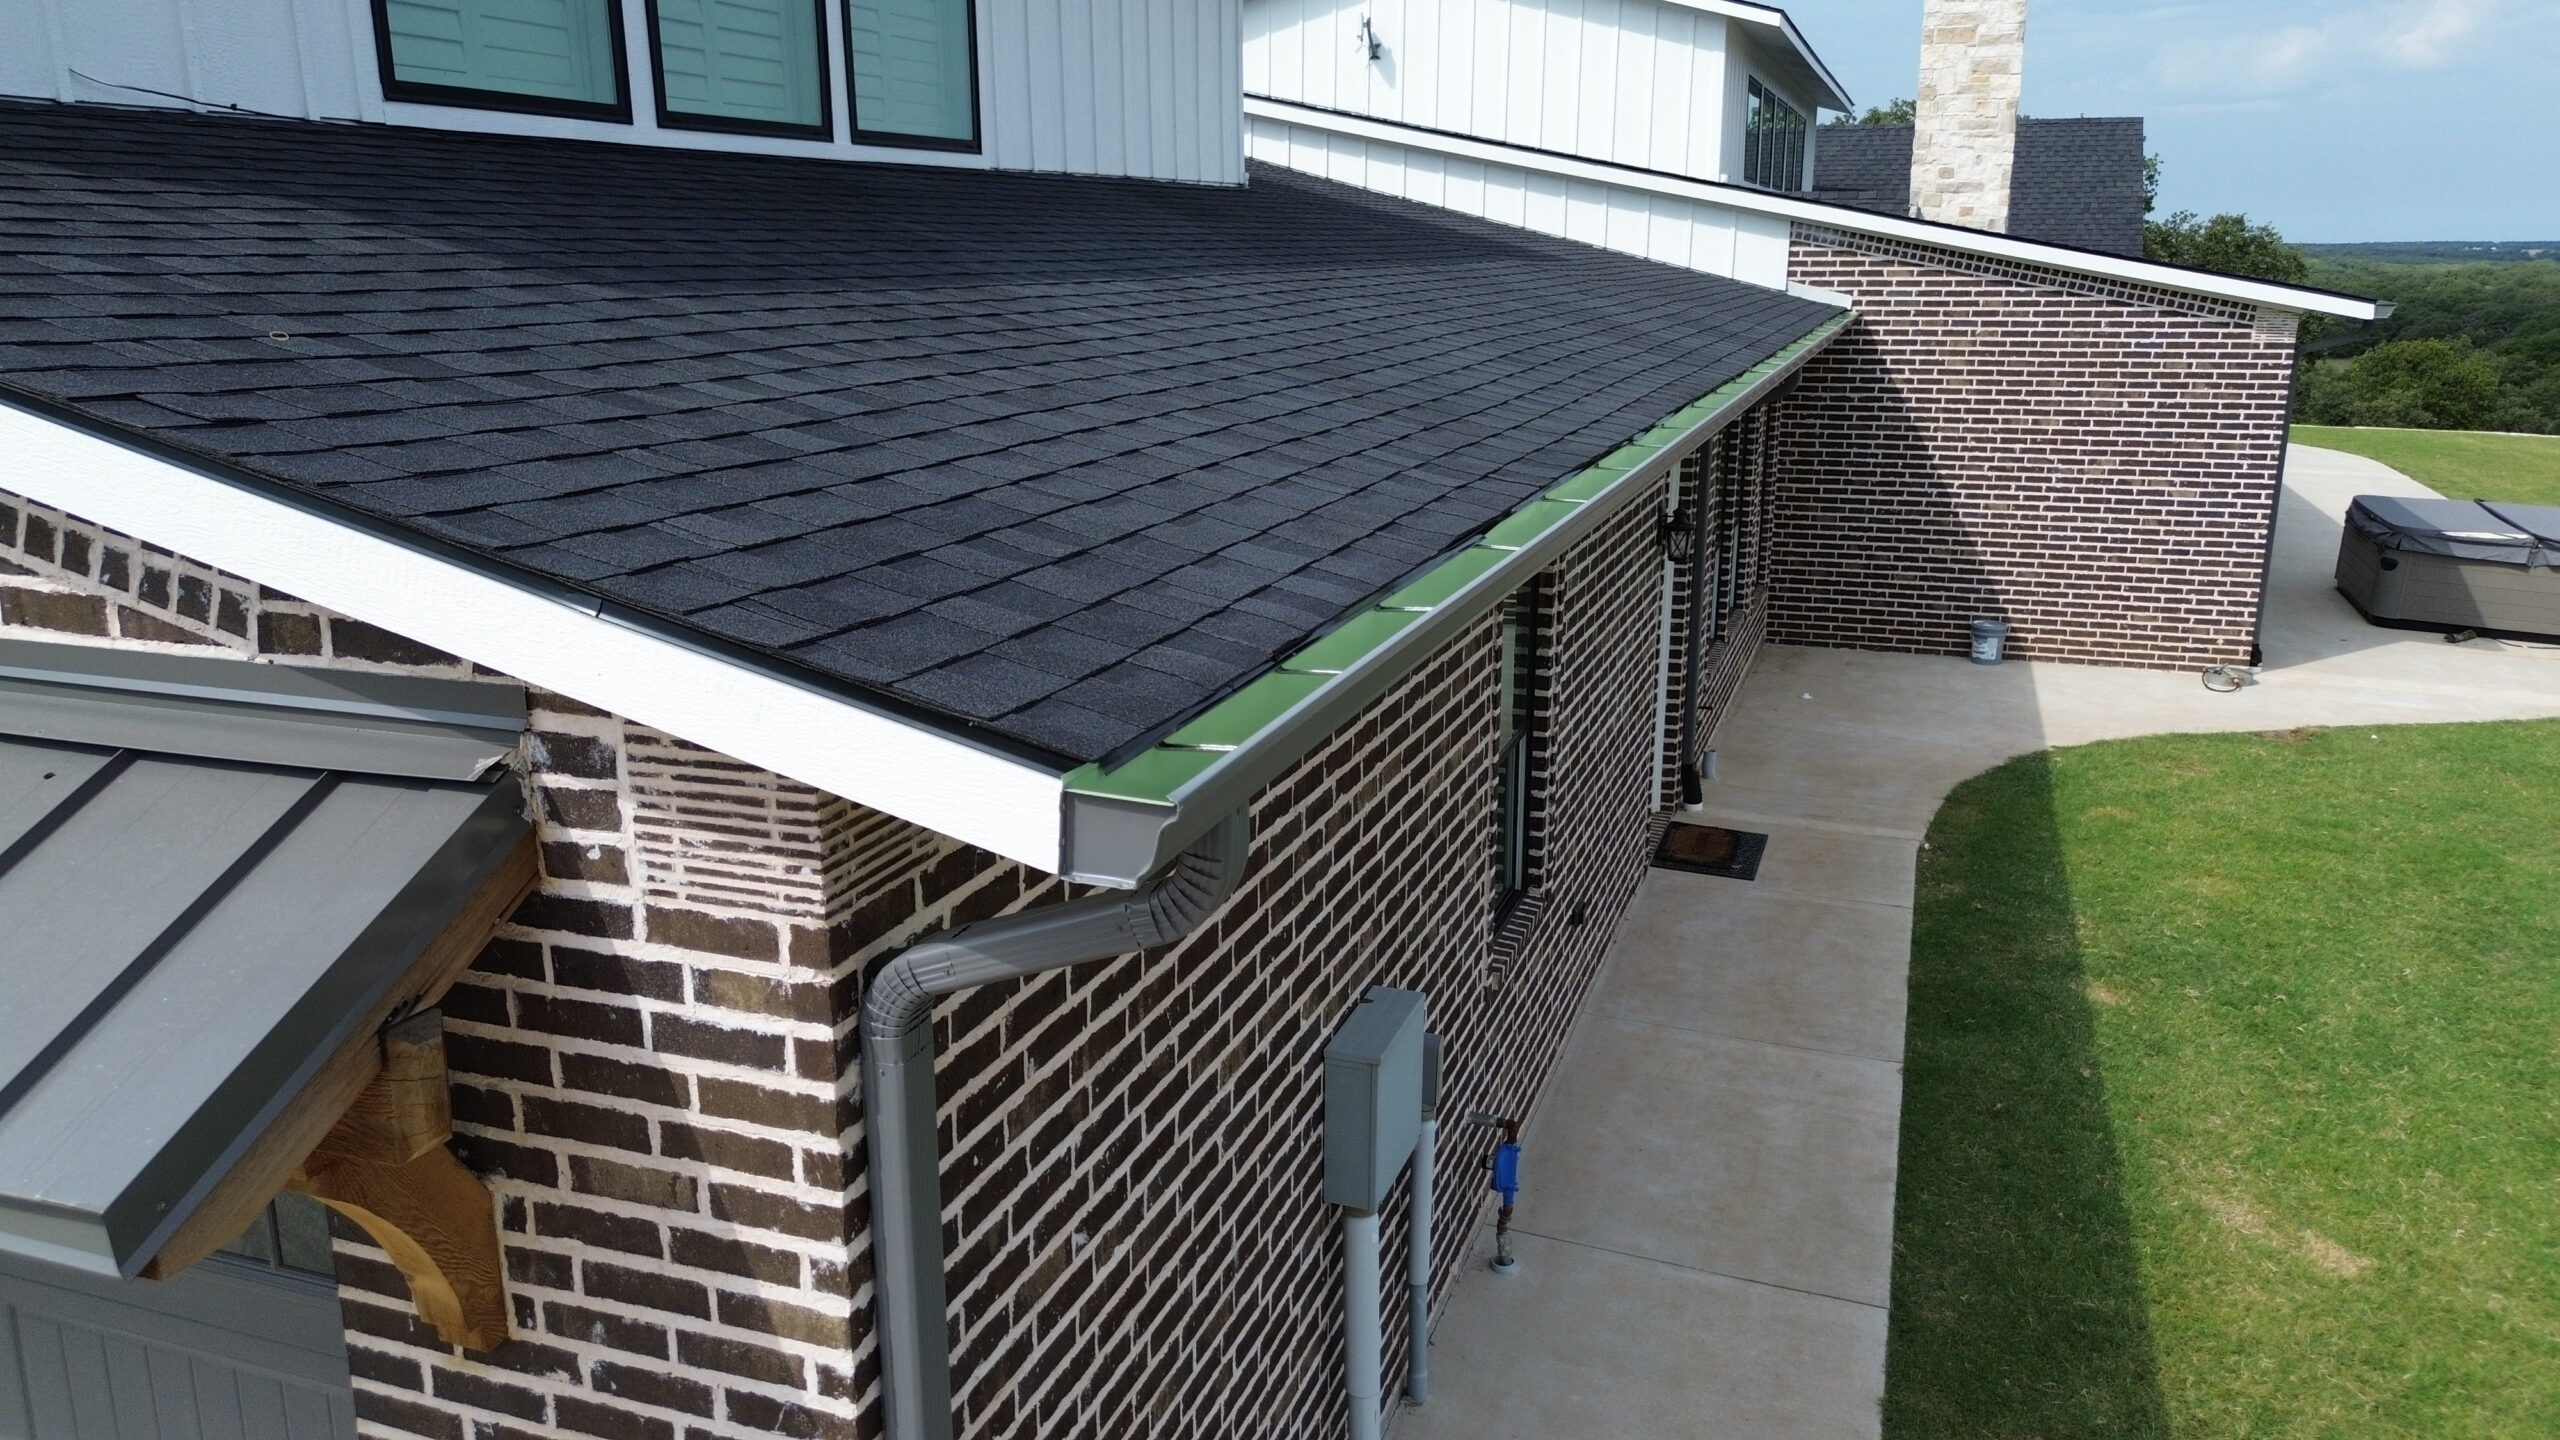
Once the roof surface has been completed, attention turns to the drainage system that manages rainwater flowing from the roof. Gutters and downspouts play an important role in protecting the home’s exterior by directing water away from walls, landscaping, and the foundation. Proper drainage helps prevent erosion, moisture damage, and structural problems over time.
Contractors install gutters along the roof edges with a slight slope that encourages water to flow naturally toward the downspouts. Maintaining the correct angle is essential because poor alignment can cause standing water or overflow during heavy rainfall. Secure fastening also ensures the gutters remain stable under changing weather conditions.
Downspouts carry collected water safely to ground level where it can drain away from the home’s foundation. Some properties include underground drainage systems or splash blocks that further improve water management. These additional features reduce the likelihood of soil erosion and standing water around the building.
After installation, contractors test the drainage system to confirm that water flows efficiently through every section. Any necessary adjustments are made before the project proceeds to its final inspection stages.
Daily Quality Checks During Installation
Quality control is an ongoing process that continues throughout the entire roof installation rather than occurring only at the end. Professional roofing companies inspect completed work every day to verify that installation standards are being maintained. Identifying small concerns early helps prevent larger problems later in the project.
Supervisors examine shingle alignment, flashing placement, fastening patterns, ventilation components, and moisture protection throughout construction. They also check that roofing materials remain undamaged during handling and installation. Correcting issues immediately helps maintain consistent quality across the entire roof.
Daily inspections also improve project efficiency because workers can resolve minor concerns before moving to the next installation stage. This systematic approach reduces the likelihood of having to remove completed sections later to correct hidden problems.
Manufacturers often specify detailed installation procedures that contractors follow to maintain warranty eligibility. Daily quality checks help verify that these requirements are consistently met throughout the project. This attention to detail benefits both the contractor and the homeowner.
Homeowners may occasionally observe supervisors inspecting the roof even after workers have finished installing materials for the day. These reviews are a normal part of professional quality assurance and contribute to the reliability of the completed roofing system.
Weather Delays and Timeline Adjustments
Even the most carefully planned roofing schedule must remain flexible because weather conditions can change unexpectedly. Professional contractors continuously monitor forecasts to protect both installation quality and worker safety. Temporary schedule adjustments are common and should be viewed as responsible project management rather than unnecessary delays.
Rain is one of the most significant challenges during roof installation because exposed roof sections must remain dry before new materials are installed. If rain is expected, contractors secure unfinished areas using temporary waterproof coverings until work can safely continue. These protective measures help preserve the condition of the roof deck.
Strong winds create additional difficulties by making large roofing materials harder to handle safely. High winds can also affect the accurate placement of underlayment and flashing, increasing the risk of installation errors. Roofing crews often postpone work until wind conditions improve.
Extreme temperatures may also influence the construction schedule. Excessive heat can make certain roofing products more vulnerable to handling damage, while very cold conditions may reduce material flexibility. Contractors adjust installation techniques when necessary to maintain product performance.
Although weather related interruptions may extend the timeline slightly, they help ensure the finished roof meets expected quality standards. A carefully installed roof provides far greater long term value than one completed under unsuitable conditions.
What Homeowners Should Expect During Installation
Roof installation temporarily changes the normal routine around a home. Understanding what to expect each day helps homeowners prepare while reducing unnecessary concerns during construction. Most roofing projects create increased activity for only a short period before returning the property to normal.
Construction noise is generally highest during the removal of existing roofing materials and the installation of new shingles or panels. Hammering, material movement, and worker activity may continue throughout the workday. Homeowners who work remotely or have young children may wish to plan accordingly.
The property will also experience increased vehicle traffic as workers, suppliers, and waste removal services arrive throughout the project. Contractors usually organize parking and equipment placement to minimize inconvenience while maintaining efficient access to the work area.
Homeowners should avoid entering active construction zones unless invited by the contractor. Roofing materials, tools, ladders, and falling debris create potential hazards during installation. Maintaining a safe distance allows workers to complete the project efficiently while reducing risks for everyone on the property.
Regular communication with the project supervisor helps homeowners stay informed about daily progress and expected completion dates. Asking questions throughout the installation process encourages transparency and ensures any concerns are addressed promptly.
Final Roof Inspection Process
As the installation work comes to an end, the roofing contractor performs a comprehensive inspection of the completed roofing system. This final review ensures every component has been installed according to manufacturer specifications, industry best practices, and local building requirements. It is the last opportunity to identify and correct any issues before the project is officially completed.
The inspection begins with a careful examination of the roof surface. Contractors check shingle alignment, fastener placement, flashing installation, ridge caps, and roof edges to confirm everything is secure and properly positioned. Any small adjustments identified during this review are completed immediately.
Roof penetrations such as chimneys, skylights, plumbing vents, and exhaust vents receive additional attention because these locations are more susceptible to water intrusion. Inspectors verify that flashing has been installed correctly and that waterproof seals remain intact. These detailed checks help ensure the roofing system provides dependable weather protection.
The attic may also be inspected to confirm proper ventilation and to ensure there are no signs of moisture infiltration. Contractors verify that insulation has not been disturbed during installation and that airflow remains unobstructed. These inspections support the roof’s long term performance and energy efficiency.
In many areas, a local building inspector completes a final review before approving the project. Passing this inspection confirms that the roof complies with applicable building codes and officially completes the permitting process.
Cleanup and Property Restoration
A professional roof installation includes thorough cleanup once construction has been completed. Removing debris and restoring the property to its original condition demonstrates attention to detail while ensuring the area is safe for homeowners. Cleanup is an important part of the overall project rather than an afterthought.
Roofing crews collect discarded shingles, underlayment, flashing, damaged wood, packaging materials, and other construction waste before removing dumpsters and equipment from the site. This organized process prevents leftover debris from affecting the appearance or safety of the property.
Contractors also perform a careful inspection of the surrounding yard, driveway, sidewalks, and landscaping. Magnetic sweepers are commonly used to collect loose nails that may have fallen during installation. This extra step helps protect children, pets, lawn equipment, and vehicle tires after the project is finished.
Outdoor furniture and protective coverings are returned to their original locations once construction is complete. Homeowners should walk around the property with the contractor to confirm cleanup has been completed to their satisfaction before the project is officially closed.
Warranty Documentation and Project Handover
After the roof has been inspected and the property cleaned, the contractor provides the documents associated with the completed installation. These records are valuable because they explain warranty coverage, maintenance recommendations, and important product information that homeowners may need in the future.
Most roofing projects include separate warranties for roofing materials and installation workmanship. The manufacturer’s warranty typically covers defects in the roofing products, while the contractor’s warranty addresses issues related to installation quality. Understanding the difference between these warranties helps homeowners know who to contact if concerns arise.
Homeowners should review all documentation before storing it in a secure location. Warranty certificates, invoices, inspection reports, and maintenance guidelines become important references throughout the life of the roof. Keeping these documents organized also simplifies future warranty claims if they ever become necessary.
The contractor may also explain recommended maintenance practices before leaving the property. Guidance on gutter cleaning, roof inspections, ventilation, and seasonal maintenance helps homeowners protect their investment while maximizing the lifespan of the roofing system.
Project handover marks the official completion of the installation timeline. At this point, responsibility for routine roof care transitions from the contractor to the homeowner.
Common Timeline Delays and How They Are Managed
Although roofing contractors work hard to complete projects on schedule, unexpected situations occasionally extend the installation timeline. Understanding these possibilities helps homeowners maintain realistic expectations while appreciating the importance of proper workmanship over speed.
Some of the most common causes of roofing delays include:
- Heavy rain or severe weather conditions.
- Discovery of damaged roof decking or structural components.
- Delays in specialty material deliveries.
- Additional permit inspections or approval requirements.
- Design modifications requested after construction has begun.
Professional contractors communicate these issues as soon as they arise and explain how they will affect the revised schedule. Clear communication helps homeowners understand the reason for the delay while maintaining confidence in the project.
Most delays are temporary and are managed through careful planning rather than rushed installation. Contractors may adjust crew schedules, reorder work activities, or secure temporary weather protection until conditions improve. These solutions help preserve installation quality without compromising safety.
Patience during unexpected delays often results in a stronger and more durable roofing system. Taking the necessary time to complete each stage correctly is always more beneficial than rushing to meet an unrealistic deadline.
Roof Installation Timeline Summary Table
The exact schedule varies from one project to another, but most residential roof installations follow a similar sequence from the initial inspection through final approval. The table below provides a general overview of the complete timeline.
| Project Stage | Typical Duration | Main Purpose |
|---|---|---|
| Initial roof inspection | 1 day | Evaluate roof condition and project scope |
| Material selection and contract | 2 to 7 days | Finalize products, pricing, and agreement |
| Permits and scheduling | 2 to 10 days | Obtain approvals and organize the project |
| Property preparation | 1 day | Prepare the home before construction |
| Material delivery | 1 day | Deliver roofing products and equipment |
| Roof removal | 1 to 2 days | Remove existing roofing materials |
| Deck inspection and repairs | 1 to 3 days | Repair structural issues if necessary |
| Underlayment installation | 1 day | Install moisture protection |
| Roofing material installation | 2 to 5 days | Install the primary roofing system |
| Flashing, ventilation, and finishing | 1 to 2 days | Complete waterproofing and airflow systems |
| Final inspection and cleanup | 1 day | Verify quality and restore the property |
Actual timelines depend on weather conditions, roof complexity, material availability, and any unexpected structural repairs discovered during construction. Contractors provide more accurate estimates after inspecting the property and reviewing the project requirements.
Tips for Keeping Your Roofing Project on Schedule
While many aspects of the installation timeline are managed by the contractor, homeowners can also contribute to keeping the project running smoothly. Good preparation and communication help reduce unnecessary interruptions throughout construction.
The following practices can support an efficient roofing project:
- Finalize material selections before construction begins.
- Review the contract carefully and ask questions in advance.
- Ensure permits and approvals have been completed.
- Move vehicles and outdoor belongings before installation day.
- Maintain regular communication with the project supervisor.
- Be prepared for possible weather related schedule adjustments.
- Approve necessary repair work promptly if hidden damage is discovered.
- Schedule the final walkthrough soon after installation is complete.
These simple steps help contractors focus on installation while reducing delays caused by last minute decisions or site preparation issues. Cooperation between homeowners and roofing professionals often leads to a smoother overall experience.
Frequently Asked Questions
Homeowners often have questions about how long roof installation takes and what factors influence the schedule. Understanding these common concerns helps create realistic expectations before construction begins.
How long does a typical residential roof installation take?
Most residential roof installations are completed within several days once construction begins. Larger homes, complex roof designs, or unexpected structural repairs may extend the timeline.
Can roof installation continue if it rains?
Roofing crews generally stop work during active rain because moisture can affect installation quality. Temporary coverings are installed to protect exposed areas until weather conditions improve.
Will hidden damage always delay the project?
Not necessarily, but structural repairs usually require additional time. Repairing damaged decking or framing before installing new roofing materials ensures the finished roof has a strong and reliable foundation.
Should homeowners remain at home during installation?
Most homeowners can remain in the house throughout the project. However, construction noise may be significant, so some families choose to spend part of the day elsewhere if they work from home or have young children.
When is the project officially complete?
The installation is generally considered complete after the final inspection has been approved, cleanup has been finished, warranty documents have been provided, and the homeowner has completed the final walkthrough with the contractor.
Conclusion
A roof installation project involves much more than replacing old roofing materials. From the initial inspection and planning stages to structural repairs, waterproofing, material installation, final inspections, and cleanup, every step contributes to the performance and durability of the finished roof. Understanding this complete timeline allows homeowners to approach the project with realistic expectations and greater confidence.
Although the exact schedule varies depending on roof size, weather conditions, material selection, and structural requirements, the overall process follows a logical progression that prioritizes quality over speed. Allowing each stage to be completed properly helps ensure the roofing system delivers reliable protection, energy efficiency, and long term value.
Preparation before installation, clear communication during construction, and careful review after completion all play important roles in the success of the project. Homeowners who stay informed throughout the timeline are better equipped to make decisions, understand contractor recommendations, and recognize the value of professional workmanship.
Ultimately, a well planned roof installation is an investment in the future of the home. By understanding the timeline from the first inspection to the final approval, homeowners can work confidently with their roofing contractor and enjoy a durable, professionally installed roof that provides dependable protection for many years to come.